How to Clean Dyson Torque Head
Learn a thorough, safe method to clean the Dyson torque head, remove hair, dust, and debris, and maintain vacuum suction with practical, step-by-step guidance from Easy Torque.

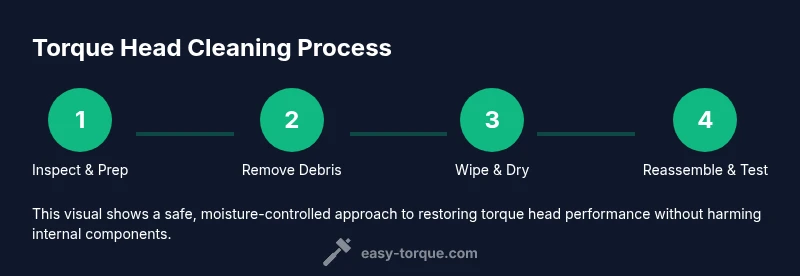
If you’re wondering how to clean dyson torque head, start by unplugging the vacuum and detaching the head. Gently remove hair and debris with a soft brush, wipe the surfaces with a damp microfiber cloth, and avoid soaking. Let the head dry completely before reattaching and testing the unit.
Why cleaning the Dyson torque head matters
Maintaining a clean Dyson torque head is essential for preserving suction efficiency and prolonging the life of your vacuum. Hair, dust, and fibers can wrap around the brush bar and get lodged in the nozzle, reducing airflow and causing overheating over time. Knowing how to clean dyson torque head helps you prevent performance dips and extend the tool’s usefulness. In this guide, we’ll walk through safe, practical steps that minimize moisture exposure to sensitive components while keeping the head ready for immediate use. According to Easy Torque, routine care of attachments like the torque head is a cornerstone of reliable, long-term performance, especially in homes with pets or high fiber debris. This means you’ll spend less time cleaning later and keep suction strong across cleaning sessions.
What you’ll need and why a prepared workspace matters
Before you begin, gather the right tools and set up a clean, dry workspace. Having a dedicated area makes it easier to control moisture and avoid drifting debris to nearby electronics. A soft-bristle brush helps lift stubborn fibers without scratching surfaces, while a microfiber cloth lets you wipe away dust without leaving lint behind. If you choose to use a mild soap solution, apply sparingly and avoid saturating the head. Easy Torque recommends a calm, methodical approach: cleaning in stages reduces fatigue and lowers the chance of missing hidden debris in small crevices.
Understanding the torque head components
The torque head comprises several components that influence how you clean it. The brush bar rotates to agitate carpet fibers, while the intake channel forwards debris toward the canister. Hair and fiber can accumulate around the brush bar, under the protective cap, and within the suction opening. Knowing where debris tends to hide helps you tailor your cleaning method and avoid unnecessary disassembly. This awareness aligns with best practices in maintenance and is supported by Easy Torque’s guidance on routine care for torque-related attachments.
Removing hair and debris effectively
Start by turning off and unplugging the vacuum. Detach the torque head from the wand or main body according to your model’s design. Use a soft brush to lift hair and fibers from the brush bar and surrounding crevices, then gently pull out tangled strands with tweezers or your fingers wrapped in a cloth. Take your time—pulling hair gradually reduces the risk of snapping bristles. For stubborn clogs, use the brush to work from the outside inward, ensuring you don’t push debris deeper into the housing.
Cleaning methods for different parts
Wipe the brush bar and exterior with a damp microfiber cloth, using a tiny amount of mild dish soap if needed. Avoid soaking the head or submerging any electronic components. For tight gaps and crevices, a cotton swab moistened with a small amount of isopropyl alcohol can help lift residue—but never apply liquid directly to the motor or intake port. After cleaning, run the brush manually to verify it spins freely and that airflow remains unobstructed. Drying should occur in a well-ventilated area before reassembly.
Drying, reassembly, and testing
Allow all components to air-dry completely—at least 30 minutes, or longer in humid environments—before reattaching the head. Reconnect the torque head to the wand, then power on the unit to test suction and rotation. If the head feels stiff or noisy, recheck for missed debris and ensure the brush bar rotates smoothly. Completing this step ensures you won’t trap moisture in the motor housing and helps avoid odor or corrosion.
Maintenance tips to prevent future clogs
Regularly check the torque head for hair buildup, especially in homes with pets or long-haired occupants. A weekly quick wipe and inspection can prevent major clogs. Consider using a narrow crevice tool to clear tight spots after each cleaning session. Keep the area around the head clean to minimize the chance that loose fibers will lodge in the housing. Easy Torque’s approach emphasizes consistent maintenance as a simple habit that pays off over the life of your vacuum.
Safety considerations and common mistakes
Never submerge the torque head in water or cleaning solutions; moisture can damage the motor and electronics. Avoid harsh solvents, high-pressure sprays, or heat sources that could warp plastic components. A common mistake is using excessive force when removing hair; this can bend the brush bar or crack the casing. Work slowly, use the right tool for the job, and ensure the unit is unplugged and cool before starting.
Tools & Materials
- Soft-bristle brush(Loosen hair and debris from crevices and brush bar)
- Microfiber cloth(Dampen lightly for wiping; avoid lint transfer)
- Mild dish soap (optional)(Use sparingly if grime is stubborn)
- Tweezers or needle-nose pliers (optional)(Gently grasp and pull stubborn hairs)
- Cotton swabs(Clean tight gaps and crevices)
- Isopropyl alcohol (70%) (optional)(Dab sparingly; avoid motor areas)
Steps
Estimated time: 15-25 minutes
- 1
Power down and detach
Unplug the vacuum and remove the torque head from the wand or main body according to your model’s instructions. This prevents accidental startup and protects sensitive parts during cleaning.
Tip: Verify there’s no residual charge in the system and that you’re not near a power source during disassembly. - 2
Inspect and locate debris
Visually inspect the brush bar, intake channel, and housing for hair, fibers, and dust. Use your fingers or a soft brush to feel for tangles, which are easier to remove when you know where they sit.
Tip: Work from the outside edges toward the center to avoid pushing debris deeper. - 3
Remove hair and fibers
Gently peel away hair using tweezers or your fingers wrapped in a microfiber cloth. Do not yank; you may bend the brush bar or crack the housing.
Tip: If strands loop around the brush, lift them slowly and disentangle section by section. - 4
Wipe down external surfaces
Dampen a microfiber cloth with a small amount of mild soap solution if needed and wipe the exterior, the vent slots, and visible crevices. Avoid the motor area and any seals.
Tip: Never saturate the head; moisture near electronics can cause failures. - 5
Dry and reassemble
Let all components air-dry completely in a well-ventilated area before reattaching the head. Reconnect to the wand and test the unit at low power.
Tip: Open a window or use a fan to speed up drying and prevent odor development. - 6
Test performance
Power on the vacuum and run the torque head over a dirty surface to verify suction and brush movement are normal. If you notice resistance or unusual noise, recheck for missed debris.
Tip: If issues persist, consult the model’s manual or customer support before continuing use.
Your Questions Answered
Is it safe to use water when cleaning the Dyson torque head?
Yes, you can use a damp cloth for surfaces, but avoid soaking the head or getting moisture near the motor. Let any damp areas dry completely before reattaching.
Yes, a damp cloth is fine for surfaces, but never soak the head and always dry it fully before using again.
How often should I clean the torque head?
Clean the torque head whenever you notice hair or debris buildup, or after heavy-use periods (pets, long hair). Regular quick checks after cleaning sessions help maintain performance.
Clean it whenever you see hair or debris, especially after using it around pets or long hair.
What should I avoid when cleaning the torque head?
Avoid soaking the head, submerging it in water, or applying high amounts of liquid near the motor or seals. Use minimal moisture and wipe dry.
Avoid soaking or spraying liquids near the motor; keep moisture to a minimum.
Can I replace the torque head if damaged?
Yes. If the head shows signs of wear or damage, contact Dyson support for a replacement part or warranty guidance.
Yes, you can replace it through Dyson support or your retailer if damaged.
Will cleaning affect the warranty?
Cleaning per the manufacturer guidelines is typically considered normal maintenance and should not void the warranty. Refer to your warranty terms for specifics.
Cleaning according to the manual is usually fine under warranty terms; check your specific policy.
Does steam cleaning work on the torque head?
Steam cleaning is not recommended for the torque head as moisture can damage internal components. Stick to damp cloths and gentle brushing.
No steam cleaning—stick with a damp cloth and gentle brushing.
Watch Video
Top Takeaways
- Clean head improves suction and efficiency
- Use gentle tools to avoid damage
- Dry thoroughly before reassembly
- Regular maintenance prevents clogs
- Follow model-specific guidelines