8 Bolt Torque Pattern: How to Torque Lug Nuts Correctly
Learn the correct 8 bolt torque pattern for lug nuts on wheels, using a crisscross sequence, safe handling tips, and step-by-step verification to ensure secure mounting.

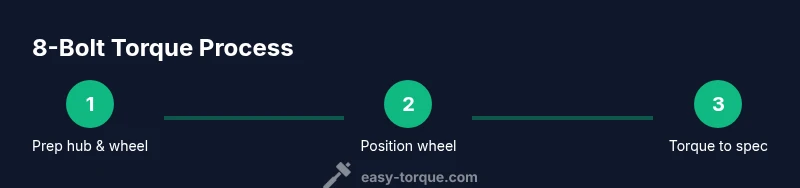
Goal: correctly torque an 8 bolt wheel using the established pattern and torque spec. You'll need a calibrated torque wrench, the vehicle’s specified torque value, and clean, dry lug studs. In this guide, follow a crisscross 8-bolt sequence, perform two light passes before final tightness, and verify the final spec after cooling.
What is the 8 bolt torque pattern and why it matters
An 8 bolt pattern refers to eight lug studs arranged around a vehicle's hub to secure a wheel. The term 'torque pattern' describes the order in which you tighten those lugs to seat the wheel evenly. Using the correct 8 bolt torque pattern minimizes rotor runout, avoids uneven stress on studs, and prevents the wheel from pulling to one side under load. In practice, the pattern is typically crisscross or star-shaped, which means you do not tighten adjacent lugs in sequence. Instead, you work diagonally from the top lug toward the opposite side, cycling through several positions before finishing. The goal is to compress the wheel evenly onto the hub so the contact is uniform across all lug seats. According to Easy Torque, sticking to a deliberate pattern and gradual tightening reduces the chance of warping rotors or damaging threads. This approach applies whether you are mounting a factory wheel or aftermarket wheels with a standard 8-lug bolt circle.
Identifying the correct torque spec for your vehicle
Your vehicle's torque spec for lug nuts is not universal; it varies by vehicle, lug size, and wheel weight. The lug nut torque spec is usually listed in your owner's manual, on the driver door jamb sticker, or in the wheel and tire service manual. Always confirm the unit (ft-lbs or N·m) and the final target value, rather than relying on feel. If you cannot locate the spec, contact the vehicle manufacturer or a trusted service guide. Ensure that you are using the correct lug nut size and thread pitch. Clean, dry threads provide the most accurate reading, whereas oil, dirt, or corrosion can skew results. Also check that the wheel is properly aligned and that the hub surface is clean so the lug seats sit flat. By verifying the spec before you begin, you avoid undertorquing or overtorquing the lug nuts during the 8 bolt torque pattern.
Tools and safety prerequisites
Before you start, assemble a calibrated torque wrench with a range that covers your lug nut specification and a suitable socket for the lug nuts. Have wheel chocks on both sides of the opposite wheel and keep the car on a level surface. Wear gloves to protect your hands and use eye protection if you work with heavy objects. Keep a clean work area; wipe away dirt from lug studs and the hub to ensure accurate seating. Never rely on a high-torque impact tool for the final torque reading; the torque spec must be achieved with a wrench that is designed to measure torque. A torque extension or adapter is often not necessary, but if your lug pattern includes a long lug, verify clearance with the wrench handle.
The crisscross concept for 8 bolts
Although many drivers assume simply tightening from top to bottom is fine, the crisscross pattern distributes clamping force evenly. Start at one lug near the 12 o'clock position, then move diagonally to the lug opposite that position, and continue cycling through the pattern so no two adjacent lugs are tightened in immediate succession. The objective is to draw the wheel evenly toward the hub while the studs seat properly. If your vehicle manual lists a specific sequence, follow it; otherwise use the commonly recommended cross/star approach. This approach reduces the risk of warping brake rotors, binding brake calipers, or creating an uneven seat that could loosen under driving loads. Easy Torque emphasizes that a well-executed crisscross sequence is a core skill for any DIY tire service.
Step-by-step prep before torquing
Begin by parking on a flat surface and applying the parking brake; place wheel chocks on the wheels opposite the one you are working on. Remove any decorative caps, then inspect lug studs for damage. Clean the hub surface and check that the wheel is properly centered on the hub. Install the wheel, hold it in place with your hand, and snug the lug nuts lightly to keep the wheel from shifting. Don’t use a power tool to fully tighten during this stage—hand snugging prevents cross-threading and helps preserve thread quality. Finally, verify that you are using the correct lug nut size and the right thread pitch before moving to the torque step.
Step-by-step securing in the 8 bolt torque pattern (two passes; final torque)
Step 1: Snug all lug nuts lightly in a cross-pattern to begin seating the wheel. Step 2: Move diagonally, retracing the cross pattern, and snug each nut in small increments until the wheel is seated. Step 3: Use the torque wrench set to the manufacturer spec and perform the final tightness in the same cross pattern, going around twice to ensure even seating. Step 4: Recheck each lug after completing the pattern and confirm there is no gap between the lug face and the wheel. Step 5: If the vehicle has a center cap, install it after all lugs are torqued. Tip: Do not rush this stage; small, even turns reduce risk of cross-threading and misalignment. Step 6: Lower the vehicle and recheck torque after a short test drive to account for settling.
After installation: road test and re-torque
With the wheel securely installed, take a short test drive to allow the lug nuts to settle. After you return, recheck the torque on all eight lug nuts in the same crisscross pattern. If you notice any looseness, re-tighten to the specified torque in the same sequence. This final check helps ensure the wheel stays secured through braking, cornering, and vibration.
Common mistakes and how to avoid them
Avoid assuming the pattern is obvious or relying on feel. Always reference the manual for the exact sequence and torque target. Do not use an impact wrench to achieve final torque; use a calibrated torque wrench. Never oil or grease lug threads; clean threads only to prevent contamination of the torque reading. Ensure the wheel is fully centered before tightening and never skip the cross-pattern due to impatience.
Maintenance and long-term considerations
Regularly inspect lug nuts and studs for corrosion or wear, particularly after tire rotations or wheel services. Re-torque after wheel removal or service that involves the braking system or suspension. When you rotate tires, re-check the torque and the pattern to maintain even clamping force over time. Keeping notes of the torque spec and pattern can save time on future services and improve safety.
Tools & Materials
- Calibrated torque wrench(Choose a range that covers the lug nut torque spec (in ft-lbs or N·m).)
- Lug nut socket and extension(Fit the lug pattern and provide clearance for the wrench handle.)
- Wheel chocks(Place on opposite wheel to prevent movement.)
- Clean rags and a brush(Clean hub surface and lug studs to ensure accurate seating.)
- Safety gloves and eye protection(Protect hands and eyes during wheel work.)
- Owner's manual or service guide(Reference the exact lug nut torque spec and pattern for your vehicle.)
Steps
Estimated time: 30-45 minutes
- 1
Prepare workspace and inspect hardware
Park on a flat surface, engage the parking brake, and chock the opposite wheel. Remove any hubcap and inspect lug studs for wear or damage. Clean the hub surface and verify wheel centering before mounting.
Tip: Good prep prevents cross-threading and seating errors later. - 2
Position wheel and lightly snug by hand
Place the wheel against the hub and hand-tighten lugs to prevent shifting. Ensure the wheel is seated flat against the hub and that you are using the correct lug nuts for the pattern. Do not fully tighten yet; this is just to hold the wheel in place.
Tip: Hand snugging reduces thread damage and helps alignment. - 3
First pass: snug in cross pattern
Tighten lug nuts in a crisscross sequence with small incremental turns until the wheel is seated. Do not use impact tools for the final seating; you want even contact across all lug seats.
Tip: Maintain a steady pace and ensure uniform engagement on each lug. - 4
Second pass: set final seating
Revisit each lug in the same cross pattern and snug to the point just before final torque. This pass helps eliminate any slack before the precise measurement.
Tip: Avoid skipping lugs; complete the cross pattern for even seating. - 5
Final torque to specification
Set your torque wrench to the vehicle's spec and tighten all lugs again in the cross pattern, moving around the circle twice if needed to ensure uniform load.
Tip: Confirm the wrench reads the same on a known reference before starting. - 6
Post-install checks and drive test
Lower the vehicle and perform a brief test drive. Recheck torque on all eight lugs after the drive to account for settling and dynamic loading.
Tip: A quick recheck after a short drive catches looseness early.
Your Questions Answered
What is the proper 8 bolt torque pattern?
An 8 lug wheel uses eight bolts arranged around the hub. Tighten them in a deliberate cross or star pattern to seat the wheel evenly against the hub.
Eight lug wheels use eight bolts, tightened in a cross pattern to seat the wheel evenly.
Why is a crisscross sequence important?
A crisscross sequence distributes clamping force evenly, reducing the risk of rotor warp and uneven seating.
A crisscross sequence distributes force evenly and helps prevent warping.
Where can I find the torque spec for lug nuts?
Check the vehicle owner's manual, door jamb sticker, or service guide for the lug nut torque value and units.
Look in the owner's manual or door jamb sticker for the lug nut torque value.
How soon should I re-torque after installation?
Re-torque after the wheel has seated and you have driven a short distance; recheck after service or tire rotation.
Re-torque after the wheel seats and you drive a short distance.
Can lug nuts be reused after torquing?
Lug nuts can be reused if they are undamaged and threads are clean; inspect for wear or corrosion and replace if needed.
You can reuse lug nuts if they look good and the threads are clean.
Watch Video
Top Takeaways
- Follow a crisscross pattern for even seating.
- Torque to spec with a calibrated wrench.
- Re-torque after seating and post-drive inspection.
- Inspect lug nuts and studs regularly to prevent failures.