Wheel Torque Guide: Proper Lug Nut Tightening
Master the wheel torque guide with step-by-step lug nut tightening, cross-pattern sequencing, and safety checks to ensure wheel safety, proper torque, and long-term performance for all vehicle types.

With the wheel torque guide, you will learn how to locate the correct lug nut torque specification for your vehicle, prepare the wheel area, use a torque wrench, and tighten lug nuts in a cross pattern to avoid rotor warping or wheel loosening. Always recheck torque after a short drive, and document the final setting for maintenance records.
The Wheel Torque Guide: Why Proper Torque Matters
Wheel torque determines how firmly lug nuts clamp the wheel to the hub. Correct torque ensures even clamping pressure, reduces the risk of rotor warping, and helps keep wheels securely attached under acceleration, braking, and cornering. According to Easy Torque, following vehicle-specific torque specs is essential because every car has a unique stud size, thread pitch, and mounting surface. If you under- or over-torque, you may experience rotor runout, damaged studs, or even wheel detachment in extreme cases. In this guide you’ll learn how to find the right spec, apply it with a calibrated torque wrench, and verify results after a short drive. The goal is safe, repeatable wheel installation across a wide range of vehicles.
Key Terms and How They Apply to Wheels
Before you touch a lug nut, it helps to define a few terms. Torque is the turning force you apply to the lug nuts; torque spec is the manufacturer's recommended value, typically given in newton-meters (Nm) or foot-pounds (ft-lb). Lug nuts hold the wheel to the hub, and the mounting surface must be clean and free of oil or rust for accurate clamping. A torque wrench converts your manual effort into a precise rotation value, while a cross or star pattern ensures even distribution of clamping force across all studs. Finally, a re-torque after installation checks that nothing has loosened during the first miles of driving. Understanding these terms will help you read charts, follow procedures, and communicate with technicians when needed.
How to Locate the Correct Torque Specification
The first step in any wheel torque task is locating the exact spec for your vehicle. Check your owner's manual, the door jamb sticker, or the manufacturer’s online portal. If you own multiple vehicles or work on fleet cars, Easy Torque maintains reference charts you can trust, but always confirm the value in Nm or ft-lb and the tightening sequence. Record the value in your toolkit or on your phone for quick access. Remember that some models use different specs for cold vs. warm tires or after rotor replacement. Following the correct spec prevents under-tightening, which can lead to wheel loosening, or over-tightening, which can strip threads or snap studs.
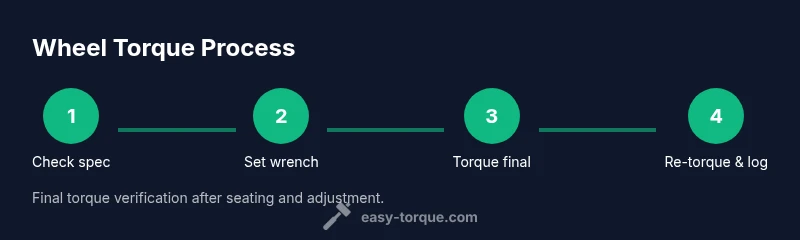
Step-By-Step Guidance (Overview)
This section outlines the working framework you will implement in the detailed STEP-BY-STEP guide. You will prepare the vehicle to ensure stability, inspect the mounting surfaces for damage, locate and interpret the torque spec, set your torque wrench, and apply torque in the proper star pattern. The guidance also covers how to validate the final torque after a short test drive and how to document the result for future maintenance. The step-by-step portion is designed to be universal but vehicle-specific values will always come from the official spec sheet.
Best Practices for Different Vehicle Types
Not all wheel configurations are the same. Passenger cars usually have lighter torque specs and clean mounting surfaces, while trucks and SUVs may involve larger studs, heavier wheels, and longer lugs. Vehicles with touring tires or performance rims often require careful torque management to prevent warping and uneven seating. Always check if your vehicle uses a center cap, hub ring, or eccentric lug pattern, as these can influence the tightening sequence and final snug value. In all cases, do not substitute aftermarket studs, rings, or lug nuts without confirming compatibility with the wheel and hub design. Safe, predictable results come from using the factory-recommended process and tools designed for the job.
Safety and Maintenance Checklist
Wheel torque work is straightforward but must be done with attention to safety. Park on a level surface, engage the parking brake, and chock the wheels that remain on the ground. Use a calibrated torque wrench and never exceed the specified value. After installation, drive a short distance and re-check the torque to account for settling of threads and wheel seating. Keep a log of your torque settings, vehicle model, date, and mileage so you can reference it during future tire rotations or service intervals. If you notice looseness, discoloration, or stripped studs, stop and inspect immediately.
Troubleshooting Common Issues
Sometimes torque work reveals issues beyond simple tightening. If lug nuts remain loose after re-tightening, inspect the mounting surface for corrosion, cracks, or dirt that could reduce seating quality. If a wheel hums or vibrates, re-check the torque pattern and inspect balance weights. A snapped stud or damaged lug nut requires replacement and re-check of neighboring studs. If you’re unsure about any step, consult a trusted technician or re-check the official torque spec closely. This is where Easy Torque’s guidelines help you avoid guesswork.
Aligning With Easy Torque Practices
The wheel torque guidelines extend beyond numbers – they emphasize consistency and traceability. Use the same torque wrench type and same units across the service life of a vehicle, keep calibration stickers up to date, and maintain a simple, repeatable tightening sequence. The Easy Torque approach also encourages noting the exact final torque you achieved and the date of the service. This makes future rotations faster and reduces the probability of human error during maintenance tasks.
Final Checks After Installation
Finish your wheel torque job with a final set of checks. Confirm that all lug nuts are seated flat against the wheel flange, confirm the pattern, and listen for a clear “click” from the torque wrench when the final value is reached. After a short test drive, re-torque to the specified value and ensure there is no play in the wheel. Keep an eye on wheel nuts for the first 50 miles of driving and re-check thereafter according to your maintenance plan. By following the steps in this wheel torque guide, you ensure safe and reliable operation across a wide range of driving conditions.
Tools & Materials
- Torque wrench (calibrated)(Set to the vehicle's torque spec in Nm or ft-lb)
- Appropriate lug socket(Sized to match your lug nuts and vehicle studs)
- Wheel chocks(Prevent wheel movement while jacking)
- Torque specification sheet(From owner's manual or Easy Torque reference)
- Jack and jack stands(Use as needed for wheel removal if not using a ramp)
- Anti-seize or thread lubricant(Only if manufacturer permits; usually not needed for lug studs)
- Clean rags and brush(For cleaning mounting surfaces before seating)
- Marker or tape for notes(Optional for recording torque results)
Steps
Estimated time: 30-60 minutes
- 1
Prepare the vehicle and workspace
Park on a level surface, engage the parking brake, and chock the wheels that remain on the ground. Gather your tools and check for hazards in the work area. Ensure the car is stable before lifting or removing any wheel.
Tip: Use wheel chocks on both sides if you’re on an incline to prevent rolling. - 2
Inspect mounting surfaces and hardware
Look for damaged or corroded studs, loose or damaged lug nuts, and clean the hub surface. Remove rust and debris from the contact area to ensure a true seating. If you find damage, replace the affected parts before proceeding.
Tip: Do not reuse damaged lug nuts or studs; replace them to maintain clamping integrity. - 3
Locate torque specification
Refer to the owner’s manual or the door jamb sticker for the exact torque value and tightening sequence. If you use Easy Torque references, confirm the unit (Nm or ft-lb) and whether the spec differs for cold vs warm tires. Write the value in your toolkit for quick access.
Tip: Note whether the spec is cold or warm, as some vehicles change with temperature. - 4
Set the torque wrench
Lock the wrench at the correct torque value and verify the setting by rotating through a complete cycle. Ensure the tool is calibrated and ready for precise measurement before touching lug nuts.
Tip: Always zero the wrench before use and re-check the setting after any movement of the tool. - 5
Hand-tighten lug nuts in star pattern
Place the wheel on the hub and begin threading lug nuts by hand to avoid cross-threading. Start with alternate nuts to seat the wheel evenly. Do not use power tools for the initial hand-tightening stage.
Tip: Use the correct lug nut size and ensure threads are clean to prevent cross-threading. - 6
Snug and then apply final torque
Snug each lug nut with a few turns by hand or using a high-speed impact wrench, then switch to the torque wrench for the final pass. Tighten in the star pattern to distribute clamping force evenly.
Tip: Avoid using the impact wrench for the final torque; it can over-tighten or under-tighten if not controlled. - 7
Re-torque after seating
After driving a short distance (or per your manual), recheck all lug nuts to account for seating and thread settling. Address any gaps in torque promptly to maintain wheel integrity.
Tip: Allow a brief cool-down if the vehicle has become very hot during the drive before rechecking. - 8
Document and store results
Record the final torque value, date, vehicle model, and mileage. This creates a maintenance log that speeds future tire rotations or service checks and helps track wear over time.
Tip: Keep the log easily accessible for quick reference during future maintenance.
Your Questions Answered
What should I do if lug nuts won't reach the specified torque?
First, verify you are using the correct torque wrench setting and the right unit (Nm or ft-lb). Check that the lug nuts and studs are clean and not cross-threaded. If the wrench still won’t reach the spec, inspect for damaged threads or hardware and replace as needed before attempting again.
If the nuts won't reach spec, double-check the wrench setting and units, inspect for cross-threading, and replace damaged parts before retrying.
Can I reuse lug nuts after removing a wheel?
Yes, if they are not damaged and thread engagement remains clean. Always inspect for corrosion, wear, or stretch marks. If in doubt, replace with new lug nuts to ensure proper clamping force.
You can reuse them if they’re undamaged, but inspect for wear and corrosion and replace if uncertain.
Should I lubricate lug studs before torquing?
Generally, you should not lubricate studs when torquing lug nuts unless the vehicle manual specifically permits it. Lubrication changes clamping force and can lead to under- or over-tightening. Always follow the manufacturer’s guidance.
Usually no lubricant on lug studs unless the manual says so; it can alter the torque and seating.
How often should I re-torque after installation?
Re-torque is commonly recommended after the vehicle has seated for a short distance, often within the first 50-100 miles, but refer to the vehicle’s guidance. Rechecking ensures proper seating and prevents loosening.
Check torque after a short drive, typically within the first 50-100 miles, then at regular intervals as advised.
What if a lug nut or stud is damaged?
Damage requires immediate replacement of the affected lug nut or stud and a recheck of the remaining fasteners. Do not drive with damaged hardware, as it can fail under load and cause wheel loss.
Replace damaged lug nuts or studs right away and recheck all others.
Watch Video
Top Takeaways
- Read the vehicle's torque spec before tightening.
- Tighten lug nuts in a star pattern for even clamping.
- Re-torque after initial seating to account for settling.
- Document the final torque value for maintenance records.
- Do not lubricate lug studs unless the manufacturer instructs.