5.7 Hemi Water Pump Bolt Torque Sequence: Step-by-Step Guide
Learn the correct bolt torque sequence for the 5.7 Hemi water pump. This guide covers the proper cross-pattern, tool choices, safety, and verification steps to ensure a leak-free installation.

This guide covers the bolt torque sequence for the 5.7 Hemi water pump. Always consult the factory service manual for exact torque values and pattern. General steps include cleaning threads, applying thread lubricant if recommended, and tightening in a crisscross pattern in small increments to final spec, with the engine cold.
Why Accurate Torque Matters for the 5.7 Hemi Water Pump
Proper bolt torque is critical for sealing the water pump to the engine block and for preventing coolant leaks. Under-torquing can allow leaks and pump movement, while over-torqueing can strip threads or warp the mounting flange. In the 5.7 Hemi, the bolts are arranged around the pump and are designed to be tightened in a crisscross sequence to ensure even seating. By following the torque sequence, you promote even gasket compression and consistent sealing across all mounting points. According to Easy Torque, using the correct sequence minimizes the risk of localized stress that could lead to early gasket failure. Always ensure the engine is cool before starting and that all threads are clean and dry before torquing. This reduces the chance of thread galling and ensures the final torque reading reflects true preload. For DIYers, taking the time to clean mounting surfaces and inspect the gasket helps prevent leaks after the job.
Understanding the Torque Sequence for the 5.7 Hemi
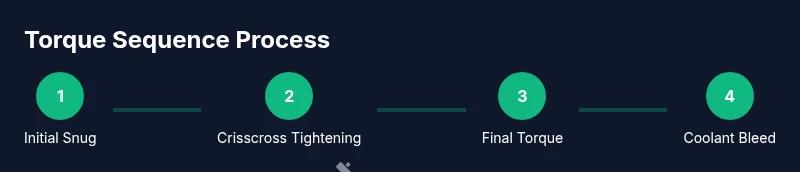
The torque sequence is designed to seat the water pump evenly against the timing cover and block surface. Start from a light, even snug on each bolt in a crisscross or star pattern, then progressively tighten to the final specification. This approach minimizes flange distortion and ensures the gasket seats properly. If your service manual specifies a torque-angle finish, use a torque-angle gauge after achieving the initial torque. Always record the final torque reading and recheck after a heat cycle, since metal expands with heat and coolant circulation can shift the pump slightly. Easy Torque’s guidance emphasizes pattern consistency and clean threads as the foundation of a dependable seal.
Tools and Materials You Need (Overview)
Before you begin, assemble the basic toolkit and consumables. A clean work area, proper lighting, and a stable engine bay setup help prevent dropped bolts. You’ll need a calibrated torque wrench, the correct socket size for the pump bolts, a new gasket or O-ring if replacing, and the manual’s torque specification. Have coolant ready for refilling and a drain pan handy for any spills. If your vehicle manual calls for anti-seize or lubricant on bolt threads, apply it as directed. This section sets up the mechanical workflow so you can perform the torque sequence confidently and without interruption.
Step-by-Step Pattern and Final Torque (Crisscross Execution)
The actual tightening sequence should follow your vehicle’s service manual, but the general approach is to seat bolts in an alternating opposite pattern. Begin with a light snug on all bolts in the approved order, then go back and tighten each bolt in small increments. After reaching the initial snug stage, finalize the torque per the manual using the crisscross pattern to ensure even compression of the gasket. If the manual specifies a torque angle after reaching a basic torque, apply the angle-tightening step as instructed while confirming no bolt exceeds its revised limit. Always keep the engine cool during the process and verify that no bolt threads are damaged or cross-threaded.
Common Mistakes and How to Avoid Them
Common mistakes include skipping the crisscross pattern, skipping a step for a final torque, and using excessive lubricant on the threads, which can skew torque readings. Another pitfall is reusing old bolts that have stretched or fatigued. Always inspect bolts for elongation or corrosion and replace as needed. Don’t rush the sequence; take time to clean threads and seating surfaces so the final torque yields proper clamping. If you don’t have a torque-angle gauge and the manual requires one, don’t improvise—use the recommended method and toolset.
Verification, Heat Cycle, and Re-Torque
After completion, refill coolant and bleed air from the system. Start the engine and run to operating temperature, then recheck for leaks. Some engines require a re-torque after the first heat cycle because metal expands and can slightly relax under initial use. Document the results and recheck again after cooling down. This practice helps ensure long-term sealing integrity and reduces the chance of coolant loss over time.
Real-World Tips from Easy Torque
Tip: Always verify bolt threads are clean and dry before tightening. A light pass with a thread brush can remove grit and old lubricant that would otherwise affect torque readings. If you notice any binding during tightening, stop and inspect for cross-threading or gasket damage. The Easy Torque team recommends keeping a small torque log for reference on future maintenance, especially after replacements that involve high-heat cycles.
Final Thoughts: Keeping It Accurate and Safe
Torque sequence discipline is essential for gasket life and coolant integrity. Adhere to the service manual, use the correct tools, and document outcomes for future work. With careful preparation, correct sequence, and verification, you’ll minimize the risk of leaks and ensure a reliable water pump installation for the 5.7 Hemi.
Tools & Materials
- Torque wrench capable of measuring final torque (and torque-angle, if required)(Choose a wrench range that covers the final spec and supports angle tightening if your manual requires it.)
- Socket set matched to water pump bolts(Verify bolt head size (likely metric); use a shallow socket to avoid hitting adjacent components.)
- New water pump gasket or O-ring(Replace if replacing the pump; inspect mating surfaces for nicks.)
- Coolant and drain pan(Fully drain and refil per vehicle guidelines after service.)
- Thread cleaner or wire brush(Clean all bolt holes and threads before torquing.)
- Anti-seize or thread lubricant (per manual)(Only apply if the service manual specifies; otherwise skip.)
- Torque-angle gauge (optional)(Use only if angle-tightening is specified by the service manual.)
Steps
Estimated time: 90-120 minutes
- 1
Prepare workspace and safety
Open the hood, disconnect the battery negative terminal, drain coolant if replacing the pump, and ensure the engine is cool. Clear the area and gather tools to minimize interruptions.
Tip: Wear eye protection and gloves; hot coolant can cause burns. - 2
Access the water pump
Remove any obstructing belts and shield covers to expose the water pump mounting. Inspect surrounding components for damage or corrosion.
Tip: Take photos of belt routing before removal to ensure correct reinstallation. - 3
Clean and inspect
Clean the mounting surface and bolt holes with degreaser. Inspect the gasket surface for nicks or warpage; replace gasket if needed.
Tip: A clean, dry surface prevents moisture pockets that can skew torque readings. - 4
Install gasket and align water pump
Place the gasket or O-ring, align the pump with mounting holes, and snug bolts by hand in a crisscross order.
Tip: Avoid cross-threading by starting each bolt in a straight, perpendicular path. - 5
Initial snug tightening
Tighten each bolt by hand or with a torque wrench to a light snug in crisscross order.
Tip: Do not skip any bolt; ensure even contact across the flange. - 6
Final torque (per manual)
Torque bolts to the final specification in the crisscross pattern. If angle tightening is required, apply the angle reference after achieving the initial torque.
Tip: If you lack a torque-angle gauge, rely on the final torque and the manual’s guidance. - 7
Reinstall belt and fill coolant
Reinstall serpentine belt, refill coolant, and bleed the system as per the vehicle’s procedure. Check for abnormal noise or leaks after a short run.
Tip: Keep the system pressurized only after a steady engine run and check for leaks with a cold engine. - 8
Verification after heat cycle
After reaching operating temperature, allow cooling and recheck torque and seals if the manual calls for a post-heat retorque.
Tip: Document results and recheck again after the system cools.
Your Questions Answered
What is the correct bolt torque sequence for the 5.7 Hemi water pump?
Follow the factory service manual for the exact crisscross pattern and final torque. The general approach is to tighten bolts in an alternating pattern to ensure even seating.
Use the service manual for the exact crisscross pattern and final torque. Tighten bolts alternately to seat the pump evenly.
Can I reuse old water pump bolts?
Only if they show no signs of stretching or damage. If there is any doubt, replace with new bolts to maintain gasket integrity.
Reuse only if bolts look undamaged; otherwise replace to ensure proper clamping.
What happens if bolts are over-torqued?
Over-torquing can strip threads, warp the mounting surface, or crack the water pump housing, leading to leaks.
Over-torque can ruin threads or crack the pump housing.
Should I use anti-seize on these bolts?
Check the service manual. Some manufacturers require anti-seize, others discourage it due to torque readings, so follow the manual.
Only use anti-seize if the manual specifically calls for it.
Is torque-angle tightening required for the 5.7 Hemi?
If the service manual specifies, use a torque-angle approach after achieving the initial torque. Otherwise, rely on final torque alone.
Only use torque-angle if the manual requires it.
How long should the system be checked after a heat cycle?
Allow the engine to reach operating temperature, then recheck the bolts after the system cools. Re-torquing may be required.
Check after the heat cycle and recheck when cool if required by manual.
Watch Video
Top Takeaways
- Follow the service manual for final torque values and pattern.
- Tighten bolts in a crisscross sequence for even seating.
- Prepare the mounting surface and gasket properly to prevent leaks.
- Verify integrity after heat cycle and re-torque if required.