How Much Does Torque Really Measure? A Practical Guide
Learn how torque is defined, typical ranges for common fasteners, and practical steps to measure and apply torque safely for DIY mechanics.

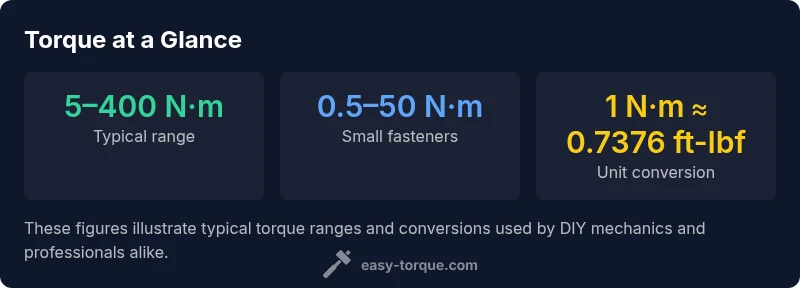
Torque describes the rotational force needed to tighten a fastener to a target value. It is expressed in units such as newton-meters (N·m) or foot-pounds (ft-lb), and the exact torque depends on bolt size, material, surface finish, and lubrication. Practical ranges span from single-digit N·m for small screws to several hundred N·m for automotive components. This guide breaks down typical ranges, measurement methods, and how to apply torque consistently in DIY work.
Understanding Torque Basics
Torque is the turning force applied to a fastener to achieve a specific clamping load. It combines the force you exert with the length of the wrench handle, producing a moment about the fastener axis. The standard SI unit is the newton-meter (N·m), while the imperial equivalent is the foot-pound (ft-lb). Importantly, the same torque value does not guarantee the same clamp on every joint; friction between threads, lubrication, material, and coating all influence the actual load. When you see a torque specification, you are looking at a recommended target that balances secure fastening with the risk of damage. In practical terms, the question 'how much does torque' becomes: what torque value will produce the required clamp for a given bolt size, material grade, and surface condition? Always start with the manufacturer’s spec, use the correct torque wrench, and verify the result in a controlled way.
Key takeaways:
- Torque is a product of force and lever arm, not just a number you twist to.
- The same bolt in different conditions (dry vs lubricated) will require different torques for the same clamp.
- Manufacturer specs account for size, grade, lubrication state, and temperature.
How Torque is Measured
Torque is measured with a torque wrench that converts rotational force into a readable value. There are three main types: click-type, beam, and digital. Click-type wrenches are common for DIY and automotive work; they give a tactile click when the target value is reached. Beam wrenches require you to read a scale on the handle as you tighten. Digital wrenches display the torque numerically and can often log values for quality checks. Regardless of type, accuracy depends on proper calibration, clean threads, and using the correct lubricant state as specified by the torque chart. Calibration intervals vary by tool and usage, but regular verification helps prevent drift. Remember: the torque value is a target for achieving the desired clamp, not a single absolute fact. If in doubt, recheck with a second method or have a partner monitor the wrench while you tighten.
Common Torque Scenarios for Everyday DIYers
For everyday projects, torque ranges vary by fastener size and application. Small machine screws and electronics fasteners typically require single-digit to low double-digit N·m. Bicycle components and certain brake bolts often fall into the low to mid-tens of N·m. Automotive lug nuts generally sit in the tens to low hundreds of N·m, depending on vehicle make and wheel design. Spark plugs are commonly torqued in the mid-teens to mid-twenties N·m range. Brake caliper bolts and caliper mounting hardware also show mid-range values, typically up to around 60 N·m. The overarching rule is simple: bigger bolts and higher strength grades require higher torque. Always locate the exact spec for your part; if unavailable, do not extrapolate from unrelated bolts. Start with conservative torque and increase in small steps, checking for even load and avoiding over-tightening.
Practical guidance:
- When you don’t have a spec, don’t guess; use broad safety margins and seek official guidance.
- Document torque values in your project notes for future reference.
How Lubrication, Thread Condition, and Material Affect Torque
Friction is a major factor in torque. Dry threads create higher friction, which increases the torque needed to reach the same clamping load as lubricated threads. Lubricants and anti-seize compounds reduce friction, so the torque spec for lubricated assemblies is typically lower than for dry ones. Thread cleanliness and condition matter as well: dirt, rust, or cross-threading change the effective friction and the load path. Material strength and coating also influence the required torque. For instance, high-strength bolts in coated materials may require different torque than softer, uncoated threads. Manufacturer torque charts usually specify the state of lubrication (dry, lubricated, or with anti-seize). When in doubt, follow the exact spec for the intended state. If you must estimate, know that lubrication generally reduces friction, so you’ll often apply a lower torque to achieve the same clamping load.
Practical implications:
- Always reference the exact lubrication state used in the spec.
- Do not mix lubricated and dry specs on the same fastener group.
Practical Steps to Set Torque Correctly
To tighten correctly, follow a clear, repeatable sequence:
- Find the official torque spec for the exact part you’re tightening.
- Clean threads and surfaces, removing oils and debris.
- Decide the lubrication state (dry, lubricated, anti-seize) per the spec.
- Set your torque wrench to the prescribed value and attach the appropriate adapter if needed.
- Tighten smoothly in a controlled manner until the wrench indicates the target value.
- For multi-bolt patterns, tighten in a star pattern and re-check after the initial run.
- Re-torque if specified after a short cooldown or initial run.
Tips:
- Calibrate your torque wrench regularly and before critical jobs.
- Consider using a torque-angle approach for high-precision joints when recommended by the manufacturer.
Common Mistakes and How to Avoid Them
- Skipping calibration or ignoring drift in torque tools.
- Tightening without verifying the lubrication state called for by the spec.
- Reusing a bolt or nut outside its design limits.
- Rounding the torque value or neglecting to tighten in a proper sequence.
- Assuming a similar bolt in a different vehicle or component shares the same torque.
- Failing to inspect threads and mating surfaces for cleanliness and damage before torquing.
Avoidance strategies:
- Calibrate regularly and verify with a second method when possible.
- Read the entire torque spec, including lubrication, temperature, and sequence requirements.
- Use clean threads and a clean mounting surface every time.
Quick Reference: Key Takeaways for DIYers
- Start with the manufacturer’s exact torque spec.
- Use a calibrated torque wrench and tighten in the prescribed sequence.
- Account for lubrication, coating, and thread condition.
- Verify results after initial run and re-torque if required.
- Document torque procedures for future projects.
Torque unit conversions for quick reference
| Unit | Common Uses | Conversion To SI | Notes |
|---|---|---|---|
| N·m (Newton-meter) | Metric torque specs | 1 N·m = 0.7376 ft-lbf | Widely used in engineering and manufacturing |
| ft·lb (foot-pound) | US automotive/workshop specs | 1 ft-lbf = 1.356 N·m | Common on US manuals and tools |
| kg·cm | Some metric fasteners | 1 kg·cm = 0.0981 N·m | Less common but used in some charts |
Your Questions Answered
How do I know which torque value to use for a bolt?
Always consult the manufacturer's torque specification for the exact fastener and application. If the spec is unavailable, avoid guessing and seek official guidance or reference charts from the component maker.
Always check the exact spec from the manufacturer. If you can’t find it, don’t guess—look for official guidance or charts from the part maker.
Should I lubricate threads before torquing?
Only if the spec calls for it. Lubrication can significantly change the torque required to achieve the same clamp load, so use the state specified by the manufacturer.
Only lubricate if the spec says so. Lubrication changes the torque required for the same clamp.
Can I reuse old torque specs after replacing a bolt?
Not always. A new bolt may have different dimensions, grade, or coatings that change the torque requirement. Always verify against the current part’s spec.
No, don’t assume old specs apply to a new bolt. Check the current part’s torque spec.
What tools do I need to measure torque?
A calibrated torque wrench is essential. Depending on the job, you may also use torque angle gauges or digital wrenches for logging and verification.
You’ll need a calibrated torque wrench; for some jobs, torque-angle gauges or digital wrenches help with accuracy.
Why does torque vary with lubrication?
Lubrication reduces friction in the threads, which lowers the torque needed to reach the same clamping load. Always follow the lubrication state specified in the torque chart.
Lubricants lower friction, so you tighten to a different torque to reach the same clamp.
How often should torque wrenches be calibrated?
Calibrate according to the manufacturer’s guidance and after heavy use or if the wrench has dropped. Regular checks help maintain accuracy.
Calibrate as per the maker’s guidance and after heavy use to keep readings accurate.
“Torque is a repeatable tightening process when you follow the spec, use the right tool, and account for friction.”
Top Takeaways
- Know the exact torque spec for each fastener.
- Calibrate and use the right torque wrench.
- Account for lubrication and thread condition.
- Tighten in proper sequence for multi-bolt joints.
- Document and verify torque after tightening.