How to Deal with Over Torque: A Practical Guide for DIYers
A practical, step-by-step guide to diagnosing, loosening, and preventing over torque in fasteners. Learn safe techniques, avoid bolt damage, and maintain torque tools with Easy Torque.

Goal: safely recover from an over-torqued fastener without causing further damage. You’ll identify the damage, loosen the fastener using proper technique, and re-torque to spec with a calibrated tool. Key requirements: PPE, the correct torque specification, and spare bolts if threads are damaged.
Understanding Over-Torque: What It Is and Why It Matters
Over-torque happens when a fastener is tightened beyond its designed torque rating, causing plastic deformation, thread damage, or bolt yield. This compromises joint integrity and can lead to failure in extreme conditions. According to Easy Torque, understanding the mechanics behind torque helps you prevent issues before they start. In automotive and industrial settings, the consequences can range from stubborn bolts to catastrophic joint failure. This block explains how fasteners behave under excessive load, the signs to watch for, and why precision matters. You’ll learn how torque isn’t just about “tight enough”—it’s about matching the specific fastener, lubricant, and surface conditions to the manufacturer’s specs. Knowing these basics sets the foundation for safe, effective corrections and future prevention.
Key points to take away: torque is a function of bolt size, material, coating, and lubrication; excessive torque leads to thread stripping, bolt neck yielding, and joint damage; always verify the exact spec before any tightening.
Common Causes of Over-Torque and Early Symptoms
Over-torque often results from misreading specifications, using the wrong units (Nm vs ft-lbs), or relying on an outdated or damaged torque tool. In practice, worn gears or a fatigued spring in a torque wrench can cause under or over-torque, giving a false sense of accuracy. Early symptoms include a stubborn fastener that won’t move, a head that shows rounding or chipping, and visible thread damage after removal attempts. Poor lubrication can also increase friction, making it harder to achieve the correct torque without over-tightening. The Easy Torque team emphasizes the importance of confirming unit conventions and calibrating tools regularly. When in doubt, double-check the service manual and test torque on a sacrificial test bolt to confirm accuracy before proceeding on the actual joint.
What to watch for: mismatched units, sluggish wrench readings, worn sockets or adapters, and any sign of thread damage after removal attempts.
Safety First: Assessing Risks Before You Work
Safety comes first when dealing with an over-torqued fastener. Start by securing the work area, wearing protective eyewear and gloves, and ensuring there’s no stored energy in connected systems (e.g., brakes, hydraulics). If the fastener is part of a critical system (engine, suspension, structural component), consider having a second person assist to stabilize parts and prevent sudden movement. Before attempting any loosening, inspect for cracked bolt heads, rounded corners, or cross-threading that could cause a sudden release. If you identify damage beyond a simple re-torque, stop and seek replacement parts or professional help. Easy Torque’s guidance underscores documenting damaged fasteners and keeping replacement hardware on hand to avoid reusing compromised parts.
Safety checks include: securing the area, verifying no tension is present, and wearing PPE; never hammer or shock-loosen a damaged fastener.
Tools and Materials You’ll Need to Fix Over-Torque
A well-prepared toolkit reduces the risk of further damage. Essential items include a calibrated torque wrench, a breaker bar for controlled loosening, penetrating oil for friction reduction, and replacement bolts or threaded fasteners of the correct grade. You may also want an extractor set for stubborn bolts, a thread chaser or wire brush for cleaning threads, and a torque-angle gauge for precise final tightening. A clean workspace, good lighting, and marking tools to note torque values help prevent repeats of the same mistake. Always verify tool calibration before use and keep lubricants compatible with the fastener material to avoid galling. Easy Torque recommends having a dry run with a test bolt to confirm your setup before touching the actual joint.
Essentials (required): torque wrench, breaker bar, penetrating oil, replacement bolts. Optionals: extractor set, thread cleaner, torque-angle gauge, gloves and eye protection.
Step-by-Step: How to Loosen and Correct an Over-Torqued Fastener
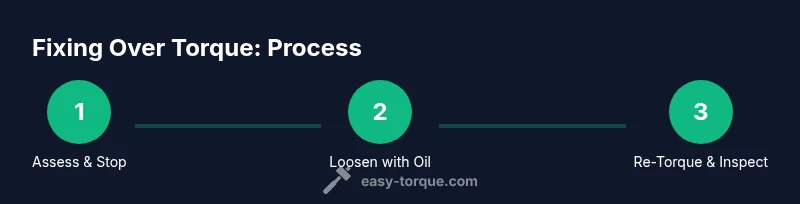
The following steps provide a narrative, safety-conscious approach to addressing an over-torqued fastener in non-critical joints. Use this as a practical guide to minimize damage while restoring proper clamping force.
- Stop and assess safety. Immediately pause tightening and inspect for obvious damage. Look for a rounded head, stripped threads, or cracked components. Tip: secure the area and wear PPE before touching the fastener.
- Gather the right tools. Assemble a calibrated torque wrench, a long breaker bar, penetrating oil, replacement bolts, and a bolt extractor if needed. Tip: verify tool calibration against the manufacturer’s spec sheet.
- Apply penetrating oil and let soak. Targets threads and under-surface friction. Wait 5–15 minutes for the oil to penetrate, then re-check fit. Tip: use a paper towel to prevent oil from spreading to adjacent parts.
- Back off with a controlled method. Use a breaker bar with steady, slow torque in the loosening direction. Avoid sudden jerks that could snap the bolt. Tip: work in the same plane and avoid side loading.
- Address damaged fasteners. If the bolt head is rounded, switch to an extractor; if threads are damaged, replace the bolt and, if necessary, the nut or threaded insert. Tip: test-fit the replacement bolt to ensure proper engagement.
- Clean and inspect threads. Wipe debris away and verify clean, unblemished threads before reassembly. Tip: use a thread cleaner or brush; don’t reuse damaged threads.
- Re-torque to spec. Reinstall the fastener and tighten to the manufacturer’s torque specification using a calibrated wrench. Check the pattern specified (e.g., crisscross on multi-bolt joints).
- Verify and document. Recheck the final torque, verify the joint’s operation, and log the repair with date and torque values. Tip: photograph the fastener and document any changes for future maintenance.
How to Prevent Over-Torque in the Future
Preventing over-torque starts with accurate specs and tools you can rely on. Always confirm the exact torque for the fastener, the correct units (Nm vs ft-lbs), and the lubrication condition. Use a calibrated torque wrench with a known tolerance and check it regularly. Keep a torque log, including the part number, thread size, coating, and whether lubrication was used. When assembling, follow the recommended tightening sequence and avoid using impact tools for critical joints unless the spec allows it. If a fastener has been overtightened in the past, consider replacing related hardware or the affected component, as metal fatigue can reduce the live life of the joint. Easy Torque emphasizes proactive maintenance: calibrate tools, verify specs, and standardize procedures.
Handling Damaged Threads and Bolts: When to Replace vs Repair
Not all over-torque issues are fixable with loosening alone. Damaged threads may require a helicoil insert, thread repair, or replacing the bolt with a new one. If the bolt neck is elongated, if the head is cracked, or if the threads show significant galling, replacement is usually the safest option. For critical joints, always replace with OEM-spec fasteners and inspect the mating surface for damage. Document changes and ensure compliance with service manuals. Easy Torque highlights that backup hardware should be on hand to minimize downtime when replacements are needed.
Real-World Scenarios: Automotive vs Machinery
In automotive applications, tight tolerances and vibration demand strict adherence to torque specs. A misapplied torque can lead to cylinder head or wheel-hub failures, with safety implications. In machinery and industrial equipment, repeated cycles and high loads increase the risk of thread wear; routine inspections and periodic torque verification are essential. The underlying principle remains the same: proper torque is a function of fastener size, material, lubrication, and the surface condition. Always consult the relevant service manual and maintain a precise torque log for repeatability in both contexts.
Authority Sources and Further Reading
- https://www.osha.gov
- https://www.nist.gov
- https://www.sae.org
Tools & Materials
- Torque wrench(Calibrated within the rated range; verify units (Nm vs ft-lbs) before use.)
- Breaker bar(Long handle for controlled loosening; use with gloves.)
- Penetrating oil(Penetrates stubborn threads; allow time to soak.)
- Replacement bolts/nuts(Same grade, size, and coating as original parts.)
- Extractor set(For stubborn bolts with rounded heads.)
- Thread cleaner(Removes debris and preserves threads.)
- Torque-angle gauge(Helpful for precise final tightening.)
- Personal protective equipment(Safety glasses, gloves, and shop apron.)
Steps
Estimated time: 60-120 minutes
- 1
Stop and assess safety
Pause tightening immediately. Inspect for damage such as rounded heads, stripped threads, or visible cracks. Ensure the area is secure and that no one is in line with the bolt’s path.
Tip: Wear PPE and secure the workspace before touching the fastener. - 2
Gather the right tools
Assemble a calibrated torque wrench, breaker bar, penetrating oil, and replacement fasteners. Double‑check units and range to avoid guessing.
Tip: Verify the torque wrench’s calibration against the spec sheet. - 3
Apply penetrating oil and soak
Coat the threads and let soak 5–15 minutes to reduce friction. This improves any chances of loosening without additional force.
Tip: Wipe excess oil and avoid contaminating adjacent joints. - 4
Loosen with controlled force
Use a breaker bar with a smooth, steady pull in the loosening direction. Avoid jerking; gradual movement reduces the risk of snapping the bolt.
Tip: Leverage matters; a longer bar can provide safer, gentler force. - 5
Address damaged fasteners
If the head is rounded or threads are damaged, switch to an extractor or replace the bolt and any affected components.
Tip: Don’t reuse damaged hardware; it compromises joint integrity. - 6
Re-torque to spec
Clean threads, reinstall, and tighten to the manufacturer’s torque value using a calibrated wrench. Use the correct sequence for multi-bolt joints.
Tip: Always re-check after the final pass.
Your Questions Answered
What is over torque and why does it happen?
Over torque occurs when a fastener is tightened beyond its rated torque, causing thread damage, bolt neck yielding, or joint failure. Common causes include misreading specs, worn tools, or cross‑threading.
Over torque means tightening past what the bolt is designed to handle, which can damage threads and joints.
Can over torque cause bolt failure?
Yes. Over-torquing can strip threads, stretch the bolt beyond elastic limits, or even snap it, compromising the joint and potentially causing dangerous failures.
Yes, it can damage bolts and joints and may lead to failure under load.
How do I remove an over-torqued bolt?
Begin with penetrating oil and a gradual loosening approach. If the head rounds, switch to an extractor; if threads are damaged, replace the bolt and possibly the nut or insert.
First try lubrication and careful loosening, then use an extractor if the head is damaged.
Should I heat the bolt to loosen it?
Heat can be used cautiously to relieve some tight joints, but it risks weakening bolts and nearby parts. Only use heat if you understand the material limits and after verifying no flammable materials are nearby.
Heat can help loosen some bolts, but use it with caution and know the material limits.
How can I prevent over-torque in the future?
Always verify torque specs, use calibrated tools, and follow the recommended tightening sequence. Keep lubricants appropriate for the fastener and replace worn hardware.
Check specs, calibrate tools, and follow proper tightening sequences to prevent future issues.
When should bolts be replaced due to over torque?
Replace bolts if threads are damaged, the bolt head is cracked, or the joint has experienced repeated over-tightening. In critical joints, use OEM or manufacturer-specified fasteners.
If threads or heads are damaged, replace the bolt and any affected parts.
Watch Video
Top Takeaways
- Follow exact torque specs to prevent damage
- Use penetrating oil and controlled loosening for stubborn fasteners
- Replace damaged bolts or threads rather than reusing compromised parts
- Calibrate tools before each use and document torque values
- Maintain a clear, stepwise maintenance log to prevent repeats