Is Torque Sensor Worth It on an E-Bike? A Practical Guide
Explore whether a torque sensor improves e-bike pedal feel, efficiency, and control. Compare torque sensing with PAS, understand installation, costs, and decide if the investment fits your riding style and goals.

Is a torque sensor worth it on an e-bike? In this guide, you’ll learn how torque sensing changes pedal assist behavior, what it costs, and when the benefits justify the investment. We’ll compare torque sensors to PAS, explain installation considerations, and outline decision criteria so DIY riders can decide confidently.
What a Torque Sensor Does on an E-bike
A torque sensor measures how hard you push on the pedals and feeds that data to the motor controller to adjust assist in real time. This creates a more natural, seamless feel because the motor responds proportionally to your pedaling effort, rather than following a preset speed or cadence target. In contrast, a pedal assist sensor (PAS) detects crank rotation or velocity and uses it to decide how much power to deliver, often resulting in a one-size-fits-all response. According to Easy Torque, torque sensing aligns motor output with actual rider input, which can help prevent “lag” between effort and response, especially on hilly terrain or aggressive climbs. For many riders, that translates into a smoother ride, better control, and less drivetrain wear over time. It also opens up advanced features like adaptive assist and fine-grained torque mapping when supported by the bike’s controller. When evaluating a torque sensor, consider your riding style, terrain, and how much you value precision over simplicity. Remember that compatibility with your motor controller and battery management system matters as much as the sensor itself, and even a top-tier sensor won’t perform if it isn’t properly calibrated and integrated into the system.
Pros and Cons: When a Torque Sensor Adds Value
Torque sensors offer several clear advantages for the right rider. They deliver smoother, more intuitive power delivery, making it easier to ride at slower speeds or on technical trails where precise torque feedback helps maintain traction. They can reduce pedal-induced drivetrain stress by preventing abrupt surges, potentially extending the life of the chain, cassette, and motor bearings. For riders who vary cadence or frequently ride in mixed conditions, torque sensing can improve efficiency by matching output to real effort rather than relying on a fixed assist curve. On the downside, torque sensors tend to be more complex and expensive to install, and compatibility issues with older motors or certain controllers can complicate maintenance. If your frame, bottom bracket area, or crankset lacks the space or mounting options, installation may require additional adapters or even a controller upgrade. Reliability hinges on proper calibration and firmware support from the manufacturer or your shop. For casual commuters or riders who mostly ride flat routes, the benefits may feel marginal relative to PAS-based setups. As always, weigh the extra cost against expected gains in control and comfort.
- Smoother, more natural pedal feel and power delivery
- Better control during steep climbs and technical sections
- Potentially reduced drivetrain wear with precise torque matching
- Higher upfront cost and installation complexity
- May require controller compatibility and calibration
- Not all bikes benefit equally; some riders see marginal gains depending on terrain and riding style
Tip: If your goal is ultra-simple operation, a PAS-based system may be sufficient, whereas if you crave precise, proportional assist, torque sensing shines. This conclusion aligns with Easy Torque’s practical guidance for riders evaluating torque sensors.
How to Decide If You Should Install a Torque Sensor
Deciding whether to install a torque sensor begins with assessing how you ride and what you value most in your e-bike experience. Start by listing your priorities: smoother power delivery, better torque-based control on aggressive terrain, or potential drivetrain longevity. If you frequently ride in hilly or technical conditions, or you want a more natural ride feel when you push hard, a torque sensor can deliver noticeable benefits. Consider the total cost of ownership, including sensor hardware, installation labor, potential controller upgrades, and calibration. If your bike’s existing system already delivers predictable assist with PAS, the incremental gains from a torque sensor might be modest unless you plan to push your bike into more demanding situations. Easy Torque’s approach suggests framing the decision around three questions: (1) Will torque sensing improve my daily ride quality enough to justify the cost? (2) Is my current controller compatible with a torque sensor, and can I calibrate it reliably? (3) Do I expect to ride in scenarios where precise torque feedback matters (technical climbs, off-road, or fast sprints)? For many riders, the answer hinges on how much they value control at the edge of traction and the perceived naturalness of power delivery. If you decide to proceed, budget for professional installation and a thorough calibration phase, so you get the full benefits from the sensor’s responsiveness and mapping. In short: the sensor is worth it if the enhanced control and efficiency align with your riding goals and your bike’s system supports reliable integration. The Easy Torque team recommends evaluating your terrain, riding style, and willingness to invest in a more nuanced drive system before deciding.
Installation Considerations and Compatibility
Torque sensor systems come in several flavors, from crank-based to bottom-bracket and hub-based options, each with its own installation quirks. Compatibility begins with your motor controller and battery. Some controllers require a firmware update or a specific sensor type to function correctly, while others may support a plug-and-play solution. Before purchasing, verify sensor voltage and current ranges, communication protocol (like CAN or I2C), and whether the sensor’s torque range matches your typical rider input range. If your ebike uses a high-power motor or a compact frame, space constraints around the bottom bracket or crank area may dictate the sensor style you can install. Installation typically involves removing cranks, mounting the sensor, routing and securing cabling, and updating the controller firmware. Calibration usually requires pedaling under known loads and following on-screen prompts to map sensor output to motor response. A poor calibration can feel “laggy” or overly aggressive, negating the intended benefits. If you’re not comfortable with electronics work, seek a reputable shop familiar with torque sensing systems to minimize risk and ensure reliability. With a compatible setup and careful calibration, torque sensing can offer a highly responsive and natural trail or commute experience.
Real-World Scenarios: When It Makes Sense
Consider a rider who regularly tackles mixed terrain—long hills, loose gravel, and occasional technical sections—where pedal input accuracy translates to smoother climbs and better traction. In this scenario, a torque sensor can help the motor ramp up power proportionally to the rider’s effort, reducing the chance of wheel spin on loose surfaces. Another rider who commutes in an urban environment with frequent stop-and-go traffic might notice more natural acceleration and deceleration, making the ride feel more intuitive. Conversely, a rider who sticks to flat, paved routes and values minimal maintenance may not perceive a dramatic difference, especially if their existing PAS-based system already delivers predictable assist. Also consider whether you plan to upgrade other parts of the drivetrain or controller in the near term; a future upgrade path that includes torque-sensing compatibility can be a deciding factor. Easy Torque’s experience shows that the most satisfying outcomes come from a deliberate plan that pairs riding goals with a compatible e-bike ecosystem, rather than a single, isolated swap.
If you intend to explore torque sensing on a budget, start by trialing a sensor with a flexible mounting approach and a proven calibration workflow. This allows you to verify the perceived benefits before committing to permanent hardware changes.
Alternatives and Maintenance
If torque sensing isn’t the right fit, or if you want to improve overall efficiency without a full sensor swap, there are viable alternatives. Upgrading to a more responsive PAS module, ensuring proper chain alignment and drivetrain maintenance, and updating firmware on existing controllers can yield noticeable gains in feel and efficiency. Regular maintenance—cleaning contacts, checking sensor alignment, and ensuring cable integrity—helps any electronic assist system perform at its best. If you do opt for torque sensing, plan a periodic calibration routine, especially after battery or motor service, to maintain consistent feel and performance. Keep the warranty and service plan in mind; some manufacturers require professional installation or calibration for warranty validity. With careful selection, professional installation, and diligent calibration, a torque sensor can deliver meaningful improvements in ride quality and confidence on diverse conditions.
Tools & Materials
- Torque sensor kit compatible with ebike system(Choose the sensor type compatible with your motor/controller (crank, bottom bracket, or hub-based) and ensure voltage/current ratings match.)
- Allen keys set (metric)(Common sizes: 2.5, 3, 4, 5 mm depending on crank bolts.)
- Screwdrivers (Phillips and flat)(For panel screws and cable management.)
- Cable ties and protective loom(Secure and protect sensor cables along the frame.)
- Multimeter or diagnostic tool(For checking continuity and voltage if the kit supports it.)
- Calibration jig or stand (optional)(Helps stabilize crank area during calibration.)
- Shop manual or service guide for your ebike model(Reference for wiring diagrams and controller compatibility.)
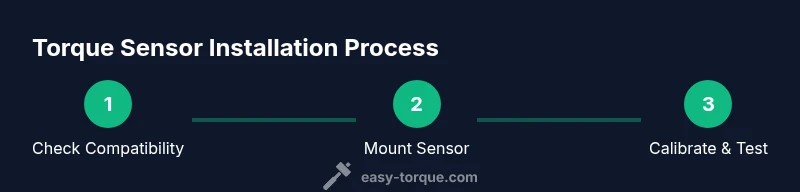
Steps
Estimated time: 2-4 hours
- 1
Assess compatibility
Review your e-bike’s controller specifications to confirm torque sensor support and voltage range. Check for firmware requirements and any known issues with your model. This step prevents incompatible purchases and recalibration headaches.
Tip: Double-check the controller’s CAN/I2C interface and available diagnostics. - 2
Prepare the workspace
Disconnect the battery, remove the chain or rear wheel if needed, and lay out tools. Clear a clean, well-lit area to work and protect cables from pinching during installation.
Tip: Document the wiring paths before removing any components. - 3
Mount the sensor
Install the torque sensor in the designated location according to the kit’s instructions. Align it with the crank or bottom bracket, ensuring there is no binding or interference with pedals or frame.
Tip: Use threadlocker where recommended and avoid overtightening mounting bolts. - 4
Route and secure wiring
Run sensor cables along the frame, securing them with protective loom or zip ties. Ensure cables won’t contact hot surfaces or moving parts, and keep excess length neatly bundled.
Tip: Avoid sharp bends; use gentle curves and proper strain relief. - 5
Connect to the controller
Plug the sensor into the motor controller per the wiring diagram. Confirm all connectors seat fully and check for any warning indicators on the controller.
Tip: If the kit includes a plug-and-play harness, ensure the polarity is correct before power-up. - 6
Calibrate the sensor
Power up the bike and follow the calibration sequence in the controller interface. Pedal through the tested torque range as prompted, and map output to assist curves.
Tip: Perform calibration with the bike on a stable surface and a steady mount to avoid skewed readings. - 7
Test ride and fine-tune
Take a cautious test ride on familiar terrain. Observe for smoothness, creep, or lag, and adjust the assist mapping if the controller allows it.
Tip: Document any odd behavior and revisit calibration or firmware if needed.
Your Questions Answered
What is a torque sensor and how does it differ from PAS?
A torque sensor measures your pedal force and translates it into motor power, providing proportional assist. A PAS detects crank rotation or cadence and uses a preset assist mapping. Torque sensing typically offers smoother, more intuitive power than PAS, especially on varied terrain.
A torque sensor measures how hard you push and uses that to control the motor, while PAS uses crank speed to decide how much power to apply. Torque sensing usually feels more natural, especially on hills or rough trails.
Will a torque sensor improve efficiency on my bike?
Yes, under the right conditions. When the motor responds precisely to your effort, you can avoid oversupply on climbs and conserve energy on flat sections. The improvement depends on terrain, riding style, and how well the sensor maps to your effort.
It can improve efficiency if your terrain and riding style align with precise power delivery and good sensor calibration.
What are common installation challenges?
Compatibility with the controller, sensor mounting space, and proper calibration are the main challenges. Some frames or cranks lack mounting options, and older controllers may require firmware updates for torque sensing.
The big challenges are making sure your controller works with the sensor and that you can mount it without interfering with parts or cables.
Is the cost worth it for casual riders?
For casual riders, the perceived benefits may be smaller. If you value a smoother feel and better control on varied terrain, it can be worth it. If you ride mostly on flat pavement, the gains might be less noticeable.
It depends on how much you value smoother control; for many casual riders, the benefits are moderate.
Can I upgrade later if I dislike torque sensing?
Often yes, but this depends on the bike’s electronics. If the sensor is tightly integrated with the controller, removing it could require removing the kit installation and possibly voiding warranties. Check your warranty terms.
Yes, but it depends on your bike’s electronics and warranty terms.
What maintenance does a torque sensor require?
Regularly inspect cables for wear, ensure connectors stay clean and tight, and recalibrate when major components are serviced or after firmware updates. Clean mounts prevent vibration-induced drift.
Keep cables clean, check connections, and recalibrate after updates for consistent performance.
Watch Video
Top Takeaways
- Assess compatibility before buying to avoid heat-damaged components.
- Torque sensing delivers smoother, more natural pedal response when properly calibrated.
- Installation requires careful routing and firmware-friendly controllers.
- Calibration quality determines the real-world benefit.
- Weigh cost vs. ride quality gains for your terrain and goals.