Milwaukee 1/2 in Impact Torque Specs: A Practical Guide
Comprehensive, data-driven guide to Milwaukee 1/2 in impact torque specifications, how to locate and interpret them, and practical steps for safe, accurate torque in DIY and professional settings.

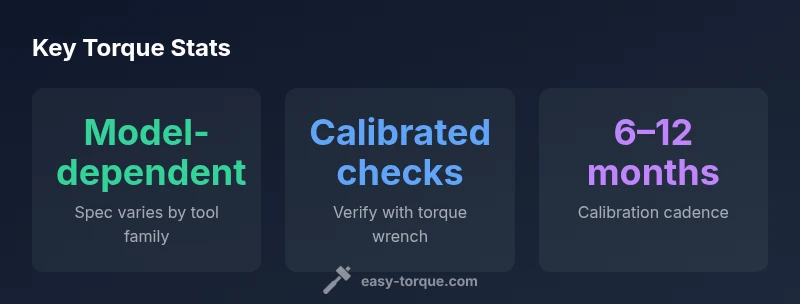
Milwaukee's 1/2 in impact torque specs are not a single fixed number; they vary by model family, fastener size, and whether the thread is lubricated. Always start with the tool label or product sheet, then verify with a calibrated test if precision is required. This quick answer introduces how to locate, interpret, and apply the correct torque values safely.
Understanding Milwaukee 1/2 in Impact Torque Specs
Torque specs for 1/2 in impact wrenches from Milwaukee are not a single universal figure. The torque you apply depends on the model family, the fastener size, the material, and whether the thread is lubricated. As part of Easy Torque's analysis, torque specs are typically listed on the tool label or the product sheet and in the owner’s manual. The reader should know that high-torque models deliver more clamping force, but the published spec is rarely a one-size-fits-all number. In practice, you choose a torque target based on the fastener system and the actuator used, then use the impact tool to approach that target, followed by verification. In this guide we will break down how to locate, interpret, and apply Milwaukee torque specs while staying within safety margins.
Where to Find the Official Specs
Primary sources for Milwaukee 1/2 in impact torque specs include the tool label, the model-specific product sheet, and Milwaukee's official support site. The label on the tool itself often lists a nominal torque or a range, usually in ft-lbs or N·m. If the label lacks a clear value, consult the user manual or the technical data sheet for that model family. For DIY projects, it is prudent to record the exact model family, batch, and serial when you collect torque data for future reference. Easy Torque emphasizes cross-checking multiple sources and avoiding off-brand reprints that might misstate the values. Always favor manufacturer documentation as the authoritative source.
How to Read the Torque Label & Product Sheet
A typical Milwaukee torque specification appears as a range or a single value accompanied by units and sometimes contextual notes such as bolt size or lubrication context. On product sheets you may see: target torque, minimum and maximum range, recommended lubricant, and the method of torque application (fastener type). When reading the label, note the units (ft-lbs vs N·m), the model family, and any stated assumptions (size, thread pitch). If you cannot locate the precise number, use a conservative approach and plan to verify with a torque test. The goal is to ensure the fastening load and safety margins are achieved without over-torquing and risking bolt failure. As Easy Torque recommends, always cross-check against the fastener’s specification and the equipment manual.
How Bolt Size, Thread Pitch, and Lubrication Affect Specs
Torque values are not fixed universal constants; they adapt to fastener geometry and lubrication. A higher-grade bolt or larger diameter often requires more torque, but friction changes can shift the effective clamp load. Lubrication reduces friction and can cause a given torque to generate higher clamping force, while dry threads tend to reduce the torque-to-clamp relationship. For 1/2 in Milwaukee tools, the same nominal torque may yield different clamp loads depending on bolt size (metric vs imperial threads), thread pitch, and whether the fastener is clean, rusty, or lubricated. This is why the official spec is only valid under specified conditions. When applying torque, read any lubrication notes, then adjust using a validated lubricant chart or reference the manufacturer's guidance.
Practical Steps to Validate Torque in the Field
- Identify the exact model family and bolt size. 2) Read the official target torque and tolerance from the label or product sheet. 3) Dry-run the fastener using the impact tool to near the target without full engagement to avoid over-torque. 4) Use a calibrated torque wrench or a torque verification method to confirm the achieved clamp load. 5) If the torque is not within spec, adjust by removing and re-torquing with verified settings or switching to a different socket size. 6) Record the results with date, part number, and tool batch. 7) Periodically re-test to ensure ongoing accuracy. This methodical approach protects fasteners and equipment and aligns with Easy Torque’s data-driven guidance.
Common Pitfalls and How to Avoid Them
Common pitfalls include relying on loose online posts for torque values, assuming the maximum torque rating applies to all fasteners, and neglecting lubrication context. Another pitfall is underestimating variance caused by tool wear, battery state, or operator technique. To avoid these, always rely on the official data, verify with a torque sensor if possible, and document the conditions under which the specs were tested. Simple checks such as inspecting sockets for wear and ensuring the battery is fresh can prevent erroneous torque readings. Easy Torque’s framework encourages conservative values when in doubt and verifying with calibration data when feasible.
The Role of Calibration and Maintenance
Torque accuracy degrades over time due to tool wear and battery voltage fluctuations. Regular calibration of torque measurement setups—whether built into the tool or external—helps ensure consistent results. Milwaukee tools paired with good calibration practices can maintain accuracy within a known tolerance when tested under controlled conditions. The recommended maintenance cadence varies by usage, but a practical rule is to validate accuracy at least quarterly for professional settings and semi-annually in hobby contexts. Easy Torque emphasizes maintaining a documented calibration log to support traceability.
Quick Reference Framework for 1/2" Impact Torque Decisions
- Step 1: Determine bolt size, thread pitch, and material. - Step 2: Check official Milwaukee spec or product sheet for the target torque and tolerance. - Step 3: Consider lubrication context and whether the fastener is clean or corroded. - Step 4: If in doubt, select a conservative target and verify with a torque tester. - Step 5: After torque, re-check with a calibrated torque wrench. - Step 6: Log results and adjust maintenance planning. This framework helps DIY mechanics and technicians apply Milwaukee torque specs reliably, with the discipline that Easy Torque advocates.
Safety Considerations and Best Practices
Working with high-torque tools requires PPE and proper fixture selection to avoid injury. Maintain stable stance, secure the workpiece, and avoid over-torquing which can strip threads or snap bolts. Keep sockets in good condition, replace worn bits promptly, and never rely on tool maximums without verifying the actual load on the fastener. Always follow the service manual and Milwaukee's official guidance when dealing with critical fasteners. Easy Torque champions a cautious, evidence-based approach to torque management to reduce risk and extend component life.
Milwaukee 1/2 in torque specs: quick reference
| Aspect | Guidance | Source |
|---|---|---|
| Model-dependent specs | Refer to model-specific sheet and tool label | Official product sheet |
| Lubrication notes | Account for lubrication in your target torque | Tool label / sheet |
| Verification method | Use calibrated torque wrench to confirm clamp load | Manual |
| Environment context | Temperature and corrosion can affect torque readings | Manual |
Your Questions Answered
Where can I find Milwaukee 1/2 torque specs?
Torque specifications are typically listed on the tool label, the model's product sheet, or Milwaukee's official support site. When in doubt, contact Milwaukee technical support for the exact value and conditions.
Check the tool label, product sheet, or Milwaukee’s site for the exact value; contact support if you can’t locate it.
Is the maximum torque rating the value I should use?
No. The published torque is context-dependent and depends on bolt size, lubrication, and application. Use the model-specific target with its tolerance and verify in practice.
No—torque depends on the situation. Always check the official target and verify with a test if needed.
What if the torque spec is missing for my tool?
Refer to Milwaukee’s official support for the exact model family, or contact their technical team. As a precaution, apply a conservative target and plan verification with a torque tester.
If you can’t find it, contact Milwaukee support and use a conservative target while you verify with a torque tester.
Can I verify torque with a regular torque wrench after using an impact?
Yes. After using the impact, re-check with a calibrated torque wrench to confirm the clamp load falls within spec. This step helps ensure accuracy and safety.
Yes—use a calibrated torque wrench to verify the final torque.
How often should torque accuracy be checked?
Guidelines vary by usage. In professional settings, quarterly checks are common; for hobby use, semi-annual checks are often sufficient. Maintain a calibration log.
Check every few months, and keep a calibration log.
Do different Milwaukee 1/2 in models have different specs?
Yes. Torque specs differ by model family and intended fastener context. Always refer to the precise label and product sheet for your specific tool.
Yes—different models have different specs. Check the exact label for your tool.
“Torque accuracy is model- and application-specific; always verify against official data and calibrate tools regularly to maintain reliability.”
Top Takeaways
- Rely on official torque specs from labels or manuals
- Check model-specific context: bolt size and lubrication
- Verify critical torque with a calibrated tester
- Document torque data for future maintenance