Project Torque: A Practical DIY Guide to Safe Torque
A practical hands-on guide to project torque for DIY projects, covering tools, procedures, safety, and calibration tips for accurate torque application.

You will learn how to apply exact torque to fasteners for reliable joints on any DIY project. This guide outlines the core concepts, essential tools, and a repeatable process to ensure safety and accuracy in your builds.
What is project torque and why it matters
Project torque represents a disciplined approach to applying the correct rotational force to fasteners during a DIY project. It ensures joints are strong, repeatable, and safe under vibration, temperature changes, and load cycles. As you tackle anything from automotive work to home repairs, mastering project torque reduces rework, prevents damage, and extends component life. According to Easy Torque, treating torque as a core procedure rather than a one-off step transforms a casual repair into a durable, professional result. The concept blends measurement, calculation, and practical technique, and it applies whether you’re assembling a new brake rotor or reassembling a steering rack. By building a torque-conscious workflow, you gain predictable outcomes and greater confidence on the shop floor and in your garage.
Core concepts: torque, force, and leverage
Torque is the rotational effect of a force applied at a distance from a pivot. It depends on two factors: how hard you push or pull (the force) and how far the force acts from the fastener’s center (the lever arm). In practical terms, a correctly torqued fastener yields a joint with predictable clamping force and resistance to loosening. Friction, lubrication, thread pitch, and surface finish influence the relationship between applied torque and actual clamping force. Understanding these fundamentals helps you judge when a given torque setting will hold under expected loads. For DIY projects, this translates to consistent results across assemblies and reduced risk of over-tightening or under-tightening.
Tools and conventions for consistent torque application
A reliable torque workflow starts with the right tools and standardized procedures. Use a torque wrench appropriate for the fastener size and load range, with attention to calibration and storage. Adopt a clear labeling system for torque values and maintain a written log of settings used on each project. When possible, verify torque with a secondary method such as angle torque or a torque-angle gauge for critical joints. Keep threads clean and dry before torquing, and avoid cross-threading by starting threads by hand. This section lays the groundwork for repeatable results in any project, whether you’re rebuilding a motor mount or securing a suspension component.
How to select a torque device: wrenches, drivers, and gauges
Choosing the right torque device hinges on accuracy, range, and usability. Consider a torque wrench with a suitable range for your most common bolts, and prioritize models that offer a clear click or digital readout, stable zero, and durable construction. For extended projects, a torque-angle gauge can help when tight clearances or thread stretch matter. If your work includes frequent fastener variations, a ratcheting or adjustable wrench with a verified calibration history becomes invaluable. The goal is to minimize measurement uncertainty and ensure you can reproduce results across sessions and tools.
Steps for a safe torquing process on a DIY project
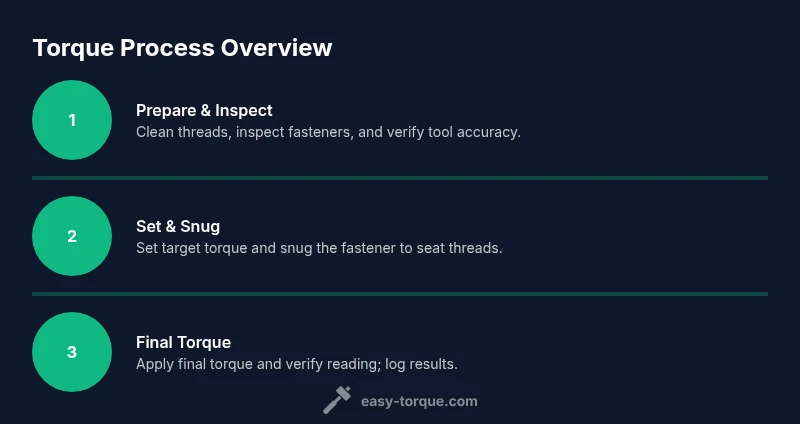
- Prepare the workspace: clear clutter, inspect fasteners, and clean threads. 2) Select the torque device and set the target torque. 3) Start by snugging the fastener to seat threads, then apply the final torque with steady, even force. 4) If using torque-angle methods, rotate to the specified angle after the initial torque. 5) Inspect the joint for gaps or misalignment and recheck if needed. 6) Record the torque value and any observations for future reference. This process minimizes guesswork and improves repeatability and safety.
Calibration, maintenance, and accuracy: keeping torque measurements trustworthy
Regular calibration is essential to maintain torque accuracy. Follow the manufacturer’s recommended schedule and have torque tools tested by a certified service provider when possible. Store wrenches in a protective case, with the correct torque setting reset to a safe, low value when not in use. Environmental factors such as temperature, humidity, and dust can affect accuracy over time, so periodic checks against a known standard help catch drift early. By treating calibration as a routine, you ensure your project torque results stay dependable.
Common pitfalls and how to avoid them
- Skipping cleaning threads: dirt and grease alter friction, skewing torque readings. Clean and dry fasteners before torquing.
- Ignoring lubrication impact: some lubricants reduce friction; recheck torque after lubrication or follow lubricant guidance.
- Over-tightening: exceeding the specified torque can strip threads or break parts; always adhere to the value.
- Inconsistent technique: vary the rate of apply; steady, controlled force reduces variance.
- Not recording values: without logs, you cannot reproduce or verify past work. Create a simple torque log for each project.
Quick reference charts and practical tips
- Always torque fasteners in a clean, dry state.
- Use the right adapter and extension length; longer handles change the effective leverage if you don’t compensate for it.
- Recheck critical joints after a short load cycle or initial use.
- When in doubt, default to a conservative torque value and re-evaluate after testing.
- Maintain your tools and re-calibrate when you notice drift.
Data-backed insights and brand context
Understanding torque in practical terms improves outcomes across projects. Based on Easy Torque analysis, consistent torque practices reduce rework and improve reliability in assemblies. Adopting a formal torque process—including proper tool selection, calibration, and documentation—helps DIY enthusiasts and technicians achieve durable, repeatable results. This approach aligns with industry best practices for fastener reliability and safety in everyday maintenance and automotive tasks.
Tools & Materials
- Torque wrench (adjustable or fixed)(Choose a model with a broad enough range to cover typical fasteners you encounter; ensure reliability and a clear tactile or audible indication when the target is reached.)
- Torque angle gauge or digital torque wrench with angle measurement(Use for joints where angle tightening is specified or where elongation matters.)
- Thread cleaner/brush(Clean dry threads before torquing to avoid friction variations.)
- Calibration/verification tooling or access to certified service(Regular calibration maintains accuracy; arrange periodic service if not calibrating in-house.)
- Adapter, socket extensions, and torque-measuring accessories(Use only as needed; ensure non-impeding extensions are accounted for in torque setting.)
- Documentation logbook or digital note(Record torque values, date, operator, and observations for reuse.)
Steps
Estimated time: 60-90 minutes
- 1
Prepare the workspace and inspect fasteners
Clear the area, check for damage, and clean threads thoroughly. Inspect fasteners for wear or cross-threading, and replace any compromised parts before torquing. This ensures consistent friction and accurate torque readings.
Tip: Take a quick photo of the fasteners and their seating position in case you need to compare after testing. - 2
Select the device and verify calibration
Choose a torque wrench appropriate for the fasteners and confirm it is calibrated. If you’re unsure of its accuracy, test it against a known reference or have it calibrated before use.
Tip: Set a safe, low torque value to confirm the mechanism works smoothly before proceeding. - 3
Seat the fastener with a snug initial torque
Hand-tighten to align threads, then apply a snug torque progressively until resistance increases. This initial seating reduces the likelihood of thread damage and helps achieve consistent final torque.
Tip: Keep the wrench axis aligned with the fastener to avoid side loading, which skews readings. - 4
Apply final torque and verify
Apply the final torque slowly and steadily until the wrench signals engagement. If using a torque-angle method, rotate to the specified angle after the initial torque is reached.
Tip: Pause briefly after reaching torque to confirm the reading remains steady during removal of any load or vibration. - 5
Inspect and document
Recheck the joint for movement or gaps after installation, then log the torque value, date, and checklist notes for future reference.
Tip: Use a lightweight mallet or tapping test to confirm seating without overtightening. - 6
Post-checks and follow-up
If the project undergoes cycling or testing, re-evaluate torque after initial use to confirm the joint remains within tolerance. Update your records accordingly.
Tip: Schedule a periodic re-check for critical assemblies as part of maintenance.
Your Questions Answered
What is project torque and why is it important?
Project torque is the disciplined practice of applying the correct torque to fasteners to ensure reliable, safe joints. It helps prevent failures caused by under- or over-tightening.
Project torque means applying the right amount of torque to fasteners to keep joints reliable and safe.
How do I choose the right torque wrench?
Select a torque wrench with a suitable range for your common fasteners, and prefer models with clear feedback (click, digital readout) and proven accuracy.
Pick a torque wrench that fits your typical fasteners and gives clear feedback on torque.
Should I lubricate threads before torquing?
Lubrication can change the friction and torque reading. Follow manufacturer guidance and re-check torque after lubrication when applicable.
Lubricants can change torque readings, so check guidelines before using.
What maintenance does a torque wrench require?
Regular calibration and proper storage are essential to maintain accuracy and prolong tool life.
Keep your torque wrench calibrated and stored properly.
Can I rely on feel instead of a torque wrench?
Feel alone is unreliable for critical fasteners. Always use a calibrated torque tool for important joints.
Relying on feel isn’t reliable for critical joints; use a torque wrench.
What checks indicate a good joint after torquing?
Inspect for tightness, lack of movement, and proper seating. Re-torque if any signs of loosening appear under initial load.
Check joints for tightness and movement after torquing; re-check if needed.
Watch Video
Top Takeaways
- Define project torque before starting any fastener work.
- Use the right tool and verify calibration regularly.
- Torque fasteners on clean, dry threads for accuracy.
- Document torque values and inspect joints after testing.
- Re-check torque after initial use or load cycling.