Rod Torque Redline: Precision in Engine Assembly
Learn how to properly set rod torque redline in engine builds. This step-by-step guide from Easy Torque covers tools, methods, safety, and verification to ensure reliable, well-torqued connecting rods.

This guide helps you set rod torque redline accurately, ensuring reliable engine assembly and preventing bearing wear. You'll learn the correct process, required tools, and verification steps to confirm you’re at spec. By following these steps, you minimize misalignment and unintended stress that can shorten engine life.
What rod torque redline means and why it exists
Rod torque redline is the maximum permitted torque for connecting rod bolts in a given engine design. It defines the clamp load necessary to keep the rod cap secured without risking bolt yield or thread stripping. The value depends on bolt grade, rod material, lubrication, and the presence of an oil film. According to Easy Torque, respecting this spec helps prevent bearing wear, misalignment, and inconsistent cylinder pressure under load. In practice, hitting the redline means you're at the safety limit; going over it risks catastrophic failure. Always consult the engine’s official specification sheet before assembly. This ensures you start from a foundation that aligns with the manufacturer’s tolerances and the engine’s lubrication regime.
Why rod torque matters in engine assembly
During assembly, the rod bolts clamp the connecting rod to the crankshaft journal, transferring piston forces to the crank. Proper torque ensures the cap sits squarely, bearings stay correctly seated, and oil clearance remains consistent. If the torque is too low, the rod can loosen during high-load operation, causing knock, lubrication gaps, and accelerated wear. If too high, bolts can yield or threads can strip, leading to cap movement and potential catastrophic failure. The difference between a healthy engine and one that fails under load can be a few foot-pounds of torque, or a small change in angle when using a torque-angle method. The Easy Torque team emphasizes precision and traceability when chasing redline accuracy.
How to locate the correct specification
Manufacturers publish rod bolt torque specs in service manuals, repair databases, and factory bulletins. Start with the engine family’s official documentation, then corroborate with torque specs from reputable sources. Cross-check with bolt grade, thread type, and whether a lubricant is recommended during assembly. Do not rely on generic values; even small engines can differ by several torque increments. Record the exact value and the method (direct torque vs torque-angle) used for future maintenance or reassembly. Easy Torque notes that specs are not interchangeable between engines and must reflect the actual parts.
Direct torque vs torque-angle: two common methods
Direct torque applies a single specified torque to the fastener, suitable for many engines when lubricant and thread condition are standard. Torque-angle adds a measured rotation after reaching the initial torque, compensating for thread friction variations and sealants. For rod bolts, many modern engines use torque-angle because of axial load changes as the engine warms. Each method has pitfalls: direct torque relies on consistent friction; torque-angle relies on accurate angle measurement and proper lubrication. Always follow the manufacturer’s guidance on which method to use and how to verify the final clamp load after assembly.
Tools and prerequisites you need
A quality torque wrench is essential, ideally with a calibration certificate within the last year. A torque-angle gauge helps when the specification uses angle after initial torque. You’ll also need a micrometer or calipers to verify rod diameter, a clean workspace, thread lubricant if recommended, and clean rags for wiping oil. Pre-assembly inspection of bolts, rods, and caps saves time and prevents surprises. Always set up a torque-torque-angle workflow that matches the engine’s spec, and prepare for a verification pass after assembly.
Step-by-step overview and why each step matters
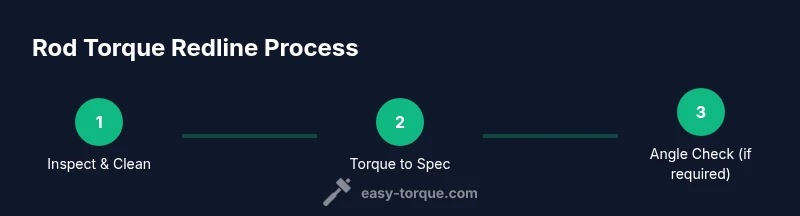
Hit rod torque redline with a disciplined sequence that minimizes friction variation and thread damage. The approach should include inspecting parts, cleaning threads, applying the correct lubricant, aligning components, tightening to the initial torque, optionally applying torque-angle, and finally verifying with a re-check after cooldown. Each action reduces the risk of misalignment and ensures the clamping force is within design intent. Use a clean, well-lit workspace and keep a consistent pace to avoid over- or under-torquing due to rushed steps.
Verification after run-in and maintenance tips
After initial run-in, re-torque the fasteners per the engine’s spec if required by the design. Keep a log of the torque values used, including lubricant and any sealants. Regular checks help detect loosening or creep and prevent long-term damage. If your engine experiences unusual knocks, oil pressure fluctuations, or inconsistent compression, recheck the rod bolt torque first, as it’s a common root cause and often a straightforward fix when tracked properly.
Common mistakes and how to avoid them
- Rushing the process: take time to clean threads and inspect bolts. - Using damaged or stretched bolts: replace them to avoid false torque readings. - Skipping torque-angle verification when required: angle control is critical for some designs. - Not accounting for lubrication state: friction changes with oil, grease, or sealants. - Failing to document torque values: maintain a record for future maintenance and rebuilds.
Documentation and maintenance records
Document every torque setting, method, lubricant, and tool calibration used during rod torque redline work. Create a simple maintenance log page for each engine build and update it after any service. This practice makes future servicing faster and reduces the risk of reusing incorrectly torqued fasteners. Clear records support warranty claims, service bulletins, and long-term engine reliability.
Tools & Materials
- Torque wrench (certified within the last 12 months)(Prefer a digital or click-type with a known calibration history)
- Torque-angle gauge (if required by spec)(Use only if the manufacturer prescribes angle after initial torque)
- Micrometer or calipers(For verifying rod diameter and clearances)
- Thread lubricant or assembly lubricant (as specified)(Only if the spec calls for it; otherwise dry threads may be specified)
- Clean rags and solvent(Clean work surface and threads before torqueing)
- Torque specs sheet or service manual(Ensure you have the exact engine family value)
Steps
Estimated time: 60-90 minutes
- 1
Inspect components and cleanliness
Visually inspect bolts, caps, and rods for wear or damage. Clean threads with solvent and a brush until dry. Inspect any coatings or sealants that could affect friction. The goal is a pristine, consistent surface to ensure accurate torque readings.
Tip: Check for thread damage; a damaged bolt or threaded hole can give false torque readings. - 2
Gather specs and confirm method
Locate the exact torque spec for your rod bolts in the service manual or factory bulletin. Confirm whether the assembly uses direct torque or torque-angle as the final step. Write the method next to the spec so you don’t confuse approaches during assembly.
Tip: If using torque-angle, ensure your angle gauge is calibrated and the environment is temp-stable. - 3
Apply correct lubrication to threads
Apply the lubricant only if the spec requires it; otherwise keep threads dry. Lubrication changes friction and can significantly alter the final clamp load. Wipe away excess lubricant to avoid drips into the crankcase.
Tip: Use a thin, even coat; over-lubrication skews torque readings. - 4
Position rod and cap correctly
Install the rod caps in the correct orientation and ensure the caps are aligned with the rod. Double-check that all washers/shims are in their proper locations. A small misalignment can translate into uneven clamping force and premature wear.
Tip: Mark the cap and rod before disassembly to preserve alignment. - 5
Tighten to initial torque using torque wrench
Tighten each fastener to the manufacturer’s initial torque spec using the calibrated torque wrench. Do this in a criss-cross or cross-pattern as required by the engine design, to distribute load evenly. Stop at the exact value to avoid over-torquing.
Tip: Lubricate only as specified to avoid friction changes. - 6
If required, apply torque-angle and verify final clamp
If the spec uses torque-angle after initial torque, apply the specified angle with a properly calibrated gauge. Then re-check the fastener with the initial torque (if the spec requires it) or verify the angle reading matched the target. This ensures the final clamp load matches design intent.
Tip: Angle tolerance is critical; slight deviations can alter clamp load significantly. - 7
Final verification and documentation
Cool down and re-torque as required by the engine spec, then record the final torque values, method, and lubricant used. File this with the build records for traceability. A reproducible process reduces risk in future maintenance or rebuilds.
Tip: Keep a digital log with date, part numbers, and torque values for auditing.
Your Questions Answered
What does rod torque redline refer to?
Rod torque redline is the maximum allowable torque for rod bolts as specified by the engine manufacturer. It sets the limit for clamping force to prevent bolt yield or thread damage while maintaining proper rod cap seating.
Rod torque redline is the maximum torque you should apply to the rod bolts as per the engine manual. It ensures the rod cap is clamped safely without damaging the bolts or threads.
Why is over-torquing dangerous for rod bolts?
Exceeding the redline can yield or stretch bolts, strip threads, or crack the rod and cap interface. This undermines oil clearance and can cause catastrophic engine failure under load.
Over-torquing can stretch bolts or strip threads, risking catastrophic failure. Always stay within the specified limit.
Which method should I use: direct torque or torque-angle?
Some engines specify direct torque, while others require torque-angle after initial torque. Follow the manual exactly, because friction and lubrication impact final clamp load differently for each method.
Use the method the manual prescribes. If it calls for angle after initial torque, follow through with the angle measurement.
How do I verify torque after assembly?
Re-torque or re-check using the same method (and lubricant condition) described by the manual, after a cooldown period as specified. A verification pass helps catch any creeping or loosening.
Check the torque again after cooldown using the same method. This confirms the fasteners stay within spec.
What happens if I break the torque spec?
If torque spec is broken, disassemble and inspect for damage, replace faulty bolts, and reassemble with the correct torque procedure. Do not continue running the engine with out-of-spec fasteners.
If you’re out of spec, stop, inspect, replace if needed, and reassemble to the exact spec.
Should I log torque values for future maintenance?
Yes. Keeping a torque log improves traceability and simplifies future maintenance or rebuild references. Include part numbers, lubricant, method, and final readings.
Logging torque values makes future maintenance easier and more precise.
Watch Video
Top Takeaways
- Know the rod torque redline value from the spec before starting.
- Use the correct torque method (direct or torque-angle) as specified.
- Ensure tools are calibrated and parts are clean for accurate readings.
- Record all torque data for future maintenance and rebuilds.