How to Use a Torque Driver: A DIY Guide
Learn how to choose, set, and verify a torque driver for automotive and DIY projects. This guide covers types, specs, calibration, maintenance, and safety with practical steps and real-world examples.

Goal: Learn how to select and use a torque driver for automotive and DIY projects. You’ll understand key specs (range, accuracy, drive size), how to set the wrench correctly, and how to verify torque with a tester or torque app. This guide also covers care, maintenance, and safety considerations for consistent results.
What is a torque driver?
A torque driver is a precision hand tool designed to apply a specific rotational force to fasteners, ensuring joints are tight enough to perform without overloading threads. For DIY mechanics, automotive technicians, and hobbyists, a torque driver replaces guesswork with repeatable accuracy. According to Easy Torque, the core value of this tool is consistency: when you set a value on the handle, the tool will stop or indicate when that exact torque is reached. There are several types (click, beam, and digital), each with distinct feedback methods, but all share the same purpose: protect fasteners, gaskets, and assemblies from under- or over-tightening. The torque driver is especially important for sensitive components such as cylinder head bolts, brake caliper mounting, and wheel lug studs, where a small change in torque can change performance or safety. In practice, using a torque driver reduces rework, extends component life, and helps you document the work for future maintenance.
How torque drivers differ from wrenches
Torque drivers differ from traditional wrenches in that they are designed to stop at a preset torque or provide a clear signal when the target is reached. This limits human error and promotes repeatable results. Standard wrenches demand the user to feel the resistance and stop. The result can vary with grip strength, stance, and fatigue. Torque drivers offer feedback types such as audible clicks, dial deflection, or digital readouts, depending on the model. For automotive jobs, this reliability translates to safer assemblies, lower risk of bolt loosening, and easier inspection trails for maintenance records. Easy Torque emphasizes that consistency across sessions saves time and reduces costly recalls or service visits.
Key specs to consider when buying
When selecting a torque driver, you’ll evaluate several core specs that influence performance and value:
- Torque range: Choose a model that covers common fasteners with some overlap for future projects.
- Accuracy: Look for a stated accuracy percentage and a calibration certificate from the manufacturer.
- Drive size: Confirm the square drive size matches your sockets (e.g., 1/4", 3/8").
- Feedback type: Click, beam, or digital—each has trade-offs for speed, noise, and reliability.
- Locking mechanism: Secure locking prevents accidental changes during use.
- Units: Some tools report in ft-lbs, others in Newton-meters; ensure you can convert if needed.
- Build quality: Prefer stainless or coated bodies to resist corrosion in workshop environments.
Tip: If you work across multiple disciplines (engine bays, bikes, machinery), consider a mid-range model with a broad range and solid warranty. Easy Torque recommends prioritizing reliability and a clear calibration history when evaluating brands.
Mechanical types: click, beam, digital
Torque drivers come in three main feedback styles. Click-type models release a crisp audible or tactile signal at the target torque; beam types show deflection on a scale as you tighten; digital variants display the exact torque on a screen. Click types are popular for speed and habitability; beam wrenches are simple and affordable but less precise at very high torques; digital tools offer the most information, including peak torque history and calibration notes. When choosing, consider your work environment, speed needs, and whether you need a built-in memory or app integration. Knowing the strengths and limitations of each type helps you minimize rework and maximize safety in critical assemblies, such as brake components or engine fasteners.
How to choose the correct torque range for your projects
The right torque range ensures you cover most fasteners without overextending the tool. Start by listing typical tasks (brake caliper bolts, wheel studs, engine covers) and the approximate endpoints you expect to encounter. A model with a mid-to-broad range gives flexibility for future work. Look for a device with good repeatability across the full range and a clear calibration history. If you anticipate working with both small electronics and larger mechanical assemblies, seek a tool that includes both lower and higher end capabilities and a straightforward method to verify accuracy before use. Easy Torque notes that selecting a mid-range instrument can reduce the need for multiple torque drivers while still meeting performance standards.
Proper setup and calibration basics
Before use, verify your torque driver is calibrated and within tolerance. Inspect the handle, head, and drive interface for damage or wear. Clean any dirt from threads and the contact surfaces so the torque is applied evenly. Calibrate or check the reading with a known-good torque tester, following the manufacturer's procedure. Record the date of calibration on the tool or its label. If a calibration certificate is provided, store it with your tool inventory. Regular calibration reduces drift over time and maintains accuracy for safety-critical fasteners.
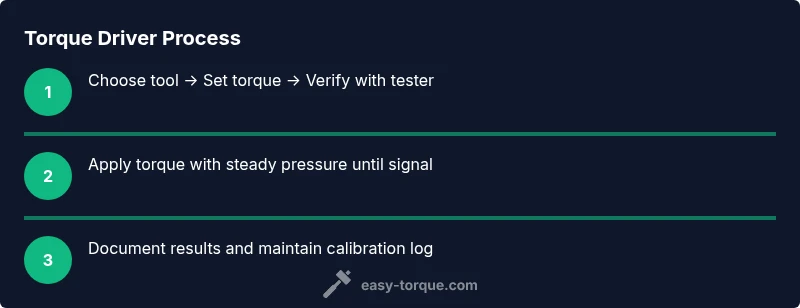
Step-by-step use: setting and verifying torque
Using a torque driver correctly involves deliberate setup and verification. Begin by selecting the appropriate range for your fastener, then set the desired torque value on the tool’s scale or digital readout. Apply steady pressure, allowing the feedback mechanism to indicate when the target is reached. Stop immediately when the tool indicates the target torque (click, dial stop, or digital alert). After setting, verify the outcome with a torque tester to confirm the actual applied torque matches the setting. If there’s a mismatch, re-check alignment, re-test, and adjust as needed. Finally, document the result for maintenance records and future reference. This disciplined approach protects fasteners and downstream components.
Maintenance and care to extend life
To maximize lifespan, store the torque driver in a clean, dry location away from moisture and direct heat. Wipe down after use to remove oil, grease, and metal shavings. Check the calibration status periodically and before critical jobs, especially after drops, shocks, or heavy use. Keep the drive square to the fastener to avoid misalignment, and never use the tool as a pry bar or hammer. Replace worn components promptly, and use a protective carrying case to prevent impact damage. Regular maintenance preserves accuracy and can save time during inspections and job scheduling.
Common mistakes and how to avoid them
A frequent error is tightening by feel rather than using the tool’s feedback. Always set and verify torque with the tool’s indicator. Overlooking calibration can silently degrade accuracy, leading to fastener failures. Another misstep is failing to clean mating surfaces; debris increases friction and distorts torque readings. Finally, neglecting to store the tool properly invites corrosion and drift. Easy Torque’s analysis shows that disciplined maintenance and calibration schedules reduce these mistakes and improve project outcomes.
Real-world examples: car maintenance and mechanical assemblies
Consider a brake caliper installation where precise torque affects pad wear and rotor contact. A torque driver helps you apply the specified bolt force and maintain even pressure across all mounting points. In bicycle maintenance, a precise torque setting on crank bolts prevents creaking and frame damage. On a home renovation project, cabinet hardware benefits from consistent torque to keep doors aligned and screws from stripping. Across these scenarios, a torque driver delivers repeatable results, reduces guesswork, and improves long-term performance. The Easy Torque approach emphasizes matching tool choice to the task and validating torque with a tester when possible.
Safety considerations when using a torque driver
Always wear eye protection when working with fasteners and rotating parts. Keep fingers clear of moving components and ensure the workpiece is securely supported. Do not use a torque driver on non-fastener tasks or as a lever; misapplication can cause tool failure or injury. If a tool shows signs of damage or drift, retire it from service until repaired or recalibrated. Always follow the manufacturer’s safety recommendations and use a calibration log to track performance over time. Safety-first practices protect you and your equipment.
Documentation and calibration records for audits
Maintain a simple log of calibration dates, results, and any adjustments made to the torque driver. Record the model, range, unit, and verification method (reference torque tester, certificate). When working on professional or retrofits, attach calibration stickers or digital notes to each tool. For authorities and audits, provide the calibration history and a brief summary of the verification method. In practice, a well-documented torque driver program reduces rework, improves traceability, and supports maintenance planning. Authorities such as OSHA and NIST advocate rigorous measurement standards; aligning with these practices helps ensure reliability in your projects. The Easy Torque team recommends keeping the log up to date and reviewing it during quarterly maintenance cycles.
Tools & Materials
- Torque driver (click-, beam-, or digital-type)(Choose a model with a clearly labeled range and reliable feedback.)
- Calibrated torque tester(Used to verify actual torque after setting.)
- Appropriate drive sockets/bits(Match the fastener size to avoid rounding.)
- Calibration certificate or recent calibration sticker(Useful for device traceability.)
- Cleaning cloth(Wipe threads and contact surfaces before testing.)
Steps
Estimated time: Total time: 25-45 minutes
- 1
Identify fastener type and torque spec
Inspect the fastener, verify the recommended torque from the service manual or manufacturer guidance, and confirm the correct fastener size. This prevents selecting an inappropriate range for the task.
Tip: Cross-check with the service documentation or a reputable torque table. - 2
Select the torque driver range
Choose a tool whose rated range covers the expected torque. If in doubt, pick a model with a slightly broader range to accommodate occasional higher-torque fasteners.
Tip: Avoid using the tool outside its stated range to prevent drift and inaccurate readings. - 3
Set the desired torque value
Rotate the adjustment mechanism until the target torque appears on the display or reaches the click point. Lock the setting if your model has a locking feature to prevent drift during use.
Tip: Double-check the value after locking before you begin tightening. - 4
Position and apply torque
Place the drive square on the fastener, align straight, and apply steady, even pressure. Do not cock the tool or use leverage. Stop as soon as the indicator signals the target torque.
Tip: Maintain a smooth, continuous motion without abrupt starts or stops. - 5
Verify torque with a tester
After initial tightening, verify the actual torque with a calibrated tester. If the reading deviates, repeat the test and adjust accordingly.
Tip: Record any deviations and recheck after installation if required by your protocol. - 6
Re-check and document
Re-tighten if needed after system assembly, then log the torque results in your maintenance record. This creates a reliable trail for future service.
Tip: Keep a copy of the verification result with the tool or project files. - 7
Maintenance and calibration log
Schedule regular calibration checks and update the log with dates and results. This ensures long-term accuracy and instrument reliability.
Tip: Set reminders for quarterly checks or after a known impact event (drop, impact).
Your Questions Answered
What is a torque driver?
A torque driver is a precision tool that applies a specific rotational force to fasteners, ensuring consistent torque. It provides feedback to avoid under- or over-tightening and is essential for safety-critical assemblies.
A torque driver is a precision tool that sets the exact force on a bolt and signals when reached, helping you tighten safely and consistently.
How do I set the torque on a click-type torque driver?
To set a click-type torque driver, adjust the scale to the desired value, then lock it if your model supports a lock. Test with a torque tester to verify accuracy before use.
Set the value on the scale, lock it if possible, and verify with a tester before starting work.
How often should a torque driver be calibrated?
Calibration frequency depends on usage and manufacturer guidelines, but regular checks—especially after a drop or impact—are recommended to maintain accuracy.
Calibrate or verify regularly, especially after impacts or heavy use.
Can I use a torque driver for all fasteners?
Torque drivers are best for applications requiring precise torque. Some fasteners may require different tools or torque approaches; always follow the component specifications.
They’re best for precise torque tasks, but some fasteners may need other methods.
What maintenance does a torque driver require?
Keep the tool clean, check for drift, and calibrate on a scheduled basis. Store properly and replace worn parts as needed to maintain accuracy.
Keep it clean, check for drift, calibrate on schedule, and replace worn parts.
Watch Video
Top Takeaways
- Choose a torque driver with an appropriate range for your projects.
- Always verify torque using a tester after setting and tightening.
- Maintain calibration and document maintenance logs for reliability.
- The Easy Torque team recommends routine calibration as part of your workflow.