Torque Setting on Drill: A Practical How-To Guide
Learn how to set the torque on a drill for wood, metal, and plastics. Step-by-step instructions, testing tips, and safety checks to ensure reliable, repeatable fastening results.

By the end of this guide, you will set the drill's torque accurately, choose the correct clutch or setting for wood and metal, and test your results on scrap material. Start low, increase gradually, and verify every drive to prevent stripping or breaking fasteners. This empowers safer, faster fastening with consistent results.
What torque setting on drill means
Torque settings on a drill refer to how much resistance the tool applies when turning a fastener. Most cordless drills use a clutch or torque ring that slips when a predetermined torque is reached, protecting screws, bits, and the material. When you set a lower torque, the drill stops stopping short of overdriving; a higher setting allows deeper, faster driving but increases the risk of camming or breakage if misused. Understanding this balance is essential for DIY mechanics and hobbyists who want consistent results without damaging parts. According to Easy Torque, mastering torque control is a foundational skill for reliable assembly and safe tool handling. This section explains what the clutch is doing in the background and why adjusting it matters for different materials and fasteners.
The relationship between torque, speed, and duty
Many drills offer both torque control and speed control. Torque dictates how much turning force is delivered before the clutch slips; speed governs how fast the bit turns at a given trigger position. For drilling through soft wood, the goal is to minimize cam-out and avoid crush; for driving screws into hardwood, you may need higher torque to seat the fastener fully. The interplay between torque and speed means you can tailor the tool to the task, reducing wear on bits and improving finish quality. Easy Torque emphasizes practicing with scrap pieces to learn how materials respond to different settings before moving to the real job.
How clutches translate to real-world driving
The clutch acts like a smart brake. When the bit resists the material, the clutch slips and prevents the shaft from forcing the bit through the workpiece. This protects threads and maintains the integrity of the screw head. You’ll notice the drill momentarily slows or lurches as the clutch engages; that moment is your cue to back off or reposition. In heavy work, you may want a higher setting so the clutch can engage later and deliver more torque before slipping. Easy Torque notes that developing a feel for this feedback is key to consistent results.
How to locate and adjust torque settings on common drills
To locate the torque setting, look for a numbers dial or collar behind the chuck. Some drills use a simple ring with numbers 1–15 or similar ranges; others may have a dedicated switch or adjustable clutch lever. Rotate the dial to a lower number for delicate work and higher numbers for stubborn fasteners. Always confirm the setting with a quick test on scrap material before proceeding to the final piece. If your drill has a mode for wood or metal, align the mode with the task to optimize performance. Safety first: pin or clamp the workpiece to limit movement during testing.
How to choose the right torque setting by material and fastener
Soft wood typically requires lower torque settings to prevent splitting and cam-out, while hardwoods and dense materials may need more torque to drive the screw without stall. For metal, a lower setting with proper lubrication and a pilot hole can prevent stripping. Use the smallest pilot hole feasible to realize the mechanical advantage of the drill’s torque without tearing the material. Always start with the lowest practical setting and adjust upward in small increments while testing on scrap.
Testing your torque setting safely
Before working on a project, test the setting on scrap material that matches your workpiece. Clamp the test piece firmly, predrill if necessary, and drive a handful of screws or drill a pilot hole to observe the clutch engagement and any material damage. If the screw seats fully with no cam-out or head damage, you have found a suitable torque. If the head embeds or the material cracks, decrease torque and reassess. Document the results for future reference, so you can reproduce success.
Common mistakes and how to fix them
Rushing through torque adjustments leads to over-tightening or under-driving. Using the wrong bit type or ignoring pilot holes causes stripping or cam-out. Not testing on scrap wastes time when a slight adjustment could save material. Another frequent error is leaving the drill in the same setting for every job; different materials demand different torque. Easy Torque recommends a deliberate testing routine and a simple log for your most-used fasteners.
Tools and accessories that help with torque control
A drill with a reliable adjustable clutch is essential. A good set of driver bits—Phillips, slotted, Torx, and square drive—improves outcomes across fasteners. A pilot drill bit helps with wood and sheet metal, preventing splits and driving misalignment. A torque tester or calibrated gauge is optional but useful for precise validation when you need repeatable results. Always keep your bits sharp and clean to maintain consistent torque delivery.
Maintenance and calibration of clutch and settings
Inspect the clutch housing for wear and debris that can affect engagement. If you notice erratic behavior or inconsistent torque, clean the chuck, check for bent bits, and ensure the clutch ring moves smoothly through its range. Lubricate tangential moving parts only as recommended by the manufacturer to avoid attracting dust. Routine checks help keep torque accuracy over time and preserve tool longevity.
Quick-start checklist for torque setting on drill
- Confirm you have a drill with an adjustable clutch. - Gather drill bits, a scrap piece, and appropriate fasteners. - Start with a low torque setting and test on scrap. - Increase in small increments while observing the results. - Record the settings that work best for different materials. - Re-check periodically to compensate for wear and temperature changes.
Advanced techniques: impact vs non-impact drilling for torque control
Impact drills deliver higher torque in short bursts, which can improve driving into tough materials but may risk stripping if misused. Non-impact drills rely on steady torque, offering gentler control for soft wood or delicate plastics. When precision matters, choose non-impact modes or adjust the torque setting to compensate for the increased force from impact. Easy Torque suggests practicing with both modes on scrap to understand how each affects your results.
Tools & Materials
- Drill with adjustable torque clutch(Ensure the clutch range covers common fastener sizes you use)
- Driver bits (PH2, slotted, Torx, square)(Keep sharp and organized; carry multiple sizes)
- Pilot drill bits (wood and metal)(Useful for creating clean pilot holes to control torque impact)
- Clamps or a bench vise(Keep workpieces steady during testing and driving)
- Scrap pieces of same material(For safe torque testing and calibration)
- Caliper or quick ruler(For measuring hole sizes or fastener depth after testing)
- Torque tester (optional)(Useful for precise validation of torque engagement)
Steps
Estimated time: 20-40 minutes
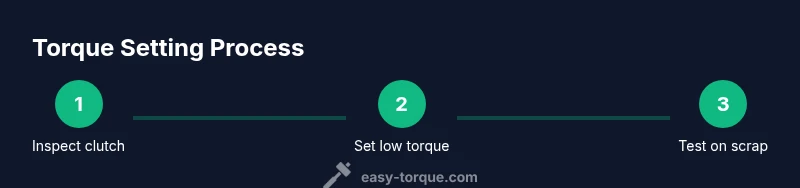
- 1
Inspect drill and clutch
Check that the clutch dial moves smoothly through its full range. Inspect bits for wear and ensure the chuck grips securely. Clean debris if needed.
Tip: A stiff, smooth clutch action reduces inconsistent engagement. - 2
Set initial low torque
Rotate the torque dial to the lowest practical setting for the task. If unsure, start at the minimum and test on scrap.
Tip: Starting low helps prevent over-tightening on first attempt. - 3
Prepare test scrap
Clamp a scrap piece of the same material as your actual work. Mark where you’ll drive a sample screw or bit to gauge behavior.
Tip: A fixed test setup minimizes movement during driving. - 4
Drive a test fastener
Drive a test screw into the scrap. Observe whether the head sits flush without stripping or cracking the material.
Tip: If the head sinks, back off torque and test again. - 5
Increase torque incrementally
Move the dial up by one or two increments and retest. Repeat until the fastener sits properly without damage.
Tip: Document the effective setting for future use. - 6
Test in different materials
If you’ll work with multiple materials, repeat testing for each to confirm the setting is appropriate.
Tip: Different materials require distinct torque experiences. - 7
Practice in real-world context
Before final assembly, perform a final test on a piece akin to your project to validate consistency.
Tip: Consistency is the goal; aim for repeatable results. - 8
Record and store the settings
Create a simple log of material, fastener size, setting, and results for each task.
Tip: A quick reference saves time on future jobs.
Your Questions Answered
What does torque setting on drill control?
Torque setting controls when the clutch slips to prevent over-driving. It protects fasteners and workpieces by limiting turning force.
Torque controls how much turning force you apply before the clutch slips. It protects screws and materials.
How do I know which torque setting to use for wood vs metal?
Start lower for wood to prevent splitting; increase gradually as needed. For metal, use pilot holes and adjust torque to avoid stripping threads.
Wood needs less torque to avoid splitting; metal often needs pilot holes and careful torque increments.
Can I rely on the drill’s speed control instead of torque for driving screws?
Speed control helps with drilling but torque control via the clutch is what keeps fasteners from over-tightening. Use both together for best results.
Speed helps drilling; torque via the clutch prevents over-tightening. Use both.
What if the screw head cam-outs or the material cracks?
Back off the torque, pause, and adjust the setting downward. Check pilot holes and bit size before retrying.
Back off torque and adjust settings if you see cam-out or cracking.
Is a torque tester necessary for hobby projects?
A torque tester is optional for hobby projects but helps validate consistency across tasks and materials.
A torque tester isn’t required, but it helps you verify consistency.
How often should I recalibrate torque settings?
Recalibrate after heavy use, tool drops, or noticeable changes in performance. Regular practice validates consistency.
Recalibrate after heavy use or if performance changes. Regular checks keep results reliable.
Watch Video
Top Takeaways
- Start with low torque and test on scrap
- Use the clutch to protect fasteners and material
- Document settings for repeatable results
- Pilot holes improve torque control
- Practice across wood, metal, and plastics