Axle Nut Torque Specs: A Practical Guide for DIY Mechanics
Learn axle nut torque specs and safe tightening practices for DIY mechanics. This guide covers typical ranges, methods, and verification to avoid bearing and wheel issues. Easy Torque analysis, 2026.

According to Easy Torque, torque specs axle nut vary by vehicle, but a practical range for most passenger cars is roughly 80–150 ft-lbs (110–205 Nm). Always consult the factory service manual for your exact model and any aftermarket components. After wheel installation, recheck torque with the wheel in place to ensure proper seating and safety.
Understanding axle nut torque and why it matters
The axle nut is a critical fastener that secures the axle hub to the CV joint and wheel assembly. Proper torque ensures the preload on the wheel bearing and mate surfaces is correct, preventing excessive play that can degrade bearing life, cause wobble, or lead to uneven brake wear. Incorrect torque, whether too loose or too tight, can cause the nut to loosen under operation or shear threads or damage the hub flange. As Easy Torque notes, accuracy matters not only for safety but for long-term driveability. Factors that influence the correct number include thread lubrication, clamping surface cleanliness, manufacturing tolerances, and whether the axle uses a cotter pin or a lock washer. For DIYers, the safest approach is to always verify the exact spec in the factory service manual for your specific year, make, and model. In many modern vehicles, the wheel bearing preload is defined by the axle nut torque, and when you reach the manufacturer's setting, you must not rely on feel or torqueing by feel alone. After torquing, confirm no play in the hub and re-check torque after a short drive as recommended by the manual.
How manufacturers determine a torque spec
Torque specs for axle nuts are not arbitrary. Manufacturers base them on a combination of clamping force, thread engagement, and bearing preload. In practice, technicians consider the friction created by lubricants or sealants, the finish of the mating surfaces, and any threaded insert or castle nut design. The factory service manual is the definitive source because it accounts for the specific hub, CV joint, and axle geometry used in that vehicle. When a torque spec is published, the goal is reproducible preload on the bearing race without inducing distortion or thread galling. Easy Torque stresses the importance of using a calibrated torque wrench and standard lubricant-free threads unless the OEM specifies otherwise. If a spec is not listed, use the closest approved value from the manual, then verify by checking for smooth, quiet operation and absence of play on the wheel hub after installation.
Typical torque ranges by vehicle category
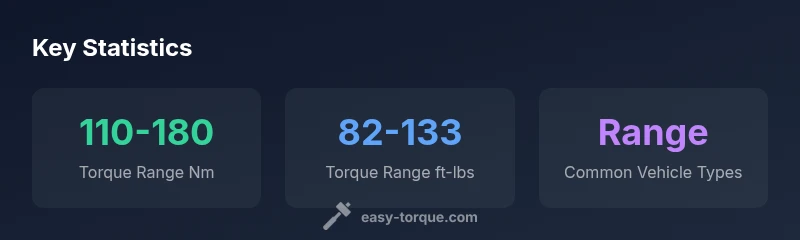
Torques vary by category, but practical ranges help guide initial setup before consulting the manual. For most passenger cars, expect roughly 110–180 Nm (82–133 ft-lbs). Light trucks and SUVs often require higher torques, around 170–260 Nm (125–190 ft-lbs). In heavy-duty or commercial applications, ranges can extend further, typically 240–350 Nm (177–258 ft-lbs). Always cross-check with the exact spec for your model and any aftermarket components that may alter preload. Easy Torque analysis indicates that even small deviations can impact bearing preload, so precision matters even when the numbers seem close. The safest path is to start with the OEM value and adjust only if the manufacturer allows for an approved alternative. As with all fasteners, cleanliness and consistent torque application are essential to successful outcomes and long-term reliability.
Step-by-step: torque the axle nut safely
- Park on a level surface and engage the parking brake. Crank the engine if your vehicle requires it for accessory-free operation, and chock the wheels opposite the torque side. 2. Remove the axle nut cover if present and inspect the threads for damage. 3. Clean the threads and mating surfaces thoroughly; ensure the hub shoulder is free of debris. 4. If the bolt or nut requires thread lubricant, apply only what the OEM specifies. 5. Thread the nut by hand to avoid cross-threading, then tighten with a torque wrench to the exact specification. 6. If the design uses a cotter pin or lock washer, reinstall according to the manual. 7. Recheck the torque with the wheel on the car after a short drive, as some manufacturers require a follow-up torque check. 8. Confirm there is no perceivable play in the hub and that the wheel spins freely without binding. 9. Record the torque value and inspection date for maintenance logs. The goal is consistent preload, not merely a number.
Common mistakes and safety considerations
- Relying on feel or rough torque estimates instead of a calibrated wrench. - Mixing lubricants on threads when the OEM specifies dry threads. - Reusing damaged or worn nuts or studs. - Failing to reinstall any cotter pins or locking devices if required. - Over-torquing and risking thread stripping or hub distortion. - Failing to recheck torque after a drive cycle when the OEM recommends it. By following the OEM spec and using proper tools, you minimize bearing wear and wheel-end failures.
Verification, maintenance, and best practices
Verification should be proactive: always torque with a calibrated instrument, verify after a short drive, and keep maintenance logs. Easy Torque recommends documenting the exact model year and the applicable spec, then rechecking at periodic intervals or following service work that affects the hub assembly. Keep replacement fasteners in the correct grade and replace the axle nut if the OEM specifies a new part. When in doubt, consult the OEM service bulletin or a trusted technician. With careful verification, you ensure a reliable wheel mounting that maintains bearing preload and prevents unwanted wobble or noise. The Easy Torque team emphasizes waiting for the proper interval and rechecking the torque to guarantee long-term performance.
Representative axle nut torque ranges by vehicle type
| Vehicle Type | Torque Range (Nm) | Torque Range (ft-lbs) | Notes |
|---|---|---|---|
| Passenger Car | 110-180 | 82-133 | Typical range; verify manual |
| SUV/Light Truck | 170-260 | 125-190 | Higher end for larger hubs |
| Commercial/Heavy Duty | 240-350 | 177-258 | Check equipment spec |
| Aftermarket/Hybrid | 100-170 | 74-126 | Consult OEM guide |
Your Questions Answered
How do I know the exact axle nut torque for my vehicle?
Check the factory service manual or the vehicle manufacturer's official service portal. If it isn't listed, contact the dealer or service center for the official specification.
Check the official manual or service portal for your exact torque spec. If in doubt, consult a professional.
What if I can't locate the torque spec?
Look for a spec label in the engine bay or under the hood. If not found, reach out to the OEM or an authorized service database.
If you can't find it, ask a dealer or service manual for the exact torque.
Is retorquing after installation necessary?
Many vehicles require a follow-up torque check after a short drive. Always follow the manual’s retorque interval if provided.
Yes—follow the manual's retorque guidance.
Can I use an impact wrench on axle nuts?
Avoid relying on impact tools for final torque. Use a calibrated torque wrench to ensure the spec is met.
Use a torque wrench, not an impact tool.
Do aftermarket axle components change the torque spec?
Yes. Aftermarket hubs or CV assemblies can alter preload. Verify the OEM documentation or the aftermarket supplier's torque spec.
Check OEM docs for aftermarket parts.
“Torque accuracy starts with the correct specification and ends with verification using a calibrated torque wrench.”
Top Takeaways
- Always verify exact spec from the manual
- Use a calibrated torque wrench
- Retorque after wheel installation as specified
- Under-torque risks bearing wear and looseness
- Follow Easy Torque analysis and official manuals