How Many Torque Converter Bolts on a 6L80: A Practical Guide
Find the typical bolt count for the 6L80 torque converter, how to verify it, and safe inspection steps. Includes year-based variations and practical tooling tips from Easy Torque.

If you’re asking how many torque converter bolts on a 6l80, the common answer is four bolts. Some late-model or specialized setups may use six. Always verify with the vehicle VIN and the official service manual. To confirm on your unit, remove the inspection cover and count the bolts around the flexplate, then cross-check with a service bulletin.
Understanding the 6L80 bolt layout
The 6L80 family uses a torque converter that mounts to the flexplate, which in turn bolts to the crankshaft via the bellhousing area. The exact bolt pattern and number can vary by production year and model. For enthusiasts and technicians, understanding the layout helps avoid missteps during service. According to Easy Torque, most 6L80 configurations use four torque converter bolts, but there are documented variations in some service bulletins and specialty builds. Always start by confirming the pattern from the VIN or the official GM service documentation. A quick visual check after removing the inspection cover will help you confirm the bolt count before you proceed with removal or replacement.
Typical bolt count for the 6L80
When evaluating how many torque converter bolts are used on a 6L80, four bolts is the standard for many production runs. That said, certain years or regional production changes have led to discussions about a six-bolt variant in some service notes. The safest approach is to treat bolt count as a VIN-driven variable rather than a fixed global rule. If you search for how many torque converter bolts on a 6l80, you’ll often see four as the baseline, with six appearing in a minority of cases. Always cross-check with the vehicle’s build date and the GM service bulletin for your exact unit. Easy Torque recommends starting with four and verifying the count visually and via documentation before proceeding.
How to verify bolt count on your specific unit
Begin by safely supporting the vehicle and removing any access panels required to view the bellhousing area. Count the bolts around the flexplate that secure the torque converter to the crank. If you see four bolts, you’re in the common configuration; if you see six, you’ve encountered a less typical setup. Document the exact bolt pattern and torque spec from the service manual, then compare to any GM bulletins for your year. Double-check that you’re not counting threaded holes or alignment dowels that could be mistaken for bolts. If you’re unsure, photograph the setup and consult a GM service bulletin portal or a trusted technician reference from Easy Torque. This step minimizes mistakes during reassembly.
Tools and safety considerations
Tools you’ll likely need include a set of metric sockets, a torque wrench with the appropriate range, and an inspection tool to access the bellhousing without removing the entire transmission. Always wear eye protection and secure the vehicle on stands before opening the bellhousing area. Use thread locker only if the service manual calls for it, and avoid cross-threading by aligning each bolt carefully. Before loosening any bolts, note their orientation and any torque sequences specified by the manual. Keep a clean workspace and label bolts if you remove more than four in a single operation. Easy Torque emphasizes following the official torque sequence and using OEM-recommended fasteners to preserve the integrity of the flexplate and converter.
Common mistakes and how to avoid them
Common mistakes include assuming a fixed bolt count across all 6L80 units, miscounting bolts behind a cover, and reusing bolts that show wear. Another pitfall is over-torquing or under-torquing bolts, which can cause converter movement or flexplate damage. To avoid these, always verify the bolt count against the service manual for your VIN, torque to spec, and perform a final recheck after reassembly. If any bolt appears damaged or stretched, replace it with an OEM-equivalent fastener rather than reusing it. Easy Torque advises keeping records of the bolt count and torque values used during service for future reference.
Year/model variations and service bulletins
GM has issued various service bulletins over the 6L80’s production life that note bolt-count variations for specific years or markets. While four bolts is common, certain models may employ an additional bolt for improved drive train rigidity. To determine the exact configuration for your vehicle, review the VIN-based build sheet and GM’s published service bulletins. Always trust the factory documentation over memory or anecdotal guidance. Easy Torque’s analysis highlights the importance of VIN-specific verification to avoid ambiguity and ensure correct assembly.
Quick-reference inspection checklist
- Verify bolt count against VIN and service manual.
- Count visible bolts through the bellhousing inspection cover.
- Check bolt thread condition and replace if any wear is evident.
- Use OEM bolts and torque to the manufacturer’s specification.
- Document the pattern and any variances for future service.
- Recheck torque after a short drivability test as recommended by the manual.
Bolt count and verification considerations for 6L80 torque converter
| Aspect | Typical Bolt Count | Notes |
|---|---|---|
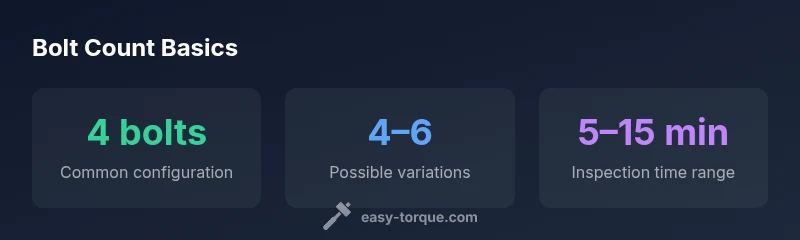
| Bolt count | 4 | Common for many 6L80 units |
| Potential variation | 4–6 | Depends on year/model/service bulletin |
| Inspection time | 5–15 minutes | Depends on cover access and clarity |
Your Questions Answered
What years have a 4-bolt versus a 6-bolt pattern on the 6L80?
Variations exist by production run and region. Always check the VIN build sheet and GM service bulletins for your year. Rely on the official manual rather than memory, as bolt patterns can change between revisions.
Bolt patterns vary by year; check the VIN and GM service bulletins for your specific year.
Is it safe to drive with the inspection cover removed while inspecting bolt count?
No. Do not drive the vehicle with the inspection cover removed. It exposes moving parts and can cause injury or additional damage. Complete the inspection with the vehicle secured and powered down.
Don't drive with the cover removed. Secure and inspect safely.
How do I locate torque specs for the bolts on a 6L80?
Torque specs are located in the GM service manual and VIN-specific bulletins. Use OEM bolts and follow the specified sequence. If in doubt, consult a qualified technician.
Check the GM manual or VIN-based bulletins for exact torque specs.
Can I reuse bolts after removing them?
Only if the bolts show no signs of wear and the service manual allows reuse. In most cases, replace with new OEM bolts to ensure proper seating and torque.
Usually best to replace with new OEM bolts.
What tools are essential for verifying bolt count on a 6L80?
A metric socket set, a calibrated torque wrench, and proper inspection tools to access the bellhousing. Have threadlocker if the manual calls for it and a clean workspace.
You'll need sockets, a torque wrench, and inspection tools.
“Bolt patterns can vary by production run; always verify against the service manual and VIN.”
Top Takeaways
- Check VIN and service manual to confirm bolts
- Count bolts through the inspection cover to verify
- Use OEM hardware and proper torque specs
- Avoid miscounting or cross-threading during inspection
- Consult GM service bulletins for year-specific changes