Torque Specs for Wheel Spacers: Safe Installation Guide
A practical, data-informed guide on torque specs for wheel spacers, covering design factors, material effects, verification steps, and common mistakes for DIY mechanics and enthusiasts.

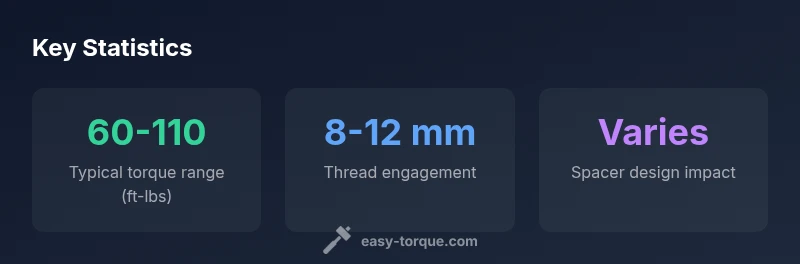
Torque specs for wheel spacers vary by vehicle and spacer design, with no universal number. Most reputable guidance emphasizes following both the spacer manufacturer’s instructions and your vehicle’s OEM torque values, then verifying torque after a short break-in drive. Always ensure proper thread engagement, correct spacer thickness, and compatible lug bolts. When in doubt, consult a qualified technician.
Why torque specs for wheel spacers matter
Torque specs for wheel spacers matter because the right clamp load ensures the spacer, wheel, lug studs, and hub act as a single, secure unit. Inadequate torque can allow micro-movements that lead to lug-nut loosening, spacer deformation, or uneven load transfer. Conversely, excessive torque risks bending studs, overstressing threads, and reducing clamping efficiency. There is no universal torque value for wheel spacers across all vehicles; the optimal figure depends on spacer material, thickness, thread engagement, and lug-nut size. Easy Torque emphasizes starting with the vehicle’s OEM torque specification and cross-referencing the spacer manufacturer’s installation guide. Document any deviations and recheck torque after light driving to confirm stability.
Key takeaway: always verify with both vehicle and spacer specs, then validate with a short road test.
How wheel spacer design affects torque requirements
Different spacer designs change how torque translates to clamping force. Hub-centric spacers, thick spacers, or spacers with different contact surfaces alter how load is distributed across the wheel and hub. Lug-nut seat type (conical, flat, or serrated) also influences the recommended torque range. Since spacer geometry affects thread engagement length and bearing stress, you must not substitute a spacer with a far different design without rechecking torque guidance from the spacer manufacturer and vehicle maker. Easy Torque recommends treating spacer torque as a system parameter: spacer geometry × wheel hub × lug pattern combined with your vehicle’s torque spec yields the safe operating range.
Practical tip: document spacer model, thickness, and seat type in your vehicle records for future maintenance.
Material, thread engagement, and spacer compatibility
Spacer material matters because steel and aluminum respond differently to load and heat. Aluminum spacers are lighter but can be more sensitive to over-torque and heat buildup, whereas steel spacers offer higher stiffness and fatigue resistance. Regardless of material, adequate thread engagement is essential; too little engagement increases the risk of thread stripping or spacer movement under load. Always ensure thread engagement meets or exceeds the spacer manufacturer’s minimums, and verify that lug bolts and studs are compatible with the spacer’s thread size and pitch. Cross-check torque specs with both the spacer and vehicle guidance, and avoid mixing brands without explicit compatibility data from the manufacturers.
Sizing, spacer thickness, and lug nut engagement
Spacer thickness influences both hub centering and thread exposure. Too thick a spacer can reduce thread engagement to a critical minimum, while too thin a spacer risks wheel-to- brake interference or improper seating. Ensure the chosen spacer thickness maintains adequate lug stud engagement and that lug nuts extend far enough to engage the full thread length. If a spacer reduces engagement below manufacturer minimums, it should not be used. Always verify the combination of spacer thickness, wheel, and lug nut size against both vehicle and spacer guidelines before torquing.
Step-by-step: verifying correct torque after installation
- Clean threads and studs to remove dirt and corrosion.
- Start all lug nuts by hand to ensure even seating, then tighten in a criss-cross pattern to the recommended torque in small increments.
- After an initial break-in (short drive), re-torque to the specified value and verify that all nuts are evenly tightened.
- Inspect for any signs of movement, unusual vibrations, or uneven wear around the studs or spacer hub.
- Re-torque at regular maintenance intervals or after off-road use, heavy braking, or wheel impacts.
Tip: keep a torque wrench calibrated and document each torque event in your vehicle records.
Common mistakes and safety reminders
Common mistakes include using spacers with insufficient thread engagement, ignoring OEM torque specs, or assuming a universal torque for all spacers. Never mix spacer brands without compatibility data, and avoid forced fits that require excessive force to seat spacers. Always verify hub cleanliness, proper seating of the wheel against the spacer, and correct lug-nut size and seat type. For high-performance or off-road applications, consider professional installation to ensure bolt circle and caliper clearance are correct.
How to source and apply torque specs for common vehicles
Begin with the vehicle manufacturer’s torque spec for lug nuts and wheel fasteners. Then consult the spacer manufacturer’s installation guide for any spacer-specific requirements, including whether the torque specification differs when spacers are used. If incompatible data exists, contact the spacer supplier or a trained technician. Save the data sheet and note any model-year-specific changes. For DIY enthusiasts, this proactive approach reduces the risk of post-install failures and ensures consistent wheel safety.
Comparison of spacer torque expectations by vehicle type
| Vehicle type | Spacer material | Torque range (ft-lbs) | Notes |
|---|---|---|---|
| Passenger car | Steel spacer | 60-90 | Cross-check OEM + spacer guide |
| SUV/Crossover | Aluminum spacer | 80-110 | Follow vehicle spec + spacer guide |
Your Questions Answered
Are wheel spacers torque specs the same as lug nuts?
No. Torque specs for spacers vary with spacer design, thickness, and engagement. Always follow both OEM lug-nut torque values and spacer manufacturer guidance, then verify after installation.
Spacers have their own torque requirements based on design and engagement. Always use the manufacturer’s torque values and recheck after install.
Should I re-torque spacers after driving a bit?
Yes. Re-torque after a short break-in period to ensure fasteners seat properly and to detect any settlement or movement.
Yes—re-torque after a short drive to confirm everything stays tight.
Can I use aftermarket spacers with different bolt patterns?
Only if the spacer and wheel combinations are explicitly declared compatible by the manufacturers. Mismatched patterns can lead to improper seating and failure.
Only if the manufacturers confirm compatibility; mismatched patterns are risky.
What if the torque is too high?
Over-torquing can strip threads, bend studs, and cause wheel failure. Stop tightening once the recommended value is reached and inspect for damage.
Over-tightening can cause serious damage—don’t exceed the recommended torque.
Is there a universal spacer torque spec?
No universal torque spec exists. Always rely on OEM vehicle specs and spacer manufacturer guidelines for your exact setup.
There isn’t a universal spec—check the OEM and spacer guidelines.
How can I verify torque without a torque wrench?
A torque wrench is recommended for accuracy. If unavailable, seek professional installation to ensure correct seating and engagement.
A torque wrench is best; otherwise, professional installation is advised.
“Torque is a safety-critical parameter, and wheel spacers introduce additional interfaces between hub, wheel, and spacer. Correct torque and verification are essential for long-term reliability.”
Top Takeaways
- Check OEM torque values first.
- Follow spacer manufacturer installation guidelines.
- Re-torque after a short break-in drive.
- Ensure proper thread engagement and spacer thickness.
- Consult a professional if unsure.