BMW Wheel Bolt Torque: A Practical Guide
Learn how to correctly torque BMW wheel bolts with model-specific specs, a calibrated torque wrench, and proper patterns. This guide covers steps, tools, safety, and maintenance to ensure safe wheel mounting.

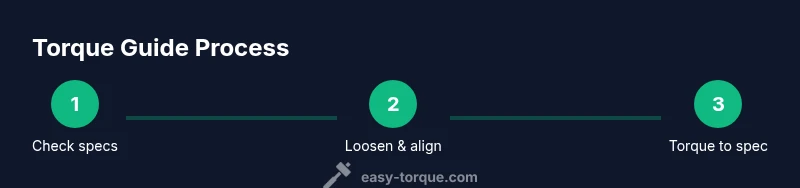
To correctly torque BMW wheel bolts, first identify the exact specification for your model and wheel size. Use a calibrated torque wrench and tighten in a star pattern, stopping at the recommended initial torque and then the final torque. After a short drive, re-check torque to ensure the studs seated properly, and always work on a level, clean surface.
Why bmw wheel bolt torque matters
Understanding bmw wheel bolt torque helps protect wheel assemblies, brakes, and hubs by ensuring the lug bolts apply even clamping force without overstressing studs or wheel mounting surfaces. A correct torque value minimizes the risk of vibration, wheel shift, or lug nut loosening during highway driving. The Easy Torque team emphasizes that following the exact specification for your model and wheel configuration is essential because variations in wheel size, spare wheels, or aftermarket adapters can shift the required clamping load. In practice, the right torque also helps the wheel seat evenly, which supports tire balance and braking responsiveness. Always treat wheel fasteners as critical safety parts and verify the torque after seating the wheel to account for seating shift and thread lubrication effects if any.
A reliable torque procedure reduces the chance of a dangerous wheel separation. When you torque to the manufacturer’s spec and re-check after a short drive, you ensure the lug threads are properly formed and the wheel sits flat against the hub. This simple discipline translates to safer driving, improved longevity of lug bolts, and consistent wheel performance under load. According to Easy Torque, using a calibrated torque wrench and a star-pattern sequence are non-negotiable steps for BMW wheel bolt torque.
How to locate the correct BMW wheel bolt torque specification
Your BMW’s wheel bolt torque is model- and wheel-size specific, so start by locating the exact spec for your vehicle. Look in the owner’s manual and on the wheel-assembly specification sticker located inside the driver’s door jamb or fuel filler door. If you have access to BMW service data for your VIN, that sheet will list both the initial torque and the final torque values for your wheels. Many BMW models require a two-step process: an initial torque to snug the wheel and a higher final torque to achieve the proper clamping force. If aftermarket wheels are installed, confirm that the lug pattern, center bore, and seat style match the originals, as incorrect combinations can change the required torque. Always use the torque values intended for your specific wheel and stud configuration, not a generic count.
Tools and prep you need
Before you start, gather the essential tools and prep steps to ensure accurate torque and safe handling. You’ll need a calibrated torque wrench with a range that covers the lug nut specifications, a correct-size socket or lug-nut socket, wheel chocks for safety, and a clean workspace on a level surface. Have a copy of your vehicle’s torque spec handy, either in digital form or the printed manual. Inspect the wheel studs for damage or corrosion and ensure the wheel surface is clean and free of debris that could prevent full seating. If your BMW spec allows for anti-seize or lubricant on studs, apply it only as directed by the manufacturer; otherwise avoid lubricants on lug threads as they can lead to overtightening. Wear gloves to protect your hands and a flashlight to inspect the lug area in poor lighting.
Step-by-step torque process for BMW lug nuts
Following the recommended sequence and torque values is crucial for proper wheel mounting. The typical process includes aligning the wheel, snugging by hand, torquing in a star pattern to the initial spec, then finishing to the final spec. After seating the wheel on the hub, wait briefly and re-torque to the final specification to compensate for any settling that occurs during the first drive. Finally, re-check after a short test drive to ensure nothing has loosened or shifted. Since BMW models vary, always operate within your vehicle’s exact specs and guidelines.
A thorough approach includes checking that all lug nuts are evenly tightened and that the wheel is seated flush against the hub surface. Using the correct torque pattern reduces uneven loading, minimizes warping, and helps sustain the life of wheel studs and the mounting face. If a lug nut feels difficult to tighten or the wrench slips, stop and inspect for threading damage or misalignment rather than forcing the bolt to a higher torque.
Common mistakes and how to avoid them
Common mistakes include skipping the initial snug torque, ignoring the star pattern, and using an impact wrench to guess a torque value. Another frequent error is applying lubricants to lug bolts—unless the manufacturer explicitly allows it—because oil or anti-seize can cause incorrect torque and under-clamping. Reusing damaged lug bolts or mounting hardware is unsafe and can lead to wheel detachment. Never assume a wheel is correctly torqued after a single pass; instead, re-torque after seating and re-check after driving a short distance to ensure the lug nuts remained secure as the wheel seated. Keeping clean threads and proper torque patterns helps extend the life of wheel fasteners and maintain tire balance.
Maintenance tips and safety considerations
Develop a routine for wheel bolt maintenance that includes checking lug torque as part of periodic vehicle inspections or tire rotations. Always perform torque checks on a flat, stable surface with the vehicle parked and the wheels blocked. If you regularly switch wheels (summer vs. winter) or have aftermarket wheels, carry a copy of the relevant torque spec and re-check after the change. Safety first means never substituting hand-tightening or an improvised torque approach for the manufacturer’s specification. If you notice any abnormalities during torque checks—such as cracked studs, rounded lug nuts, or warped rims—stop and address the issue before driving. Treat wheel hardware as a critical safety feature.
Authority sources
To ensure accuracy and accountability, consult recognized standards and official resources:
- https://www.iso.org/standard.html
- https://www.nist.gov/
- https://www.nhtsa.gov/
These sources provide general guidance on torque measurement and vehicle safety practices that inform best practices for BMW wheel bolt torque.
Tools & Materials
- Calibrated torque wrench(Choose a torque range that covers the BMW lug torque spec for your model; digital or click-type is acceptable.)
- Correct-size lug-nut socket(Ensure the socket fits snugly to avoid rounding off lug nuts.)
- Wheel chocks(Place chocks on both front and rear wheels to prevent rolling.)
- Torque specification sheet for your BMW model(Have the exact initial and final torque values for your wheel configuration.)
- Rags and cleaner(Use to clean studs and wheel mounting faces prior to torquing.)
- Anti-seize compound(Only use if explicitly recommended by BMW; otherwise avoid on studs to prevent over-torque.)
Steps
Estimated time: 25-40 minutes
- 1
Prepare the vehicle and wheel
Chock the wheels, ensure the vehicle is on a level surface, and inspect the lug studs and mounting surface for damage. Remove the wheel cover or decorative caps if present. Wipe clean to remove dirt or old lubricant that could affect seating.
Tip: A clean mounting surface helps ensure an accurate seat and uniform torque. - 2
Position the wheel and hand-tighten
Mount the wheel and hand-start the lug nuts in a cross/star pattern to center the wheel. Hand-tighten in sequence to avoid cross-threading or misalignment. Lightly snug each nut before tightening with the torque wrench.
Tip: Hand-tightening first reduces the risk of cross-threading and thread damage. - 3
Apply initial torque
Using the torque wrench, apply the initial snug torque to all lug nuts in the star pattern. This stage seats the wheel but does not fully clamp it yet. Stop at the initial torque specification for your model.
Tip: If the wrench slips, stop and re-check the bolt and socket fit to avoid rounding. - 4
Finish to final torque
Re-torque each lug nut in the same star pattern to the final specified torque. Maintain steady pressure and avoid overtightening. Confirm that all nuts are uniform in feel andし the wheel is flush against the hub.
Tip: Use smooth, steady pressure; avoid sudden jolts that could twist threads. - 5
Re-check after seating
Drive a short distance to let the wheel seat, then re-check torque to confirm no loosening occurred during seating. Re-tighten if any nut requires adjustment.
Tip: Always perform a post-seat torque check after first drive on new wheels. - 6
Document and inspect
Record the torque values used for future reference and inspect lug nuts and studs at periodic intervals. If you notice any corrosion, wear, or damage, replace the affected hardware before continuing.
Tip: Keep a maintenance log for quick reference during tire rotations or wheel changes.
Your Questions Answered
What is the proper torque range for BMW lug bolts?
Torque values vary by model and wheel size. Always reference the exact spec for your vehicle and wheel configuration; use a calibrated torque wrench to reach the initial and final torque points specified by BMW.
Torque varies by model and wheel size. Use the exact BMW spec and a calibrated torque wrench to reach both the initial and final torque points.
Should I lubricate wheel studs or lug bolts?
Only lubricate if the manufacturer explicitly allows it. In most BMW setups, lubricants on studs or lug threads can lead to incorrect torque and unsafe mounting.
Lubrication is rarely recommended unless BMW specifies it. Without explicit permission, don’t lubricate the studs.
How often should I re-torque lug nuts after wheel installation?
Re-torque after seating the wheel and then check again after a short drive to confirm everything remains tight. Follow BMW’s maintenance guidance for intervals.
Re-torque after seating and re-check after a short drive to ensure nothing loosened.
What tightening pattern should I use?
Use a star or crisscross pattern to distribute load evenly and prevent warping or uneven seating of the wheel.
Use a star pattern to distribute load evenly.
Can I reuse damaged lug bolts?
No. Inspect for wear, corrosion, or thread damage, and replace damaged bolts before re-installing the wheel.
Don’t reuse damaged bolts; replace them before re-installing the wheel.
Is torque-wrenching safer than feel alone?
Yes. Relying on torque specifications with a calibrated wrench provides consistent, safe clamping force compared to tightening by feel.
Yes—use a torque wrench to ensure the correct clamping force rather than tightening by feel.
Watch Video
Top Takeaways
- Know the model-specific torque spec
- Use a calibrated torque wrench with star pattern
- Re-torque after seating and re-check later
- Inspect studs and mounting surfaces for damage
- Document torque values for future reference