How to Adjust Torque on a Drill: A Step-by-Step Guide
Master how to adjust torque on a drill using its clutch or electronic control. Learn safe settings, testing on scrap, and tips to protect screws, bits, and your work surface.

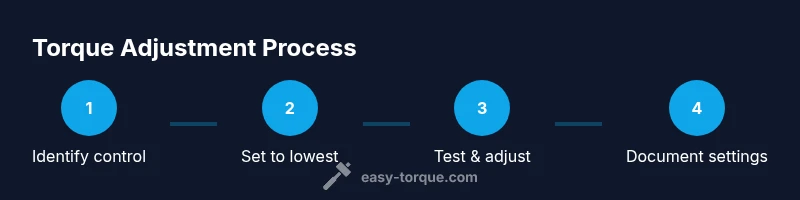
To properly adjust torque on a drill, locate the clutch or torque control, set it to a conservative starting level, and test on scrap material before working on real screws or holes. Choose a setting appropriate for the fastener size and material, then gradually increase until the screw seats snugly without stripping or camming. Always wear safety gear and consult the manual for your model.
What torque control means on a drill
Torque control is built into most drills as a clutch or electronic limiter. When you set a torque level, the drill will stop driving the screw or reduce power once that limit is reached, preventing stripped screw heads, damaged workpieces, and premature motor wear. On screw-driving tasks, choosing the right torque is more important than speed: too little torque and the fastener will not seat; too much torque can cam out or strip wood or damage the screw head. For drilling holes, torque works with speed to manage bite, but many drills use a separate drilling mode. Always consult the manual for your exact model, because some compact or budget models have fewer discrete settings or different drive modes. When you change torque settings, consider the fastener type (wood screws, sheet metal screws, or self-tapping) and the workpiece material (softwood, hardwood, metal, or plastic).
In practice, torque control helps you balance aggression and control. It protects fasteners from snapping, preserves workpieces from unnecessary damage, and extends tool life by preventing overworking the motor. If you’re new to torque settings, start with low levels and move up in small steps while observing the result. Documenting your go-to settings for common tasks makes future projects faster and safer.
How to locate and interpret your torque setting
On most cordless drills, you’ll see a ring around the chuck with numbers or icons representing torque levels. The clutch dial (or electronic limiter) controls how much resistance the drill will apply before it slips or cuts power. Start by identifying whether your model uses a mechanical clutch or an electronic setting. If there are numbers, the lower end means gentler driving and higher end means more force. For drilling tasks, many drills switch to a dedicated drilling mode, which disables the clutch. If your drill uses discrete steps (1–20, for example), choose a setting close to the size of the fastener and the hardness of the material, then adjust in small increments after testing. Always have a the manual handy to translate numbers into real-world equivalents for your model.
If you’re unsure about what your model’s settings mean, look for a label on the drill housing or consult the online manual. Electronic torque controls may offer presets like “Driving” or “Drilling” that automatically adjust power and speed. Regardless of the mechanism, the principle remains: start conservative, verify with a test, and adjust based on observed results. Over time, you’ll build a quick mental map of which settings work best for common tasks such as woodworking, metalwork, or plastic assemblies.
Practical approach: choosing the right setting for common tasks
Choosing torque involves matching to the fastener type and material. For wood screws into soft pine, a low to mid setting is often enough; for hardwood or thicker materials use mid to higher ranges. For sheet-metal screws into thin metal, start mid-range and watch for thread stripping. For pilot holes, keep torque low to prevent enlarging the hole. If you frequently switch between softwood and hardwood, consider setting a per-material guide and keep a small log of which settings produced the best results. Remember: torque is about control, not just speed, and the right setting can save you time and frustration on every project.
Safe testing, adjustments, and best practices
Always test torque changes on scrap material before applying them to your actual project. Begin with the lowest setting, drive a test screw into scrap, and inspect the head seating and material integrity. If the screw beds too easily or camming occurs, reduce torque or switch to a pilot hole. If the screw barely engages or the head sinks, increase torque gradually and re-test. Use pilot holes when driving larger screws into hardwoods to reduce resistance and prevent splitting. Wear safety glasses, ensure the workpiece is clamped, and never monitor torque changes while holding the workpiece with your hand. Keeping a quick-reference chart of your most-used settings can prevent repeated guessing and speed up future tasks.
Authority sources
- https://www.osha.gov
- https://www.nist.gov
- https://www.consumer.ftc.gov
Tools & Materials
- Cordless drill with adjustable torque/clutch(Ensure model has mechanical clutch or programmable electronic torque limit)
- Pilot bits and assorted screws(Use sizes appropriate for the material and fastener)
- Scrap wood or metal piece for testing(Use softwood for practice before hardwood)
- Safety glasses or goggles(Eye protection mandatory during testing)
- Owner’s manual or model-specific guide(Translate numbers into real-world equivalents for your drill)
- Marker or label tape(Label tested settings for future reference)
Steps
Estimated time: 15-25 minutes
- 1
Gather tools and safety gear
Collect your drill, testing scraps, screws, pilot bits, and safety glasses. Clear the workspace and clamp the test piece to prevent movement. This ensures accurate results and protects fingers from shifting material during testing.
Tip: Wear eye protection and keep a scrap piece close to compare seating without risking your real workpiece. - 2
Identify the torque control on your drill
Locate the clutch dial or electronic torque setting on your drill. If numbers are present, note their range and any mode indicators like Driving or Drilling. Understanding the control helps you select the right starting point for tests.
Tip: If you’re unsure about the meaning of numbers, check the manual or manufacturer’s online guide for model-specific mapping. - 3
Set the initial torque to the lowest practical level
Start with the lowest setting or the smallest number available. This reduces the risk of overdriving the screw or damaging the workpiece on the first test.
Tip: Document the starting setting so you can adjust methodically and reproduce results later. - 4
Prepare the test piece and pilot hole
Drill a shallow pilot hole if needed and position your test screw in the scrap. This helps you assess bite, seating, and potential splitting without risking the actual project.
Tip: Pilot holes are especially important for hardwoods and thicker materials. - 5
Drive a test screw and evaluate seating
Drive the screw slowly and observe while the bit or screw head seats. If it sinks flush without camming or stripping, you’re close. If it stalls or spins, back off and adjust.
Tip: Make small torque adjustments (one notch or one click) to refine results. - 6
Finalize the setting and document results
Once you achieve clean seating, apply the same setting on a real piece to confirm consistency. Record the setting for future tasks and store the manual for quick reference.
Tip: Keep a simple log: material, fastener size, setting, outcome.
Your Questions Answered
What is torque on a drill and why should I adjust it?
Torque is the rotational force a drill applies when driving screws or drilling. Adjusting torque helps prevent stripping screws and damaging the workpiece by matching the force to the fastener size and material.
Torque controls the force the drill applies; adjust it to prevent stripping and material damage.
Do all drills have adjustable torque?
Most modern cordless drills include a clutch or electronic torque limit. Some basic or budget models may have fewer settings or a single drive mode.
Most drills have torque control, but some cheaper models have limited options.
How do I choose the starting torque setting?
Begin with the lowest setting available. Test on scrap material and increase in small increments until the screw seats snugly without stripping.
Start low, test on scrap, then increase gradually.
Can adjusting torque damage the workpiece?
Yes, too much torque can strip screw threads, crush soft materials, or cause splitting. Always test and use pilots when needed.
Excess torque can damage screws and material, so test first.
What’s the difference between torque and speed?
Torque controls driving force (how hard the screw is pushed). Speed controls how fast the bit rotates. For driving screws, torque matters more; for drilling, speed and feed rate dominate.
Torque is about force; speed is about rotation rate. Use torque for screws, speed for drilling.
How should I store torque settings when not in use?
Return the drill to a safe, low or neutral setting, unplug or remove the battery if possible, and keep the manual handy for quick reference.
Store the drill at a safe setting and keep the manual handy.
Watch Video
Top Takeaways
- Understand torque control to protect fasteners and workpieces
- Always test torque settings on scrap before real work
- Start with the lowest setting and adjust incrementally
- Document settings for repeatable results
- Use pilot holes and proper safety gear at all times