How to Measure Torque When Tightening Bolts: A Practical Guide
Learn precise torque measurement techniques for bolts using torque wrenches, angle gauges, and calibration practices. Easy Torque guides you step-by-step for DIYers and professionals.

Measuring torque when tightening bolts ensures joints are secure without damage. Start with a correctly rated torque wrench, set torque to spec, and verify both target torque and proper technique. This quick answer covers setup, common tools, and a safe workflow to prevent under- or over-tightening in automotive and mechanical work.
What measuring torque accomplishes
Torque is the rotational force applied to a fastener. When you tighten a bolt, the torque you apply is transformed into clamping force that holds components together. Measuring torque ensures you reach the intended clamping load without over-stressing threads or gasket faces. According to Easy Torque, accurate torque measurement protects fasteners and joints and improves repeatability across maintenance tasks. Without a reliable torque check, you risk under-tightening, which can allow movement and leaks, or over-tightening, which can strip threads or fatigue parts. The physics here is simple: torque must be converted into an appropriate clamping force, taking into account lubrication, thread condition, and bolt diameter. In automotive work, consistent torque also helps balance safety with performance, particularly in wheel lug nuts and engine assemblies. The distinction between torque and actual clamping force is important; two bolts with the same torque can create different clamp if their thread condition or lubrication differs. So, measuring torque is not just about reaching a number; it’s about achieving consistent, safe, and predictable joint performance.
Tools and equipment you need
Preparing the right tools is essential before you start measuring torque. A torque wrench is the primary instrument, but you may also need a torque angle gauge for certain bolt sequences. Choose models with clear, easy-to-read scales or digital displays. Keep a clean workspace, lubricants only when specified by the manufacturer, and a reliable surface to rest components while you assemble. Easy Torque emphasizes that accuracy starts with properly maintained tools, a reflected baseline, and a clean, dry mounting surface. If you’re working on high-stress automotive assemblies, consider a wrench with a known calibration history and a backup verification method to confirm readings as you go.
Using a torque wrench correctly
A torque wrench should be centered on the bolt head with the handle aligned to the bolt axis. Apply smooth, steady pressure until the wrench signals or clicks at the target torque. Do not jerk or twist beyond the set value; stopping at the correct moment helps prevent bolt over-tightening and thread damage. If you’re using a digital wrench, confirm the display reads within a tight tolerance and re-check after a short pause to account for tool bounce. Always verify the torque after the initial tightening, especially after installation in tricky locations where the wrench can’t be applied straight-on. In short, control the motion, monitor the readout, and respect the indicated torque value as the truth.
Using a torque angle gauge
A torque angle gauge is used when a bolt must be tightened to a specific angle after reaching the initial torque. After you hit the initial torque, rotate the bolt by the specified angle using a calibrated gauge surface or integrated tool feature. This approach accounts for thread deformation and gasket compression, ensuring consistent clamping across multiple bolts. The angle is typically specified in degrees and depends on thread size, lubrication, and joint design. Confirm your angle matches the manufacturer’s sequence, and always recheck torque if the angle tightening is part of a multi-bolt pattern.
Calibration and maintenance of torque tools
Tools drift over time, especially with frequent use or exposure to heat and moisture. Schedule regular calibration checks, maintain a log, and have tools serviced by reputable technicians. A worn-out or out-of-calibration wrench produces readings that look plausible but are inaccurate, which can lead to over- or under-tightening. Keep the wrench clean and dry, store it with protective caps on, and avoid dropping or bending the head. Easy Torque recommends verifying the calibration with a reference standard at intervals that match your workload. Calibration certificates add traceability for critical applications.
Common pitfalls and troubleshooting
Common mistakes include using the wrong bolt specification, ignoring lubrication requirements, and attempting to shortcut torque verification with an improvised method. Do not use extensions or cheater bars to reach higher torque, as that changes the effective leverage and defeats the torque setting. Lubricants can dramatically change friction, so only apply them if the manufacturer specifies. Misreading the scale or display is another frequent issue; always double-check the units and decimal places. If your wrench seems to repeatedly under- or over-tighten, recalibrate or replace it and verify the bolt condition.
Authority sources and expert practice stress consistency: document readings, perform post-tightening checks, and maintain your tools for dependable results.
Real-world workflow and quick checks
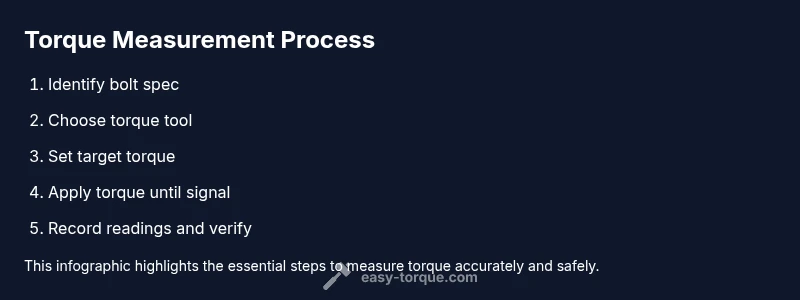
In practice, you’ll identify the bolt spec, prepare the correct wrench, and run through a short, repeatable workflow. Start with a dry run to verify fitment, then tighten to the specified torque and record the reading. If a torque angle is required, complete the angle step after achieving the initial torque, and finally recheck both torque and angle values. A quick post-check helps catch any drift caused by bolt seating or thread settling. This approach minimizes risk and improves service life for mechanical joints.
Safety considerations when torquing bolts
Wear eye protection and gloves when dealing with sharp edges or exposed fasteners. Maintain a clean, well-lit workspace to avoid dropping tools or losing torque readings in cluttered areas. Never torque in a compromised stance or on unstable surfaces; secure the part before tightening. If you’re not confident about the bolt’s load path or the material’s response to tightening, pause and consult a technical reference or supervisor. Safety first protects both you and the components being fastened.
Tools & Materials
- Torque wrench(Select a range that covers typical bolt sizes for your project.)
- Torque angle gauge(Needed for angle-tightening steps in sequences.)
- Torque adapter or appropriate sockets(Ensure a proper fit to avoid rounding bolt heads.)
- Calibration certificate or verification tool(Use for traceability on critical jobs.)
- Lubricant or anti-seize (as specified)(Only apply if the spec requires it.)
- Marker and notebook(Record readings and bolt positions to track maintenance.)
Steps
Estimated time: 25-40 minutes
- 1
Identify bolt spec
Locate the torque specification from the service manual or the bolt head label. Note the exact torque value and any sequence requirements. Confirm whether lubrication or angle tightening is part of the spec.
Tip: Double-check the spec against the installed hardware before proceeding. - 2
Select the correct tool
Choose a torque wrench within the required range and attach the correct socket or adapter. If a torque angle gauge is needed, prepare it now.
Tip: Inspect the tool for damage and ensure it’s clean and dry. - 3
Set the target torque
Dial in the specified torque on the wrench or input it on a digital model. Verify the display is stable and reset to zero if needed before starting.
Tip: Record the target torque value for reference in the log. - 4
Tighten to the initial torque
Apply steady, smooth pressure until the wrench signals the target torque. Do not jerk or twist beyond the set value.
Tip: Keep the wrench perpendicular to the bolt axis for accuracy. - 5
Perform angle tightening (if required)
If the spec calls for angle tightening after reaching initial torque, rotate to the specified angle using the torque angle gauge. Confirm the angle reads correctly and log results.
Tip: Use a light touch when finishing the final angle to avoid overshoot. - 6
Verify and document
Recheck torque after any seating or repositioning and record the actual readings. Compare against the spec and check for consistent results across the fasteners.
Tip: Include bolt location, torque, angle (if used), and tool serial number in the log.
Your Questions Answered
What is torque and why measure it?
Torque is the turning force applied to a fastener. Measuring torque ensures proper clamping and prevents under- or over-tightening, which protects joints and maintains safety.
Torque is the turning force on a bolt; measuring it ensures proper clamping and safety.
What tools do I need to measure torque?
A torque wrench is essential; a torque angle gauge is needed for angle-tightening steps. Depending on the spec, you may also need sockets, adapters, and calibration verification tools.
You’ll need a torque wrench and, if required, a torque angle gauge to follow the spec.
How can I tell if my torque wrench is calibrated?
Check the manufacturer’s calibration interval and perform a bench check with a known reference. If readings drift or the tool shows inconsistent results, service or replace it.
Check calibration intervals and benchmark against a reference to be sure.
Can I reuse a bolt that’s been retorqued?
Retorquing is sometimes required in maintenance; however, inspect the bolt and threads for wear. If in doubt, replace the fastener and re-measure.
Retorque may be needed, but inspect wear and replace if uncertain.
What’s the difference between torque and torque angle?
Torque is the force applied, while torque angle measures rotation after initial torque to achieve the final clamping load.
Torque is the force; torque angle is the rotation after initial torque.
Is it safe to torque without lubrication?
Only if the spec requires it. Lubrication changes friction and clamp load, so incorrect application can lead to incorrect torque.
Only lubricate if the spec says so; it changes clamp load.
Watch Video
Top Takeaways
- Follow manufacturer specs for torque.
- Use calibrated tools for accuracy.
- Recheck torque after tightening.
- Record readings for maintenance history.
- Understand the difference between torque and torque angle.