How to Torque to Spec: Safe, Accurate Fastening
Master how to torque to spec with a practical, step-by-step approach. Learn to select the right tools, apply correct sequences, verify torque, and document results for reliable fastening.

Why Torque to Spec Matters
Accurate torque is a cornerstone of mechanical reliability. When you torque to spec, you ensure clamping force is applied evenly, fasteners are protected from fatigue, and joints seal properly. Under-torquing can lead to loosened hardware, leaks, or component misalignment, while over-tightening risks thread stripping, bolt failure, or warped parts. According to Easy Torque, the practice of tightening to exact manufacturer values reduces variable outcomes and extends service life. In DIY projects and professional maintenance alike, adhering to the correct torque specification for each fastener ensures predictable performance under vibration, heat, and load. Always start from the official spec sheet, consider thread condition and lubrication, and treat each fastener as unique rather than applying a single universal value. The result is a safer, more reliable buildup that you can trust on daily driving, off-road adventures, or shop-floor production.
The Easy Torque team emphasizes that a consistent approach minimizes surprises during inspections and service windows. By documenting your torque decisions, you create a traceable history that helps troubleshoot future issues and supports maintenance scheduling. This mindset—specify, verify, document—keeps projects moving smoothly and safely.
Understanding Torque Specifications and Units
Torque specifications come in units such as foot-pounds (ft-lbf) or newton-meters (Nm). The value represents the force multiplied by the lever arm length, i.e., how hard and how far you twist. Specs are printed on service manuals, door jamb stickers, engine covers, or component diagrams. Some fasteners require a torque-angle method after reaching the initial value; in others, you simply stop when the wrench indicates the target. Always note the unit and ensure you're measuring in the unit the spec uses; mixing units leads to over-tightening or under-tightening. Remember that greases, lubricants, and thread sealants change effective friction, so some specs assume dry threads, others account for lubrication. When in doubt, re-check the equipment manufacturer or the vehicle service bulletin and use a torque chart or conversion calculator to avoid misinterpretation.
Tools and Prep: What You Need
Before you begin, gather the tools and prep the workspace. Use a calibrated torque wrench with the appropriate range for the fasteners you're tightening. Have a socket or drive set that fits cleanly on the fastener head, and keep the thread surfaces clean and dry. If manufacturer's instructions call for lubricant, apply the specified lubricant sparingly; otherwise, avoid oil on critical load-bearing threads that should be dry. A torque spec sheet or digital app can keep you aligned with the right value and sequence. Lay out a clean rag, a torque angle gauge if required, and a seal for any openings to prevent contamination. In tight spaces, good light, a mirror, and a magnetic tray help keep fasteners organized. Finally, verify the torque wrench is zeroed or calibrated before starting, using a known reference bolt if possible. This prep ensures accurate measurement and a smooth workflow.
The Right Sequence and Pattern
Many fasteners must be tightened in a specific sequence to prevent uneven seat and distortions. For a simple four-bolt flange, use a criss-cross pattern; for a wheel lug pattern, follow a star pattern (opposite lug nuts diagonally). If the manual specifies a torque-angle method, complete the initial pass to the specified value, then turn each fastener through a prescribed angle, easing into final position. When loosening is not an option, ensure the fasteners are clean, dry, and free from corrosion before reusing. Uneven seating can cause leaks and mechanical binding, while uniform tightening distributes clamping force and reduces stress concentrations. If a vehicle uses a layered sequence (base bolts, then an alignment bolt), follow the full order. Keep track of the order, especially on multi-part assemblies. A printed or digital checklist helps you stay consistent across days and vehicles.
Verifying Torque and Quality Checks
After the initial pass, re-check every fastener within the specification window. Tap the wrench handle or apply a light torque to confirm the last pass is still within spec, then rotate through all fasteners again if required. For assemblies exposed to temperature swings or heavy vibration, re-torque after a short run-in period per manual guidance. Document the final values in your tool log or vehicle service records and note any fasteners that required lubrication or thread repair. Consistency matters: a single under-torqued bolt can fail under load, while over-tightened threads can become damaged beyond repair. Always verify that the torque wrench shows the correct unit and that the tool’s calibration has not drifted during use.
Common Mistakes and How to Avoid Them
Common mistakes include assuming one torque value fits all fasteners, failing to consider friction changes from lubrication, and skipping the star/sequence pattern. Never torque with a dirty or damaged fastener; torque accuracy depends on clean threads. Avoid using damaged or mismatched bolts; replace them if threads are stripped or if there is any sign of fatigue. Don’t rely on feel or a “back off and retighten by hand” method to reach the target; torque spec requires measurement with a tool. If torque values were previously set with the wrong unit, remove the fastener, re-clean the threads, and reset to the correct unit and value. Finally, do not reuse torque wrenches without calibration checks. Regularly verify the wrench’s accuracy against a known reference and recalibrate as needed.
Post-Install Checks and Maintenance
After torqueing to spec, perform post-install checks that reflect real-world use. Inspect for leaks, misalignment, or abnormal noise during initial operation. Re-torque any critical fasteners after running the system in for a short period, as vibrations and thermal cycling can alter seating. Store your torque wrench properly—set to a safety or minimum-spring value to preserve calibration and keep the tool protected from impact. Maintain a simple log with date, vehicle, fastener size, and the torque value used; this makes future maintenance easier and helps with warranty or service history. If you encounter a fastener that continually moves from spec, stop and reassess the joint; something is off, and forcing a value can cause damage.
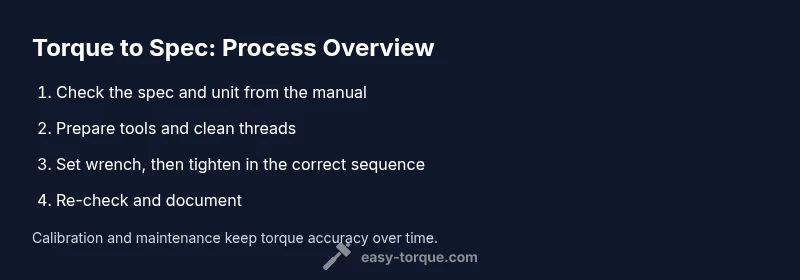
Quick Reference: 10-Point Checklist for Everyday Use
Create a quick, repeatable reference for future jobs: 1) confirm exact spec, 2) ensure dry, clean threads, 3) zero the wrench, 4) select the correct unit, 5) apply in sequence, 6) use smooth motion, 7) stop at spec, 8) recheck, 9) log results, 10) inspect for damage. This checklist keeps you consistent and reduces missed steps when speed matters.