Mastering Torque: A Practical How-To Guide for Safe, Accurate Fastening
Learn how to measure, apply, and verify torque with step-by-step guidance, tools, tips, and safety considerations for DIY mechanics and professionals.

Torque is the rotational force you apply to fasteners to create preload and secure joints. Proper torque yields reliable clamping, gasket sealing, and predictable performance, while under- or over-torque can cause loosening, leaks, or component damage. This guide provides practical steps, tool choices, and safety practices for accurate torque across automotive and mechanical tasks.
What torque is and why it matters
Torque is the measure of rotational force applied to a fastener. In practical terms, it translates to the preload force that clamps joined parts together. The right amount of torque creates a secure joint that resists vibration, temperature changes, and load cycles. Too little torque allows slip and leaks, while too much torque can stretch or shear threads, strip housings, or snap bolts. In automotive and mechanical work, torque control yields repeatable results and longer service life for components like cylinder heads, wheel hubs, and brake assemblies. You will often see torque expressed in Newton-meters (Nm) or foot-pounds (ft-lb); recognizing these units helps you read service manuals, select the correct wrench, and communicate with teammates.
For DIY projects, developing torque discipline translates into safer repairs, fewer callbacks, and more predictable outcomes. Start by understanding the manufacturer’s torque specification, the material being fastened, and whether lubrication or thread treatment is required. This foundational knowledge empowers you to plan, measure, and verify fastening work with confidence.
Common torque units and conversions
Torque is commonly specified in Nm (Newton-meters) or ft-lb (foot-pounds). To work across different standards, you’ll convert between units:
- 1 Nm ≈ 0.73756 ft-lb
- 1 ft-lb ≈ 1.356 Nm
- 1 in-lb ≈ 0.113 Nm
Some tasks use in-lb for small fasteners. When you see a spec like 40 ft-lb, you know the wrench should apply 40 pounds of force at a 1-foot lever arm. For precision, rely on explicit manufacturer guidance and avoid guessing based on feel alone. Always check whether lubricant is required, since lubrication can change the effective preload for a given torque.
Understanding these conversions helps you bridge tools across different regions or vehicle models and ensures you apply the correct preload regardless of the unit system used in the service manual.
How torque interacts with engines and fasteners
Torque isn’t just about turning a bolt to a number; it’s about preload, clamping force, and thread behavior under load. When you tighten to the specified torque, you preload the joint so parts remain in contact during vibration, thermal cycling, and dynamic loads. Bolt stretch contributes to sustained clamping, but each fastener and material pair behaves differently under temperature changes. Excess torque can over-stress threads, while insufficient torque may allow movement and gasket failure. Lubrication further affects preload by reducing friction; many engine and drivetrain fasteners require a chosen lubricant or anti-seize compound to achieve the intended torque. In practice, always follow the manual and consider the operating environment (heat, corrosion, lubrication) to maintain reliability over time.
How to measure torque correctly
Accurate torque measurement relies on using the right tool and technique. Start with a calibrated torque wrench and a clean, dry thread surface. Before tightening, verify the wrench is within calibration; if you’re unsure, test on a known reference fastener. When applying torque, steady, smooth motions yield consistent preload and reduce peak loads that could damage threads. For fasteners that require lubrication, apply the lubricant as specified and recheck the torque after the lubricant has seated. Finally, document the torque values used for critical joints so maintenance teams can verify later.
Different torque wrench styles offer different benefits:
- Click-type wrenches provide a tactile and audible cue when the target torque is reached.
- Beam wrenches offer simplicity and reliability without complex electronics.
- Digital wrenches provide real-time torque readouts and data logging for traceability.
Common mistakes and best practices
Even experienced technicians can stumble over torque. Common mistakes include skipping lubrication when required, using damaged or worn tools, and failing to clean threads before torquing. Never substitute a larger wrench for a smaller bolt, as this changes the effective lever arm and skews the actual torque. Always torque in the sequence prescribed for multi-fastener joints and verify final values after any reassembly or temperature changes. For high-stress assemblies, re-torque after a brief cycling period to account for settling and thermal expansion.
Safety and maintenance considerations for torque
Torque work involves rotating fasteners under load, so PPE matters. Wear eye protection in workshop settings and keep hands away from pinch points. Regularly inspect your torque tools for wear, corrosion, and calibration drift; calibrate according to manufacturer recommendations. Store wrenches in a protective case and avoid exposing them to extreme temperatures or impacts. Finally, maintain a running log of torque specifications, tool calibrations, and maintenance checks to ensure ongoing accuracy and safety.
Torque in automotive and industrial applications
Torque control is critical in many applications. In vehicles, lug nuts require precise torque to ensure wheel retention without over-torquing the studs, which can cause thread damage or rotor warping. Engine assemblies rely on accurate bolt preload for head gaskets and main bearing caps to maintain sealing and alignment. In industrial settings, bolts in machinery, pumps, and structural components demand consistent torque to prevent leaks, misalignment, and fatigue. Across all uses, documenting torque specs, cleaning surfaces, and verifying with the appropriate tool helps sustain performance and safety.
Tools & Materials
- Torque wrench(Choose a range that covers your target specs; verify calibration regularly (at least annually) and after any drop or impact.)
- Socket set (metric + SAE)(Ensure you have the correct drive size and socket size for the fasteners you’ll torque.)
- Torque spec sheet/manual(Have the service manual or spec sheet available for exact values and lubricant requirements.)
- Thread cleaner / degreaser(Clean threads and fastener shanks for accurate torque readings.)
- Lubricant or anti-seize compound (if required)(Only use when the manufacturer specifies lubrication; incorrect lubrication changes preload.)
- Cleaning rag(Keep threads clean and dry before torquing.)
- Calibrated reference fastener(Use to verify wrench calibration if a test fastener is provided by the tool maker.)
- Safety glasses(Protect eyes from debris during tightening and testing.)
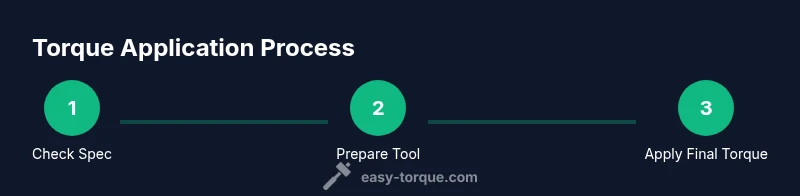
Steps
Estimated time: 25-40 minutes
- 1
Verify specs and prep workspace
Locate the exact torque specification for the fastener from the service manual and confirm units (Nm or ft-lb). Check whether lubrication is required and ensure your workspace is clean and well-lit. Gather the necessary tools and lay out the bolt pattern or assembly order.
Tip: Double-check the fastener grade and thread condition to avoid misinterpretation of the spec. - 2
Clean threads and inspect fasteners
Use a degreaser or solvent to remove oil and rust from threads; dry thoroughly. Inspect the bolt or stud for signs of wear, rounding, or damage. Replace any questionable fasteners before torquing to prevent failures.
Tip: Dirt or damaged threads can falsely elevate torque readings and compromise preload. - 3
Lubricate if required
If the manual calls for lubrication, apply the correct lubricant to the threads and under the bolt head as prescribed. Do not over-lubricate; excess lubricant can reduce friction unpredictably and alter the actual torque.
Tip: Lubrication changes friction; verify the spec with the lubricant applied. - 4
Position fastener and snug-torque
Hand-tighten to ensure proper alignment and seating. Bring the fastener to snug-tight or initial snug torque if specified by the manual, ensuring there’s no cross-threading. This step prevents thread damage when applying full torque.
Tip: Snug torque prevents binding as you approach final torque. - 5
Apply final torque with wrench
Set the wrench to the specified torque and apply steady, smooth torque without jerking or using impact. Stop exactly at the target value and avoid surpassing it; test once to confirm the value is held.
Tip: Use a controlled, smooth motion to avoid peak loads that can deform threads. - 6
Verify and document
Re-check torque after assembly, especially if the joint experiences temperature changes. Record the torque value, tool used, date, and any observations for future maintenance.
Tip: Documentation aids warranty claims and maintenance history.
Your Questions Answered
What is torque and why is it important?
Torque is the rotational force applied to a fastener to create preload. It controls clamp load, prevents leaks, and keeps assemblies secure under vibration and temperature changes. Proper torque improves reliability and safety.
Torque is the rotational force used to tighten a bolt, creating preload that keeps parts secure and leak-free.
How do I convert Nm to ft-lb?
Use the conversion 1 Nm ≈ 0.73756 ft-lb. Multiply the value in Nm by 0.73756 to get ft-lb. For quick checks, many manuals provide both units, so refer to the spec sheet.
To convert newton-meters to foot-pounds, multiply by about 0.737.
Do I need lubrication for all torque procedures?
Lubrication is only required when the manufacturer specifies it. It changes friction and preload, so always follow the exact guidance in the service manual.
Only lubricate if the manual says so; it changes how much torque you need.
Can I reuse a torque wrench for different ranges?
Yes, but ensure the wrench is set to a range appropriate for the target torque and that you don’t exceed its designed capacity. Recalibrate after major use or any drop.
Yes, just keep within the wrench's intended range and recalibrate after major use.
What happens if I over-torque a fastener?
Over-torquing can stretch or snap bolts, strip threads, or damage components. It also may alter gasket sealing and lead to immediate or future failures.
Over-torquing can break bolts and ruin threads, causing leaks or failures.
Should I re-check torque after cycling or temperature changes?
Yes. Thermal cycling and settling can change preload, so re-check torque on critical joints after initial operation or significant temperature shifts.
Recheck after use or temperature changes to ensure the joint remains at spec.
Watch Video
Top Takeaways
- Know the exact torque spec before starting
- Use the right tool and proper lubrication when specified
- Clean threads and inspect fasteners for accurate readings
- Torque verification improves safety and reliability
- Document torque values and tool calibration for maintenance