Valve Cover Torque Specs: Find, Apply, and Verify
Learn how to locate valve cover torque specs, apply the correct torque, and verify a leak-free seal with practical steps, tools, and maintenance tips from Easy Torque.

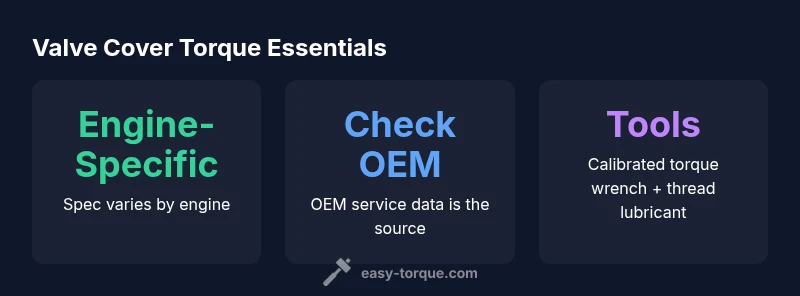
There is no universal valve cover torque spec. Engine designs vary widely; always locate the exact torque value from the OEM service manual or manufacturer data sheet, and torque the bolts with a calibrated wrench using the correct sequence and cleanliness. This approach ensures a reliable seal, protects the gasket, and prevents bolt or cover damage.
What valve cover torque specs are and why they vary
Valve cover torque specs are engine-specific values that define how tightly the bolts should be tightened to seal the valve cover without causing damage. The exact figure is determined by multiple factors including gasket material, bolt diameter, thread pitch, cover design, and engine cooling behavior. Because these factors differ across makes and models, there is no single universal torque number. For DIYers and professionals alike, the safest approach is to locate the precise specification for your engine in the OEM service manual, factory data sheets, or dealership repair databases. Always document the exact value you use, and verify that your torque wrench and lubrication are appropriate for the task.
Why accurate torque matters for gasket integrity
Proper torque is essential to creating an even seal around the valve cover gasket. Under-torquing can allow leaks and oil migration, while over-torquing increases the risk of cracked covers, stripped threads, or deformed gasket seats. Both scenarios create oil seepage, which can lead to engine bay contamination, misreads on sensor data, and costly repairs. The net goal is a uniform clamping force that preserves gasket life and maintains crankcase integrity.
How to locate the spec for your engine
Start with the OEM service manual for the exact year, engine code, and VIN. If the manual isn’t readily available, check the manufacturer’s repair database or official service bulletins. Dealership service departments can provide the spec by VIN. In many modern engines, torque specs are listed in a dedicated gasket or cylinder head section, occasionally accompanied by notes on bolt sequence and lubrication. Always cross-check with any applicable service notes for revisions.
Understanding torque units and conversions
Torque specs are commonly shown in Newton-meters (Nm) or foot-pounds (ft-lb), and occasionally in inch-pounds (in-lb). A basic conversion helps when you’re cross-checking sources: 1 Nm ≈ 0.73756 ft-lb and 1 ft-lb ≈ 1.35582 Nm. When converting, use a precise calculator or refer to OEM guidance if the manual provides a recommended unit. Consistency matters; avoid mixing units between the same job unless you convert accurately.
The role of gasket material and bolt hardware in torque values
Gasket material compresses differently under load, so some gaskets require slightly different clamping forces to achieve a proper seal. Steel bolts vs. aluminum bolts, coated threads, and bolt length all influence how the clamping force develops. In general, follow OEM guidance for the exact bolt material and gasket combination. If you’re unsure, consult the service tech bulletin or a certified technician.
Step-by-step: applying the correct torque using a torque wrench
Prepare the surface by cleaning both the gasket seating area and bolt threads. Lightly oil or lubricate bolts if the OEM calls for it. Install bolts in the recommended order, typically a criss-cross or star sequence, and snug each bolt by hand. Then, using a calibrated torque wrench set to the specified value, tighten in small increments around the pattern until the final value is reached. Recheck bolts in the same sequence to ensure uniform load.
Re-torque after heat cycles and maintenance
Some engines require re-torquing after a heat cycle or initial run to account for settling. If the OEM specifies post-heat re-torque, follow that procedure precisely. If no re-torque steps are listed, inspect the gasket and bolts after the first drive and re-torque if leaks or seepage are observed. Routine checks help catch creeping loads before they become leaks.
Common mistakes and how to avoid them
Avoid guesswork: never tighten to a sub-specified or guessed value. Do not skip the sequence, ignore thread cleanliness, or reuse damaged bolts. Use the right gasket and ensure modest, even torque across all bolts. Store your torque data for future service and always err on the side of checking the OEM spec first.
Tools, lubrication, and technique for repeatable results
Use a properly calibrated torque wrench with a suitable range for the final spec. Use OEM-recommended thread lubricant if required, and never apply excessive lubricant that could cause false torque readings. When removing and reinstalling, inspect threads and reuse only if the bolts and nuts remain clean and undamaged. Document any deviations from the standard procedure.
Documentation and storage of torque specs for future maintenance
Record the valve cover torque spec used, the tool type and calibration date, the engine model, and the maintenance date. Maintaining a simple log makes future service more efficient and reduces the risk of reusing incorrect specs. Include any notes about gasket type or special instructions from OEM bulletins.
Representative torque context by engine family
| Engine Family | Torque Units | Common Gasket Type | Notes |
|---|---|---|---|
| Inline-4 | Nm / in-lb | Rubber or composite | Spec varies by model; consult OEM manual |
| V6/V8 | Nm / in-lb | Composite | Higher torque ranges; verify from manufacturer data |
| Turbo/specialized | Nm / in-lb | Metal or composite | Follow service bulletin for torque pattern |
Your Questions Answered
What exactly is valve cover torque and why does it matter?
Valve cover torque refers to the targeted tightness for the bolts that secure the valve cover. Correct torque ensures a proper seal, prevents leaks, and avoids overtightening that could crack the cover or threads.
Valve cover torque is the tightness you need for the bolts; getting it right prevents leaks and damage.
Where can I find the official valve cover torque specs for my engine?
Official specs are in the vehicle’s service manual, manufacturer data sheets, and OEM repair databases. If you can’t locate them, contact a dealer or service center for your VIN.
Check the owner's manual and OEM service data for your VIN.
Can I reuse a gasket or bolts after removing the valve cover?
Reusing gaskets is risky; most manufacturers recommend new gaskets after removing a valve cover. Bolts can sometimes be reused if undamaged and properly cleaned, but check the manual.
Usually replace the gasket; bolts can sometimes be reused if they pass OEM guidelines.
Do torque specs apply to all engines or vary by mounting pattern?
Torque specs vary by engine family, gasket material, and mounting pattern. There is no universal value; always verify with OEM data for the exact engine configuration.
No universal torque; check your engine's manual.
What torque wrench accuracy is acceptable for valve cover torque?
Use a calibrated torque wrench within its specified accuracy range, ideally within ±5% of the target value. Check the tool's calibration schedule.
Choose a calibrated torque wrench and keep it within accuracy specs.
Should I re-torque after a heat cycle or maintenance?
Some engines require re-torquing after a heat cycle or initial run to account for settling. If OEM specifies post-heat re-torque, follow that procedure; otherwise recheck for leaks after the first drive.
Check OEM guidance on re-torque after first heat cycle.
“Valve cover torque is engine-specific; never substitute a generic value. Rely on OEM data and verified tools to prevent leaks and bolt or cover damage.”
Top Takeaways
- Always verify OEM torque specs for your engine
- Torque accuracy prevents leaks and gasket damage
- Follow a proper tightening sequence and cleanliness
- Use a calibrated torque wrench and correct units
- Document the exact spec for future maintenance