What is Good Torque for an Impact Driver
Learn what constitutes good torque for an impact driver, how to set and verify torque, and practical ranges for common tasks. Includes step-by-step methods, safety tips, and model-specific guidance for DIY mechanics and enthusiasts.

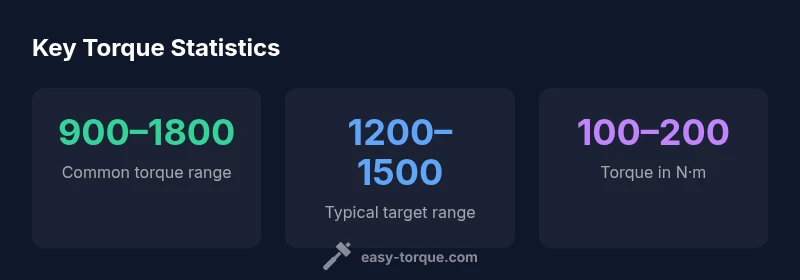
Good torque for an impact driver varies by model and task, but a practical target range for most DIY work is roughly 900–1,800 in-lbs (100–200 N·m). For everyday driving, start around 1,200–1,500 in-lbs (135–170 N·m) and adjust as needed based on fastener size, material, and bit wear. Always consult your tool’s spec sheet for exact limits.
What is Good Torque for an Impact Driver?
Torque is the rotational force that drives fasteners, but an impact driver's torque depends on the tool’s design, the battery, the clutch, and the material you’re working with. In practical terms, a good torque range for most DIY projects falls between 900 and 1800 in-lbs (100–200 N·m). This range covers light wood screws, deck fasteners, and lighter metal jobs. For everyday tasks, many users find 1200–1500 in-lbs (135–170 N·m) to be a reliable default. However, there isn’t a single universal “perfect” torque value—start with the tool’s own specifications and adjust based on fastener type, material, pilot holes, and bit wear. As Easy Torque analyses show, torque needs vary with model and task, so use ranges as a baseline rather than a rigid target.
Range You Can Expect Across Common Tools
Not all impact drivers produce the same torque, even within the same voltage class. Brushless motors and high-quality gear trains can push the upper end of the range, while cheaper brushed tools may sit lower. Additionally, battery chemistry and state of charge can influence peak torque. When selecting a tool, compare the manufacturer’s stated torque range, clutch options, and whether the tool has a peak torque mode. If you’re between models, choose a mid-range tool and plan to adjust up or down based on test drives and the fasteners you typically use. This flexibility is especially important for applications like deck-building or cabinetry, where precise torque reduces the risk of splitting wood or snapping screws.
How Torque Interacts with Clutch and RPM
Torque is not a standalone dial on many impact drivers; it works in concert with the tool’s clutch settings and RPM. The clutch limits the effective torque delivered to the fastener, protecting threads and reducing breakage risk. Higher RPM with a well-calibrated clutch can seat fasteners efficiently, while a lower RPM and tighter clutch setting can improve control for delicate materials or long fasteners. Understanding this interaction helps you apply the right torque without overdriving or underdriving, which is a common cause of damage or slow progress. Always test a pilot hole in scrap material and adjust based on observed bite and thread engagement.
Factors That Influence the 'Good' Torque Value
Several variables determine the ideal torque for a given job:
- Material: Softer woods require less torque than hardwoods or metal.
- Fastener size and type: A larger fastener or self-drilling screw may need more torque, but not at the expense of stripping.
- Bit condition: Worn or worn-out bits reduce effective torque and can cause slippage or tearing.
- Surface and pilot holes: Proper pilots reduce resistance and help achieve the target torque.
- Battery health: A fresh battery can deliver more peak torque than a tired one.
- Tool design: Some models have tighter clutch thresholds; others provide smoother torque ramp.
By accounting for these factors, you’ll narrow the torque band to a safe, efficient range for each project.
Measuring and Validating Torque in Practice
Directly measuring torque with an impact driver is not always practical, but you can validate torque behavior with a torque wrench on the fastener after driving, or use a torque calibration method on a test piece. A systematic approach:
- Select a representative fastener and material.
- Drive to the initial target range using the tool’s clutch and observe bite.
- If needed, tighten in small increments until you reach the desired resistance without stripping threads.
- Remove and re-measure with a torque wrench to verify the actual torque and adjust your approach accordingly.
- Keep track of results to build a personal reference sheet for future projects.
This validation helps you translate the theoretical torque range into real-world performance that you can trust on the jobsite.
Task-Based Torque Guidelines (by Material and Fastener Type)
- Softwood or lightweight lumber: 900–1300 in-lbs (100–150 N·m)
- Hardwood or dense materials: 1100–1700 in-lbs (125–190 N·m)
- Decking screws in treated lumber: 1200–1500 in-lbs (135–170 N·m)
- Sheet metal screws: 1400–1800 in-lbs (160–200 N·m)
- Light masonry anchors: 1500–1800 in-lbs (170–200 N·m)
Note: These ranges are starting points. Always align with the fastener manufacturer’s guidelines and check tool specifications.
Safety, Technique, and Common Mistakes
Common mistakes include using too high a torque setting for soft materials, skipping pilot holes, and relying on peak torque without clutch control. To reduce risk:
- Use the clutch and start at mid-range.
- Confirm bit fit and wear.
- Work in short bursts to avoid heat buildup.
- Pause to inspect fasteners and material between operations.
Good torque practice reduces stripping, gear wear, and safety hazards on the jobsite.
Accessories and Maintaining Torque Performance
Keep torque performance consistent by maintaining accessory health:
- Inspect bits regularly and replace worn ones.
- Clean and lubricate the tool as per the manufacturer’s guidelines.
- Use the correct bit type for the fastener and material.
- Store batteries in good condition and avoid deep discharges.
- Calibrate the tool against a known reference piece periodically to track drift.
With proper maintenance, your impact driver will retain a useful torque range longer and provide reliable results for a wide range of tasks.
Representative torque ranges for common fasteners with consumer impact drivers
| Task Type | Typical Torque Range (in-lbs) | Typical Torque Range (N·m) | Notes |
|---|---|---|---|
| Wood screws into softwood | 60–180 | 0.7–2.0 | Light to medium drive |
| Deck screws into wood (softwood) | 120–300 | 1.3–3.4 | Medium drive |
| Sheet metal screws | 180–360 | 2.0–4.0 | Medium to heavy drive |
| Masonry anchors (light) | 400–700 | 4.5–7.7 | Heavy drive to seat anchor |
Your Questions Answered
What is considered a good torque range for most impact drivers?
Most consumer models perform well in the 900–1800 in-lbs range. Always check your tool’s spec and test on scrap material before final work.
Most impact drivers operate effectively between 900 and 1800 in-lbs; verify with your tool’s spec and test on scrap material first.
How do I avoid over-torquing when using an impact driver?
Use the clutch, start at mid-range, and test on a sacrificial piece before committing to the final fastener.
Use the clutch, start mid-range, and test on a scrap piece before final fastening.
Does voltage affect torque recommendations?
Voltage can influence available torque; higher-voltage models often provide broader torque ranges. Always consult the model’s specification.
Higher voltage tools can deliver more torque, but always check the tool spec.
Can I use a torque wrench with an impact driver?
Yes, for verification after driving, use a torque wrench to confirm the final torque. It’s best done on a test fastener first.
Yes, you can verify with a torque wrench after driving; use a test fastener first.
Should torque be adjusted for different materials?
Yes. Softer materials need less torque; harder materials require more. Always pilot and test, and choose the appropriate bit.
Yes—adjust torque by material, and test first.
What signs indicate incorrect torque?
Loose fasteners, stripped threads, or damaged fasteners indicate under- or over-torque. Stop and reassess before continuing.
Look for looseness or stripped threads—reassess torque before continuing.
“Torque isn’t a single number; it’s a spectrum that depends on the tool, the fastener, and the material. Start in the mid-range and adjust based on result.”
Top Takeaways
- Know your tool's torque range and start in the mid-range.
- Match torque to fastener type and material to avoid damage.
- Verify torque against manufacturer specs when available.
- Use proper clutch settings to protect fasteners and bits.
- Inspect bits for wear to maintain accurate torque.