Impact Gun with Torque Setting: A Practical DIY Guide
Learn how to choose, use, and maintain an impact gun with torque setting for automotive tasks. Get practical steps, safety checks, and torque verification guidance.

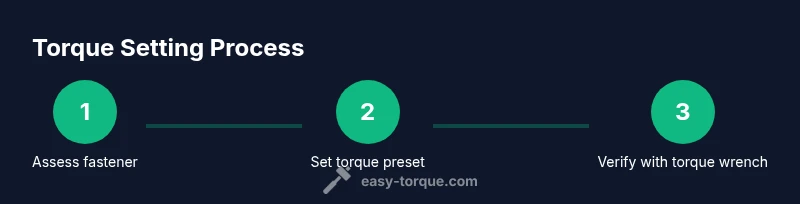
You will learn how to select and use an impact gun with a torque setting safely and accurately. This quick guide covers choosing a model with adjustable torque, applying the correct setting for common fasteners, and verifying tightness with a torque wrench. Expect practical drill-downs, safety checks, and maintenance tips from Easy Torque to keep your toolkit reliable.
Why safety matters when using a torque-setting impact gun
When you work with fasteners, especially on vehicles, safety and accuracy are non-negotiable. An impact gun with a torque setting helps you apply the right amount of torque without over-tightening, which can strip threads, warp components, or cause failures. The Easy Torque team emphasizes building a habit of pre-checks: inspect fasteners for damage, wear the appropriate eye protection, and ensure the workspace is stable. By using a controlled torque setting, you reduce the risk of slip, tool damage, and personal injury, making the job safer and more predictable. Remember that even at low settings, repetitive use without verification can accumulate issues—pause to re-evaluate if something feels off or if you’re working with unfamiliar hardware.
How torque settings work: clutch mechanisms and presets
Most modern impact guns with torque settings rely on a clutch system. When the preset torque is reached, the clutch slips to prevent further tightening. This feature protects fasteners and tools, and it creates a repeatable baseline across tasks. Different models offer variable ranges, from broad mid-range options to fine-grain presets. A key practice is to understand your tool’s clutch behavior: some guns behave like a fixed limiter, others offer progressive resistance. Always pair the tool with a calibrated torque chart and cross-check with a separate torque wrench for critical assemblies. Easy Torque recommends logging your common settings in a simple quick-reference sheet to avoid guesswork during busy jobs.
Selecting the right tool for your tasks
When selecting an impact gun with torque setting, consider battery life, weight, and compatibility with your socket drive. Cordless models offer portability, while pneumatic guns can sustain longer sessions with consistent power. Look for a model with clearly labeled torque presets, a comfortable grip, and a reliable trigger feel. Drive size matters too: most automotive fasteners use standard drives, but verify the system you’ll work with. It’s wise to choose a gun that covers a broad range of typical fasteners while still offering precise, adjustable torque for delicate assemblies. For challenging tasks, keep a trusted torque wrench on hand for final verification.
Using the tool: practical workflow for common tasks
A practical approach is to set the tool to a conservative torque first, then gradually increase only as needed. Begin by breaking loose stubborn bolts with light impact, then transition to the set torque mode to snug the fastener until the clutch begins to slip. Stop when the clutch engages consistently or when you hear a change in the tool’s tone. After using the impact gun, always verify final tightness with a calibrated torque wrench. This two-step approach prevents overtightening and ensures consistent tension across all fasteners. Easy Torque highlights the value of documenting the final torque for repeat projects, especially in maintenance cycles.
Maintenance and verification for accuracy
Maintenance is critical to preserve torque accuracy. Regularly inspect the tool for signs of wear, clean air or battery contacts, and check that the torque presets remain within tolerance. Clean any debris from the drive anvil and sockets to prevent binding. If your tool uses batteries, follow proper charging cycles and store at moderate temperatures. Verification should be part of your routine: after servicing or changing a torque setting, test on a representative fastener with a torque wrench to confirm the setting is trustworthy. Consistency is the cornerstone of reliable fastening.
Common mistakes and how Easy Torque recommends avoiding them
Common mistakes include relying solely on the gun’s torque setting without verification, using the wrong drive size, or applying torque in one continuous motion instead of a controlled, staged approach. Avoid cross-threading by starting with light engagement and ensuring clean threads. Do not torque heavily into soft materials like certain plastics without a test fit. Finally, avoid neglecting maintenance; a dirty or miscalibrated tool will not perform as expected. A disciplined approach—check, verify, and maintain—reduces errors and extends tool life.
Tools & Materials
- Impact gun with torque setting(Ensure adjustable torque presets are clearly labeled and functional)
- Socket set matching fastener drive(Choose the correct drive size and socket style for your bolts)
- Torque wrench (calibrated)(Use for final verification of critical fasteners)
- Torque chart or reference guide(Keep a current chart for your fastener types)
- Battery pack or air supply(Ensure consistent power and performance)
- Safety glasses(Protect eyes from debris and sudden tool movement)
- Work gloves(Improve grip and comfort for extended sessions)
- Lubricant or anti-seize (as needed)(Use on threads where recommended by manufacturer)
Steps
Estimated time: 45-60 minutes
- 1
Check fastener and area
Inspect the fastener threads for damage and clean the area. Remove corrosion or debris to ensure smooth engagement. Confirm that the surface is stable and that there’s adequate clearance for the tool.
Tip: If threads are damaged, replace the fastener rather than forcing it. - 2
Select the correct torque setting
Refer to the torque chart and choose a setting appropriate for the fastener and material. If in doubt, start at a conservative setting and plan to verify with a torque wrench later.
Tip: When in doubt, use the lower setting and verify afterward. - 3
Attach the correct socket
Install the socket securely on the impact gun and ensure it’s fully seated. Use the right drive size to avoid slipping or rounding off the fastener.
Tip: Verification of socket seating prevents accidental cam-out. - 4
Engage fastener with light contact
Position the socket on the fastener and apply light contact before engaging the trigger. Avoid full-power starts to prevent thread damage.
Tip: Avoid banging the socket onto the fastener—let the tool engage smoothly. - 5
Apply torque with staged bursts
Gradually apply torque using short bursts and monitor the clutch. Stop when the clutch begins to slip or you achieve the sticky feel from the mechanism.
Tip: Don’t force beyond the clutch—this is the protection mechanism. - 6
Verify with a torque wrench
After reaching the preset, check the final tightness with a calibrated torque wrench. Re-torque if needed to match the spec.
Tip: Always double-check critical fasteners. - 7
Document and repeat for similar fasteners
Record the achieved torque and apply the same setting to other fasteners of the same type for consistency.
Tip: Create a quick reference sheet for future jobs. - 8
Finish and clean up
Inspect for tool wear, clean attachments, and store equipment properly in a dry place. Ensure all fasteners are accounted for after maintenance.
Tip: Wipe down tools to prevent corrosion and keep working area tidy.
Your Questions Answered
Do I still need a torque wrench if my impact gun has a torque setting?
A torque wrench is still recommended for critical fasteners to confirm true torque and prevent over-tightening. Use the impact gun for initial seating and then verify with the wrench.
Yes. The torque wrench provides a final verification to ensure accuracy for critical fasteners.
How do I know my torque setting is accurate over time?
Regularly calibrate both the impact gun and the torque wrench. If settings drift, recalibrate or service the tools to restore accuracy.
Calibrate frequently and check against a standard torque wrench.
What should I do if the clutch engages too early or too late?
Revisit the torque chart and ensure you’re using the correct fastener type and material. If mismatch persists, inspect the gun for wear or seek service.
Check the chart and inspect the tool if timing seems off.
Can I use this setup for all fasteners in a vehicle?
Not all fasteners are suited for torque-setting guns. Use the gun for approximate tightening and reserve final torque checks for critical components.
Use the gun for most tasks, but verify with a torque wrench on critical parts.
What safety practices should I follow?
Wear eye protection, keep hands clear of the rotating socket, and work in a stable area. Maintain tools and replace damaged parts promptly.
Protect your eyes and stay aware of tool movement at all times.
Watch Video
Top Takeaways
- Know the torque range of your gun and verify with a torque wrench.
- Use staged bursts to reach torque safely and consistently.
- Maintain tool calibration and clean all interfaces after use.
- Document settings for repeat tasks to improve efficiency.