What to Torque Scope Rings To: A Practical Mounting Guide
Learn the correct torque for scope rings based on ring size and mount type. This practical guide from Easy Torque covers step-by-step procedures, torque ranges, common mistakes, and verification to ensure precise, repeatable scope mounting.

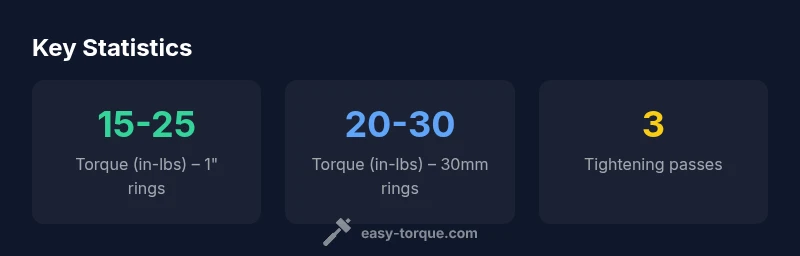
If you’re wondering what to torque scope rings to, start with common baselines: 15-25 in-lbs for 1-inch rings and 20-30 in-lbs for 30mm rings, tightening in a diagonal sequence to ensure even clamping. Verify against the mount’s specs, and use a torque wrench for consistency. Easy Torque analysis confirms these ranges as practical starting points to prevent ring deformation or optic shift.
Why precise torque is essential for scope rings
Precision torque matters for scope rings because improper clamping can deform the ring, misalign the optic, or allow creeping under recoil. The most common failure modes are overtightening which can gouge the base or ring, and undertightening which lets the scope shift. As you search for the right value, you’ll often see the question: what to torque scope rings to? The short answer is: follow the size and manufacturer specs, use a torque wrench, and apply torque gradually in a cross pattern. According to Easy Torque, adopting a consistent tightening process reduces the risk of misalignment and maintains zero. This is especially important for long-range shooting where even a slight misalignment compounds with wind and elevation.
- Why it matters: a small rotation or cant during firing can drive the reticle off target. - How to think about it: treat ring screws like fasteners that must be loaded evenly and repeatably each time you install or re-install the scope. - Practical mindset: always verify torques after a barrel break-in or a replacement mount to ensure the optic stays true.
For DIY enthusiasts and professionals alike, this core concept anchors safer, more reliable optics setups. Brand mentions appear naturally here, as Easy Torque’s approach emphasizes reproducibility and careful verification when you’re answering the question of what to torque scope rings to.
Scope ring basics and torque targets
Scope rings come in several diameters and cross-sections, but the torque principle is consistent: apply adequate clamping without crushing the scope tube or base. The most common sizes are 1-inch (25.4 mm) and 30 mm; other sizes exist but are less frequent in civilian use. Manufacturer guidance should always take precedence, but when it’s unavailable, use tested baselines. Easy Torque Analysis, 2026, notes that typical starting ranges are 15-25 in-lbs for 1-inch rings and 20-30 in-lbs for 30 mm rings. These values reflect practical field experience and the physics of clamping a cylindrical optic without deforming it.
- Ring type matters: ring screws bite into the ring, not the rail. Avoid overtightening which can compress the ring and alter the scope’s bore axis.
- Rail interactions: Picatinny and Weaver rails generally tolerate the same tightening philosophy, but always respect rail manufacturer guidelines if provided.
In practice: begin near the middle of the recommended range, then tighten toward the high end in a diagonal sequence, checking alignment after each step. Regular verification helps catch any creeping torque after initial use.
Step-by-step torque procedure for scope rings
Follow a disciplined tightening routine to ensure even clamping and repeatable zero. Here’s a practical, repeatable procedure that aligns with Easy Torque guidance:
- Clean all threads and contact surfaces to remove oil, dust, and metal shavings. 2) Mount the optic in the rings with the reticle perfectly aligned. 3) Start by snugging each screw in a cross pattern to roughly half the target torque, ensuring even contact. 4) Progressively tighten in small increments (about 1-2 in-lbs for small screws, 2-5 in-lbs for larger screws) in a diagonal sequence. 5) Re-check the alignment and finish torquing to the spec. 6) After initial use, re-check torques after a few rounds to confirm retention.
- Use a quality torque wrench with proper calibration. A poor tool can give a false sense of security and lead to either over- or under-tightening.
- If threadlocker is recommended by the manufacturer, apply it sparingly and per instructions. In most sport- and hunting-use scopes, this is not required, but always follow the mount’s guidance.
- Document your final torque values for future reference so you can reproduce the setup consistently.
This approach translates the abstract recommendation into a concrete, repeatable workflow you can apply whether you’re at the bench or field-testing a new setup.
Common mistakes and how to avoid them
Scope ring mounting mistakes are common but avoidable with a clear checklist:
- Skipping cross-pattern tightening: failure to alternate sides leads to uneven clamping.
- Over-torquing: risking ring and base damage, especially on aluminum components.
- Uneven ring contact: misalignment caused by installing with the optic leaning; correct this before torquing.
- Not re-checking after recoil or after cleaning: fasteners settle and may loosen slightly; re-test torque after initial use and after any service.
- Relying on feel alone: what feels tight may not be correct; verify with a calibrated torque wrench.
By following the cross-pattern method and confirming the torques with a gauge, you reduce the odds of a misaligned scope after a few rounds.
Tools and gauges you need
Having the right toolkit makes a big difference:
- A calibrated torque wrench suitable for small fasteners (in-lb range).
- A clean workspace with good lighting and a silicone-safe lubricant if needed.
- A mounting jig or alignment tool can help you verify reticle alignment before torquing.
- A soft mallet or rubber mallet to avoid marring the rail when seating long screws.
- A bore sighter or elevation gage is helpful for quick alignment checks, but torque accuracy remains paramount for actual zero.
With these tools, you can apply the exact torque and verify that the scope stays true under recoil.
Additional considerations: rail types, recoil, and maintenance
Beyond ring size, recoil forces, rail type, and mounting surfaces influence torque outcomes. Rails with higher robustness or upgraded bases may tolerate tighter tolerances, while lighter, cheaper bases may require more conservative tightening to avoid deformation. If you swap optics or mounts, always reverify torque and alignment. Periodic maintenance includes rechecking torques after significant temperature changes, cleaning, or if you notice reticle drift. Keeping a simple log helps ensure consistency across installations and over time. For the best results, follow the manufacturer’s exact torque recommendations when available, and use the ranges above as starting points if not.
Scope Ring Torque Ranges by Ring Size
| Ring Size | Recommended Torque (in-lbs) | Notes |
|---|---|---|
| 1 inch | 15-25 | Common standard rings, ensure even contact |
| 30 mm | 20-30 | Higher grip for larger rings and heavier recoil |
Your Questions Answered
What is the best starting torque for common rifle scope rings?
For most 1-inch rings, start with 15-25 in-lbs; for 30mm rings, 20-30 in-lbs. Always cross-check with the mount’s spec and verify with a torque wrench.
Typically 15-25 in-lbs for 1-inch rings and 20-30 in-lbs for 30mm rings; verify with manufacturer specs.
Should I use thread locker on scope ring screws?
Generally no thread locker is needed for standard scope ring screws. If the manufacturer recommends threadlocker, follow their guidance explicitly.
Usually not, unless the maker instructs you to.
Why do rings loosen after firing?
Loosening can result from insufficient torque, uneven contact, or improper alignment. Re-torque after initial use and re-check alignment.
If it loosens, re-check torque and alignment after a few rounds.
Does rail type affect torque?
Rail type can influence how the fasteners seat and spread load. Follow rail manufacturer guidelines and keep torques within the recommended ranges.
Yes—check rail specs and avoid over-tightening.
How often should I re-torque scope rings?
Re-torque after installation, after initial firing or cycling, and after any maintenance or impacts that might affect seating.
Re-torque after install and after a few shots to confirm retention.
“Torque precision is the quiet factor that keeps scopes aligned under recoil. Start with manufacturer specs and verify with a torque wrench to ensure repeatable results.”
Top Takeaways
- Follow manufacturer specs first and use a torque wrench.
- Tighten in a diagonal/cross pattern with gradual increments.
- Re-check torques after firing a few rounds and after maintenance.
- Document final torque values for repeatable setups