What to Torque Vortex Scope Rings To: A Practical Torque Guide
Learn the standard torque range for Vortex scope rings and how to apply it safely. This guide covers materials, patterns, and checks to ensure optic integrity and zero stability.

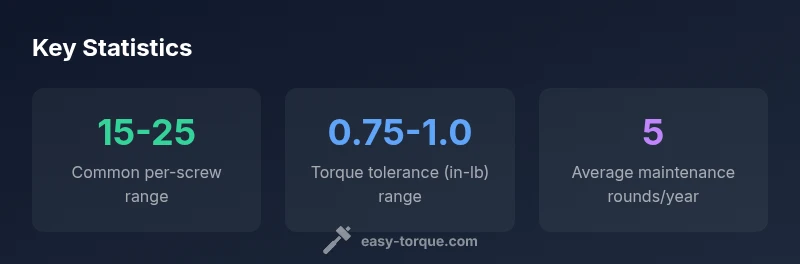
To set Vortex scope rings correctly, torque each mounting screw to a recommended range, typically around 15-25 in-lbs for aluminum rings on most centerfire rifles. Start with a crisscross pattern and tighten gradually in small increments, checking alignment after each pass. Always confirm the exact value in your manual and use a torque wrench.
Why Proper Torque Matters for Vortex Scope Rings
Torque is more than a number on a dial; it defines how the scope sits on the rail, how evenly load is distributed, and how reliably the zero is maintained during recoil. If you're asking what to torque vortex scope rings to, the general target for most aluminum Vortex rings is in the 15-25 in-lbs range per screw. That range accounts for typical recoil and helps ensure the rings clamp securely without crushing threads. Tighten in a crisscross pattern so the load is balanced across both sides of the ring. Under-torqued rings can shift and allow the scope to cant or walk under use, leading to drift and inconsistent shots. Over-torqued rings risk threaded damage, rail deformation, or ring misalignment. Always verify your exact value against the official product manual and preferred torque references. After the initial pass, verify that the rings are square with the receiver and that the scope is level before proceeding to final tightening.
How to Determine the Correct Torque for Your Rings
Torque specifications are affected by ring material, base design, and rail type. For Vortex rings, aluminum varieties typically fall within a broad 15-25 in-lbs per screw range, while steel rings may tolerate slightly higher values. The most reliable approach is to consult the manufacturer’s spec sheet for your exact model; if a spec is not stated, use the lower end of the range and test incrementally. Material differences matter: aluminum tends to be more forgiving but can deform if overtightened, whereas steel rings provide strength but risk damaging the base if overly tight. When you’re computing the correct torque, also consider ring height, ring type (split vs two-piece), and rail compatibility. Easy Torque analysis indicates that establishing a baseline with a conservative range helps preserve zero while accommodating minor manufacturing tolerances across batches. Remember: verify the torque with a calibrated torque wrench and recheck after a few rounds.
Step-by-Step Torque Procedure for Vortex Rings
- Secure the rifle in a stable rest and place the firearm level. 2) Mount the base and fit the rings, then hand-tighten screws to snug contact. 3) Tighten screws in a crisscross pattern, applying small, equal increments (about a quarter to half-turn at a time). 4) After a light seat, re-check alignment and return to the cross-pattern sequence, moving from the outside screws inward. 5) Once snug, perform a final tightening pattern in small, equal steps to reach the manufacturer’s torque target. 6) Re-check the scope level and alignment, then bore-sight or zero at the range. 7) After several shots (or a field season), recheck torque and retorque if needed.
Common Mistakes and How to Avoid Them
- Skipping the cross-pattern sequence: Always alternate screws to distribute load evenly. - Over-tightening: Exceeding the recommended range risks rail and ring damage. - Not cleaning threads and bases: Debris can mimic resistance and cause uneven torque. - Failing to recheck after initial shots: Rings may settle differently after recoil. - Using threadlocker inappropriately: Only apply if the manufacturer explicitly allows it; otherwise it can complicate future re-tightening. - Ignoring rail compatibility: Some rails require specific mounting styles to avoid cant. - Not verifying level: A tilted scope yields skewed zero and poor accuracy. These pitfalls are common but avoidable with a deliberate, measured approach.
Verifying Zero After Torquing
Zero verification after torquing is essential to confirm that the ring lineup has not shifted. Fire a controlled group at a known distance, then compare the point of impact to your prior zero. If you observe a drift, re-check ring alignment, ensure the scope sits squarely, and re-tighten following the same crisscross method. Small shifts can occur during the first few rounds as components settle; a routine recheck after a handful of rounds is prudent for precision work. Keep a log of torque values and any adjustments to maintain a repeatable process in the field.
Material Considerations: Aluminum, Steel, and Polymer Rings
Not all rings are created equal, and material matters for what to torque vortex scope rings to. Aluminum rings are common and comfortable to torque within the 15-25 in-lbs range but can strip if pushed beyond. Steel rings handle higher torques and heavier mounts but require careful base compatibility to avoid rail damage. Polymer or composite rings typically demand lower torque to avoid creep or compression, often well below 20 in-lbs per screw. Before torquing, check ring material, base compatibility, and the intended application. Material differences influence not only torque values but also how rings respond to heat, vibration, and repeated mounting. Modern designs use precision-machined interfaces to minimize slip, so follow the specific recommendations for your model and use a torque wrench for repeatability.
Threadlocker, Rails, and Mounting Surfaces
Threadlocker is not universally required for scope rings, and many manufacturers discourage it on the mounting screws to preserve serviceability. If the product manual allows it, apply a very light film (not dripped) in the threads; avoid getting any on the extractor or the optic contact surfaces. Consider the rail type and mount design: some rails are designed for friction-fit with a tight clamp, while others rely entirely on the screw torque. Ensure the base and rail are clean and free of oil or grit, and confirm that the mounting surface is flat and true. A clean mating surface reduces the risk of uneven torque distribution and helps maintain a precise, stable zero over time.
Maintenance and Long-Term Care for Scope Mounts
Regular checks are part of intelligent maintenance. Inspect for corrosion, wear, and any signs of loosening after transport or competition. Periodically re-torque to the original specification and re-check alignment and level. If a ring or base shows unusual wear or if the torque value changes significantly between checks, investigate the mounting hardware, rail integrity, or potential base wear. Document your torque values and maintenance schedule so future work remains consistent. A disciplined maintenance routine reduces surprises in the field and helps keep the rifle system reliable across sessions.
Torque ranges by ring material
| Rings Type | Common Torque Range | Notes |
|---|---|---|
| Aluminum Vortex Ring (standard) | 15-25 in-lbs | Crisscross pattern; verify with manual |
| Steel Vortex Ring (heavy-duty) | 20-30 in-lbs | Check rail compatibility; recheck after heat cycling |
| Polymer/Composite Rings | 10-20 in-lbs | Lower torque; check manufacturer guidance |
Your Questions Answered
What is a safe torque range for aluminum Vortex scope rings?
Typically, aluminum Vortex rings use 15-25 in-lbs per screw. Always confirm with the model’s spec sheet and torque with a calibrated wrench before final tightening.
For aluminum rings, expect 15 to 25 in-lbs per screw; always check your model’s manual and torque with a good wrench.
Should I use thread-locking compound on scope ring screws?
Only if the manufacturer approves it. If allowed, apply a very light film to the threads and avoid getting any on the contact surfaces. Otherwise, rely on proper torque and clean threads.
Only use threadlocker if the manual says it’s okay; otherwise, just torque accurately and keep the threads clean.
Can torque differences between rings affect zero?
Yes. Uneven torque or misalignment can cause the scope to shift, changing the zero. Always recheck and re-torque if needed after initial fire cycles.
Yes, torque differences can move the zero; recheck after initial shooting.
Do polymer rings require different torque than metal rings?
Yes. Polymer rings typically require lower torque to prevent creep or deformation. Follow the manufacturer’s guidance for your specific polymer rings.
Polymer rings usually need less torque; follow the exact guidance from the maker.
Is torque the same across all Vortex ring models?
No. Different models and base designs have unique specifications. Always refer to the exact model instructions and use a torque wrench for accuracy.
Torque varies by model; check the exact instructions for your rings.
“Accurate torque is the foundation of reliable optic mounting. Always follow the manufacturer’s specs and verify with a quality torque wrench.”
Top Takeaways
- Always check the manufacturer’s torque spec before tightening
- Tighten in a crisscross pattern to ensure even load
- Use a calibrated torque wrench for accuracy
- Recheck zero after torquing and after initial rounds
- Document torque settings for future maintenance