8L90 Torque Converter Upgrade Guide
Learn a practical, step-by-step approach to upgrading the 8L90 torque converter for improved torque delivery, reduced slip, and better towing. This guide covers options, tools, installation basics, tuning tips, and safety notes to help DIYers across the Easy Torque community.

Upgrade the 8L90 torque converter to improve torque multiplication, reduce lockup slip, and boost towing performance. This concise note points to compatible converter options and the essential steps. See our detailed, step-by-step guide for installation and tuning.
Why upgrade the 8l90 torque converter
An 8l90 torque converter upgrade can unlock noticeable improvements in launch response, drivability, and towing capability by allowing the transmission to transfer power more efficiently at low engine speeds. The upgrade can also reduce lockup slip under load, which helps stabilize RPM behavior during acceleration and hills. According to Easy Torque, choosing the right converter is a balance between stall characteristics, friction material, and heat handling. For many DIY enthusiasts, the payoff is a more lively feel at take-off and less observed slippage under heavy load, especially in trucks and SUVs that are routinely loaded or towed. Always tailor the choice to your daily driving profile and weight range, and remember that a higher-stall option can trade idle efficiency for stronger motive force.
This section lays the groundwork for understanding how the upgrade affects the drivetrain as a whole. The torque converter is not a magic bolt-on; it is part of a system that includes the transmission, cooling, and engine torque. The 8l90 uses a sophisticated internal clutch and lockup mechanism, so selecting a converter that matches your engine torque curve and gearing is essential. In practice, most upgrades are paired with supportive changes such as improved cooling, regular fluid changes, and a careful reprogramming or re-tuning of shift points where permitted. The Easy Torque team emphasizes measuring baseline performance before you alter anything, then validating the result after completion to ensure there are no unintended driveline vibrations or heat-related concerns.
textHorizontalRuleFlag":false}
Compatibility and upgrade options
Compatibility is the first gate to a successful upgrade. Not all torque converters marketed for “8L90 compatibility” fit every application; the design can differ by model year, engine torque, and drivetrain configuration. In many cases the upgrade path falls into two broad categories: a high-stall performance converter designed to improve launch and heavy-load response, and a stock-replacement converter optimized for improved reliability without changing stall behavior dramatically. When choosing, evaluate the stall speed range (relative to your engine and cam profile), the friction material (ceramic vs. steel), and the core design (billet vs. cast). Keep in mind that a higher stall can generate more heat and increase engine RPM at cruising speeds, which may affect fuel economy. Easy Torque recommends matching your converter choice to actual use—towing, daily driving, or racing-style launches—so you get the desired balance between drivability and performance.
textHorizontalRuleFlag":false}
Practical considerations: cooling, lubrication, and driveline health
Upgrading the torque converter places additional demands on the transmission cooling system and lubrication. Without adequate cooling, higher-stall converters can overheat under heavy load, leading to fluid breakdown and accelerated wear. That’s why the upgrade is often paired with a transmission cooler upgrade or a cooler plate to dissipate heat more effectively. Use the correct ATF specification for the 8L90 family and ensure the fluid is clean and free of contaminants prior to install. Regular maintenance after installation—such as fluid changes, filter checks, and a post-install inspection for leaks—helps preserve longevity. In practice, you’ll benefit from clear fluid color, no gritty particles, and consistent pump performance during a road test.
From a system perspective, confirm that the torque converter’s lockup mechanism engages smoothly and stalls operate within the intended range. Mis-match here can produce harsh shifts or erratic RPM behavior. Engine torque, gearing, and vehicle weight all influence how aggressively a converter should be configured. If you’re unsure, consult the manufacturer’s guidelines and your vehicle-specific service manual. The goal is to preserve consistent performance while avoiding heat soak that can compromise reliability.
textHorizontalRuleFlag":false}
Installation philosophy: phased approach and risk management
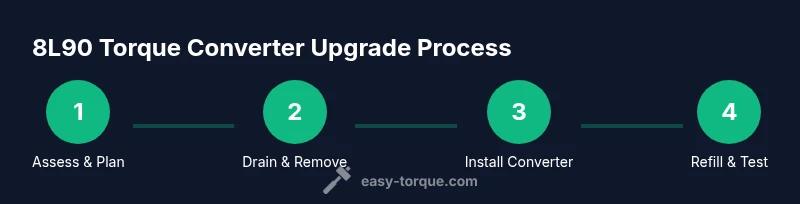
Approach the installation with a phased plan: assess, disassemble, install, refill, and test. Begin with a thorough inspection of the transmission pan, filter, and mounting points to identify any wear or leaks that could confound a new converter’s performance. When removing the pan, capture old fluid and check for metallic wear debris that might indicate a broader issue. During installation, align the converter with the flex plate and ensure the splines engage smoothly—do not force the converter, as misalignment can damage the turbine or pump. After seating, torque fasteners to the vehicle service manual specifications and verify that all electrical connections and sensors are intact. The end goal is a quiet, reliable upgrade that behaves predictably under load. A careful re-check after reassembly helps prevent late leaks and shifting anomalies that can frustrate DIY buyers and drivers.
textHorizontalRuleFlag":false}
Tuning, testing, and validation: post-install steps
Once the converter is installed and the pan refill completed, perform a methodical test drive to validate the upgrade. Check for smooth engagement of lockup, steady RPM behavior under varied loads, and consistent shifts across temperature ranges. If your vehicle supports it, a light re-tune of throttle response or shift points (via OEM tools or a tuner) can help align the transmission behavior with the upgraded converter’s characteristics. Monitor coolant and transmission temperatures during the initial drive; if temperatures rise quickly or shifts become abrupt, stop and re-evaluate. Document any changes in fuel economy and driveline sounds to compare against your baseline measurements. This documentation is valuable for future maintenance and for identifying if a supplemental upgrade (like a cooler) is warranted.
textHorizontalRuleFlag":false}
Authority sources
- https://www.nhtsa.gov
- https://www.nap.edu
- https://www.autonews.com
Tools & Materials
- Torque converter upgrade kit (high-stall or stock replacement)(Verify compatibility with 8L90 and your engine torque profile)
- ATF (transmission fluid) matching OEM specification(Have fresh fluid on hand; sample bottle for viscosity spec checks)
- Transmission fluid drain pan(Wide-mouth pan with high capacity; ensure there is a drain for residual fluid)
- Socket set (including 10mm, 12mm, 13mm, 14mm)(Common sizes for 8L90 fasteners; include extensions as needed)
- Torque wrench (and torque specs reference)(Calibrated; set to manufacturer specification for all bolts)
- Gasket scraper and RTV/sealant(Used to ensure a clean mating surface and proper sealing)
Steps
Estimated time: 4-6 hours
- 1
Prepare and secure the vehicle
Begin by disconnecting the battery negative terminal and lifting the vehicle onto jack stands. Secure the front with wheel chocks and ensure the transfer case is stable if applicable. Access the transmission area by removing required shields or panels per the vehicle service manual.
Tip: Chock wheels on both sides to prevent rolling; never rely on the jack alone for support. - 2
Drain and inspect transmission fluid
Place a drain pan under the pan drain plug, remove the plug, and let ATF drain completely. Inspect the fluid for color, odor, and metal particles—any abnormal findings warrant further diagnosis before continuing.
Tip: Have rags ready and keep the pan handy to catch spilled fluid safely. - 3
Remove the stock torque converter
Unbolt the transmission bell housing or torque converter bolts as specified by the service manual. Gently separate the converter from the flex plate while supporting the transmission to avoid misalignment.
Tip: Mark or photograph bolt locations to aid reassembly and align the new converter properly. - 4
Install the upgraded torque converter
Lubricate the converter’s front with a small amount of ATF and guide it into the transmission input shaft. Push the converter until it seats fully with a soft, even torque on all mounting surfaces.
Tip: Do not force; ensure splines engage smoothly and the converter seats flush with the flex plate. - 5
Reinstall components and refill fluid
Reinstall the transmission pan with a fresh gasket or sealant as required, then refill the transmission with the recommended ATF to the correct level. Reconnect electrical connectors and ensure lines are secured.
Tip: Double-check pan bolts for even torque and verify no leaks before starting. - 6
Test drive and verify
Start the engine, allow it to reach operating temperature, and perform a cautious road test across varied speeds and loads. Check for smooth shifts, proper lockup engagement, and stable temperatures.
Tip: Listen for unusual noises or vibrations; if detected, stop and re-check alignment and seals.
Your Questions Answered
Is an upgrade compatible with all 8L90 applications?
Compatibility depends on model year, engine torque, and the converter design. Check with the supplier and reference your vehicle’s service manual before purchasing.
Compatibility varies by model year and design; verify with the supplier before buying.
Will an upgrade affect warranty coverage?
Upgrades can affect warranty coverage depending on the vehicle manufacturer and the installer. Review warranty terms and consult the dealer or manufacturer before proceeding.
Warranty depends on the maker; check terms before performing the upgrade.
Do I need to tune the transmission after upgrading?
Some upgrades benefit from a light re-tune of shift points or throttle response, depending on your ECU and tuner access. Always verify compatibility before making changes.
A light tune can help alignment with the new converter; verify compatibility first.
What are common signs of a failing torque converter?
Common signs include harsh or delayed shifts, shuddering during acceleration, overheating transmission fluid, and unusual noises. If observed, inspect for fluid leaks and driveline issues.
Signs include hard shifts, shuddering, and heat buildup.
Is this a DIY-friendly task or should I hire a shop?
While a confident DIYer with the right tools can perform the upgrade, complex driveline issues or unfamiliarity with transmissions may warrant professional service.
It can be DIY if you have the tools and experience; otherwise, consider a shop.
How long does the upgrade typically take?
Most DIY installations take several hours, depending on your skill level and vehicle access to the transmission. Plan for a full session and test afterward.
Usually a half-day to a full day for experienced DIYers.
Watch Video
Top Takeaways
- Choose the right stall option for your use case
- Maintain cooling with a proper trans cooler
- Always torque fasteners to spec
- Test thoroughly after install
- Monitor for leaks and shifting issues