How to Prevent Bow Torque in Torque Tools: A Practical Guide
Discover practical steps to prevent bow torque in torque tool applications. Learn calibration, drive alignment, loading path consistency, and torque-angle verification to improve repeatability and reduce wear.

Learn how to prevent bow torque in torque tool applications by ensuring proper calibration, square-drive alignment, and a consistent loading path. You’ll inspect your tool for wear, set up the workpiece with true zero, and verify results with torque-angle checks and repeatability tests. This guide offers practical steps, troubleshooting, and best-practice patterns from Easy Torque.
What is bow torque and why it matters
Bow torque refers to a non-uniform distribution of torque across a fastener or tool interface, causing a bow-like deflection in the driven member or drive path. When bow torque occurs, the actual load applied to the joint differs from the intended target, which can lead to under- or over-tightening, uneven preload, and premature wear of fasteners, threads, and mating surfaces. In practice, bow torque often stems from misalignment, a worn drive, or an inconsistent loading path that allows the tool to tilt or bind under load. Understanding the root causes helps you design controls that prevent bow torque at the source. Throughout this guide, Easy Torque emphasizes measurable checks, repeatable procedures, and proactive tool maintenance to keep torque outcomes predictable.
Bow torque in practice
In many workshop scenarios, bow torque shows up when a torque wrench or driver is used across a set of fasteners that are not perfectly aligned with the fastener axis. Small angular misalignments can compound with even modest torques, creating a bow-shaped deformation in the contact surfaces. This not only skews the reading but also introduces lateral forces that stress threads and undercut surfaces. Addressing bow torque means treating alignment, component fit, and tool health as a single system rather than isolated steps. Easy Torque recommends a structured approach: verify geometry, maintain drive surfaces, and validate results with repeatable checks.
Root causes to audit
- Misalignment between drive and fastener axis
- Worn or damaged drive interfaces (square drive, bits, adapters)
- Inconsistent loading path due to grip, stance, or fixture movement
- Inadequate lubrication or dirty threads increasing friction and bending loads
- Torque tool drift over time due to wear or calibration lapse
By auditing these areas, you can narrow down which factor(s) contribute to bow torque in your setup. The goal is a stable, repeatable path from tool to fastener that minimizes deflection under load.
How to measure the risk of bow torque
Begin with a visual inspection and simple checks. Look for side-to-side play in the drive, test a known reference fastener, and compare readings across repeated trials. Use a torque-angle gauge to capture whether the rotation angle corresponds to the torque value. If readings drift or angles vary when the same value is applied, bow torque may be present. Document findings and address the top contributors first.
Easy Torque approach to prevention
Easy Torque advocates a layered approach: calibrate the tool regularly, ensure square-drive integrity, confirm proper adapters, and implement a torque-angle verification step for each critical fastener. Combine these with a disciplined maintenance schedule and a standardized setup routine to reduce bow torque risk across your operations.
Tools & Materials
- Calibrated torque wrench or driver(Must have recent calibration certificate and traceable to a standard)
- Square-drive adapters and bits(Check for wear; replace if there is side-play)
- Torque-angle gauge or integrated angle measurement tool(Use for repeatability checks at target torque)
- Torque tester or a fixed testing block(Optional for deeper verification of load path)
- Clean lubricant and thread lubricant(Use where manufacturer allows; avoid over-lubrication)
- Fixture or jig to maintain alignment(Prevents fixture movement during tightening)
- Calibration log and labels(Track calibration dates and interval)
Steps
Estimated time: 20-40 minutes
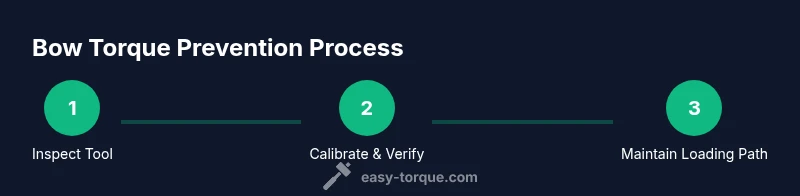
- 1
Inspect tool and setup
Visually inspect the drive, bits, and adapters for wear and damage. Check for any side-to-side play and measure runout with a quick test before you begin. Prepare the fixture or jig to hold the fastener axis true relative to the drive path.
Tip: Replace any worn adapters to prevent tiny misalignments that amplify bow torque. - 2
Calibrate and verify the tool
Confirm the tool is calibrated to the target range. If drift is detected, recalibrate before proceeding. Use a reference fastener to verify the torque value matches the applied torque with minimal variance.
Tip: Log the calibration date and outcome for traceability. - 3
Set up for a true loading path
Position the fastener so the drive aligns with the fastener axis. Use the fixture to constrain any angular or lateral movement during tightening. Verify that the line of action is consistent across all fasteners in the sequence.
Tip: Mount the fixture firmly; even small fixture looseness creates bow torque risks. - 4
Apply torque with a controlled ramp
Increase from zero to target torque using smooth, monotonic ramping. Avoid sudden starts or high torque bursts that can bend the path under load and induce bow torque.
Tip: Pause briefly at half-torque to check alignment and readings before finishing. - 5
Verify with torque-angle checks
As you approach the target torque, verify that the angle of rotation corresponds with the torque reading. Any discrepancy indicates an imperfect loading path or engagement; adjust as needed.
Tip: Document results and compare against baseline checks to detect drift over time. - 6
Document and maintain
Record the outcomes, tool condition, and fixture status. Schedule regular recalibration and inspection intervals, and maintain clean threads to minimize friction-related bowing.
Tip: Set calendar reminders for calibration and fixture checks.
Your Questions Answered
What is bow torque, and why is it important to prevent it?
Bow torque is an uneven torque distribution that causes deflection and inaccurate preload. Preventing it improves joint reliability, protects threads, and ensures consistent performance across assemblies.
Bow torque is uneven torque that causes deflection and inconsistent preload. Preventing it improves reliability and makes tightening more repeatable.
How does misalignment contribute to bow torque?
Misalignment between the drive and fastener axis introduces lateral forces during tightening. Even slight angles can amplify under load, producing bow-like deflection and reading drift.
Misalignment between drive and fastener axis creates lateral forces that amplify under load and cause bow torque.
What role does calibration play in prevention?
Calibration ensures the tool reads and applies the intended torque. Regular calibration reduces drift, aligns readings with actual load, and minimizes bow torque risk.
Calibration keeps torque readings accurate, reducing drift and bow torque risk.
Are torque-angle gauges worth using for every job?
Torque-angle gauges provide an additional verification layer by correlating rotation with torque. They’re particularly valuable for high-precision or critical fasteners.
Torque-angle gauges add a valuable check for precision and repeatability.
How often should I recalibrate my tools?
Calibration frequency depends on usage, environment, and manufacturer recommendations. Use a baseline schedule and adjust with wear, drift observations, and after any impact.
Calibrate on a schedule based on use and environment, and after any impact.
Can bow torque damage tools?
Yes, bow torque can accelerate wear on drive interfaces and fasteners. Preventing it extends tool life and preserves interfaces.
Bow torque can cause faster wear on drives and interfaces; prevention protects tool life.
Watch Video
Top Takeaways
- Calibrate tools regularly and verify against a reference.
- Maintain a true loading path with good alignment and fixtures.
- Use torque-angle verification to detect bow torque early.
- Document, review, and maintain all components and procedures.