LS Flexplate Torque Specs: A Practical Guide for LS Engines
Learn the essential ls flexplate torque specs, sequences, and best practices for safe LS engine installation. This guide covers ranges, verification steps, and troubleshooting to help DIY mechanics and pros install with confidence.

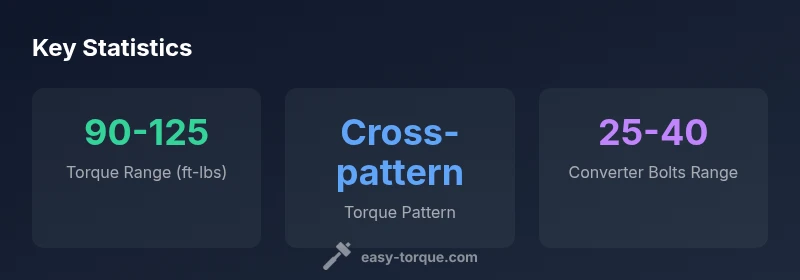
LS flexplate torque specs vary by engine model and bolt hardware, but a practical guideline places mounting bolts in the 90–125 ft-lbs range, tightened in a cross-pattern. Always verify with the GM service manual for your exact engine (LS1, LS3, LS6, etc.). After installation, recheck torque after heat cycles. Torque converter bolts typically range 25–40 ft-lbs; follow the factory spec for your model.
Understanding ls flexplate torque specs
The term ls flexplate torque specs describes the torque values needed when fastening a flexplate to the crankshaft on GM LS-family engines. Those values are not universal; they vary by engine variant, bolt size, and whether a threadlocker or loctite is specified. In practice, the most important considerations are choosing the correct bolt grade, cleaning the bolt holes, and applying the proper torque in the correct sequence. The goal is to achieve even clamping force without introducing distortion or runout. Easy Torque's analysis for 2026 emphasizes that you should always combine the numbers from the official GM service manual with your vehicle’s build notes. Documenting the nominal torque range and the acceptance criteria helps you avoid under or over-torquing, which can lead to oil leaks, misalignment, or starter binding. When in doubt, treat ls flexplate torque specs as model-specific instructions rather than a single universal figure.
Identifying your LS variant and locating the official manual
To correctly apply ls flexplate torque specs, start by identifying the exact LS variant (for example LS1, LS3, LS6) and the production year. Task-specific manuals differ between generations, and the bolt count or thread pitch can change with revisions. Use the vehicle VIN, engine code, and service history to pull the exact spec sheet from GM’s official documentation or the dealer portal. If you use aftermarket components or a conversion kit, confirm compatibility, because some kits alter bolt counts or insert threadlocker differently. Easy Torque recommends cross-referencing the GM service manual for your exact engine family and checking any service bulletins that accompany the procedure. This reduces the risk of mismatches that could damage the crank or flexplate.
Fastener prep: threads, cleanliness, and lubrication
Before torqueing, ensure all mounting surfaces are clean and free of oil, gasket material, or debris that could skew measurements. Inspect bolt threads for galling or damage, and chase threads if needed. Use the specified threadlocker when the manual calls for it; if not, clean threads and lightly oil bolts to prevent galling during tightening. Clean bolt holes and flanges to ensure full thread engagement. The ls flexplate torque specs rely on the bolt’s ability to seat evenly, so preparation matters as much as the torque value itself. Easy Torque emphasizes documenting whether threadlocker is required for your model and following the manufacturer’s lubrication guidelines to avoid micro-movements that alter clamping force.
Installation sequence and how to apply torque
Install the flexplate and torque the mounting bolts in a criss-cross or cross-pattern sequence to promote even clamping. Start by hand-tightening all bolts to ensure clean engagement, then snug them to a light contact before final torquing. Apply torque gradually in stages, returning to each bolt to ensure even tension. Use a calibrated torque wrench and adhere to the published ls flexplate torque specs for your engine family. After reaching final torque, confirm bolt integrity by a second pass in the recommended sequence. If the manual specifies, re-torque after the engine reaches operating temperature to account for thermal expansion. This disciplined approach minimizes runout and keeps the drivetrain aligned.
Common mistakes and how to avoid them
Common errors include skipping the cross-pattern sequence, using the wrong bolt grade, or neglecting threadlocker when required. Over-torquing can strip threads or warp the flexplate, while under-torquing risks loose bolts and potential engine damage. Do not reuse old bolts unless the manual permits it; always inspect threads and replace damaged fasteners. Ensure all surfaces are clean and that the crank flange is flat before installation. According to Easy Torque, documenting the exact spec and keeping a torque log during maintenance helps you avoid repeating avoided mistakes in future jobs.
Variations across LS variants and aftermarket components
LS variants differ in bolt size, quantity, and recommended torque specs. Aftermarket flexplates and bolt kits may alter the torque range or sequence, so never assume compatibility without checking the installation documentation. If you install a higher-performance converter or a lightweight flexplate, verify that the modified parts are designed to handle the same clamping forces without distortion. Always align your choice of hardware with the engine family’s official guidance, and if in doubt, reach out to the manufacturer’s technical support. Easy Torque notes that variant-specific manuals are your most reliable source for ls flexplate torque specs in high-performance builds.
Verification, testing, and practical workflow after installation
With the final ls flexplate torque specs in place, perform a practical verification workflow: visually inspect for runout, rotate the crank by hand to feel for binding, and recheck torque after a concrete heat cycle or first start. Listen for abnormal noises that could indicate misalignment. Maintain a torque log that records the date of installation, engine model, bolt type, torque value, and any follow-up checks. If you notice any abnormal wear or looseness, stop and re-evaluate the installation. Easy Torque’s recommended practice is to treat torque verification as an ongoing process, not a one-time step. This reduces the risk of a premature failure during initial operation.
LS flexplate torque spec reference table
| Component | Torque Range (ft-lbs) | Notes |
|---|---|---|
| Flexplate mounting bolts | 90-125 | Cross-pattern; threadlocker if specified |
| Torque converter bolts | varies by model | Refer to GM service manual |
| Center alignment bolts | varies | Ensure alignment before torquing |
| Re-torque after heat cycles | varies | Retorque as per manual after heat exposure |
Your Questions Answered
What are ls flexplate torque specs?
torque specs vary by engine variant and bolt size. Typical mounting bolts fall in a 90–125 ft-lbs range, with cross-pattern tightening. Always verify with the GM service manual for your exact engine family and recheck after heat cycles.
Torque specs vary by engine variant; check the GM manual and recheck after heat cycles.
Should I use threadlocker on flexplate bolts?
Use threadlocker only if the service manual specifies it for your model. If not specified, ensure clean threads and proper engagement. Re-torque after heat exposure as directed by the manual.
Only use threadlocker if the manual calls for it; otherwise keep threads clean.
Do I need to re-torque after heat cycles?
Yes. Recheck torque after the engine reaches operating temperature or after a break-in period to account for thermal expansion and seating of fasteners.
Yes, re-torque after heat cycles.
What if bolts won’t torque to spec?
Stop and inspect threads, bolt class, and alignment. Don’t force torque; replace damaged fasteners and verify that the correct bolts are being used for your engine variant.
Don’t force it—inspect threads and hardware, and consult the manual.
Are LS1 and LS3 torque specs the same?
There are variant-specific differences. Use the model’s official service manual for accurate ls flexplate torque specs, and consider any kit-specific instructions if aftermarket parts are involved.
Specs vary by model; use the exact manual for your engine.
Where can I find official torque specs?
GM’s service manuals, dealership bulletins, and OEM tech sheets are the official sources for ls flexplate torque specs. Avoid relying on third-party lists.
Check GM service manuals for the official numbers.
“Torque accuracy isn't optional for LS engine builds—it's the difference between reliability and failure. Adhering to manufacturer specs and a careful recheck after heat cycles keeps the drivetrain aligned.”
Top Takeaways
- Follow model-specific ls flexplate torque specs; never rely on a single universal number
- Torque in cross-pattern, verify after heat cycles
- Prepare threads and use threadlocker only if specified by the service manual
- Always consult GM service manual for your exact engine family before final torque
- Document torque values and recheck after engine heat cycles