LS Water Pump Torque: Step-by-Step Guide for LS Engines
A practical, step-by-step guide to torque the water pump bolts on LS engines safely and accurately, with prep, sequencing, gasket notes, and verification.

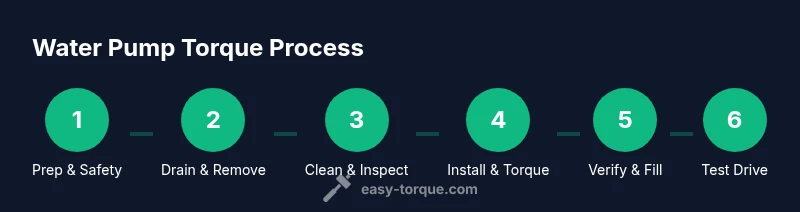
By the end of this guide you'll be able to torque the LS water pump bolts correctly, ensuring a leak-free install. You'll prep the engine bay, remove the old gasket, clean mating surfaces, then tighten bolts in the recommended sequence with a torque wrench, and verify coolant flow after the test run. Always refer to the OEM service manual for the exact specs.
Understanding ls water pump torque basics
Understanding ls water pump torque starts with the recognition that the water pump in GM's LS family is a critical coolant component. The phrase ls water pump torque refers to applying the correct clamp force to the pump mounting bolts to seal the pump to the engine block and align the pulley. Getting this right prevents coolant leaks, keeps the timing cover clean, and helps ensure the water pump bearings run without added stress.
Torque is more than snugness. It is a precise measurement that ensures the gasket is compressed correctly without overloading the pump housing. For LS engines, manufacturers typically specify a sequence and final torque value that must be applied in multiple passes while the engine is cool. Always verify the bolt threads are clean and dry before torquing, and use a calibrated torque wrench. This ensures reliable coolant circulation and long-term reliability. In this guide we reference general best practices and cite OEM manuals for exact torque figures.
Why torque accuracy matters for LS engines
The LS family uses a compact water pump that mates to the front of the block. If torque is too low, the gasket can leak and coolant can escape, which may lead to air ingress and overheating. If torque is too high, bolts can stretch or thread, risking a warped mounting surface or damaged threads. Proper torque ensures the gasket compresses evenly, the pump sits flush, and the belt and pulley align correctly. In addition, consistent torque across all bolts minimizes loads on the pump bearings and reduces vibration that can shorten service life. For DIY mechanics, paying attention to torque accuracy saves time and reduces the risk of a post-install leak that would require subsequent disassembly.
Safety and prep before you start
Safety comes first. Disconnect the negative battery cable to prevent accidental short circuits when working near the belt drive and the radiator hoses. Coolant is hazardous—drain or capture it in a suitable container and dispose of it properly. Allow the engine to cool before starting, and wear gloves and eye protection when handling coolant, solvents, and pressurized hoses. Have a clean work area, a stable engine stand or jack stands if needed, and a place to organize bolts so they don’t mix. Finally, confirm you have the correct water pump for your LS engine variant and the proper gasket or sealant as recommended by the OEM.
How torque specs are determined for the LS water pump
Torque specs are not universal; they vary with bolt size, thread pitch, and the mounting surface. The official torque specification for your engine is printed in the service manual and on the engine block or a cover label for some models. In practice, you should locate the exact spec for your engine year and variant, note the recommended torque sequence (often a star or spiral pattern), and apply the torque gradually in multiple passes. If the manufacturer calls for a two-pass approach—first snug, then final torque—follow that procedure. Lubrication plays a role: dry threads are essential for accurate torque reading; if the bolts were lubricated, the spec might change. Always re-check after heat cycling, and if you notice any resistance or abnormal noise, stop and inspect.
Pre-removal inspection and gasket decisions
Before removing the water pump, inspect the gasket and mounting surfaces. A damaged or warped surface can cause leaks even if you torque bolts to spec. If the gasket shows signs of deformation, replace it with a new gasket kit tailored to your LS engine. Clean the mounting flange and pump mating surface with a non-abrasive cleaner and a lint-free cloth. Do not use aggressive solvents that could degrade the gasket or plastic components. Keep track of the bolt lengths and positions as you remove them, because some engines use different-length bolts on specific holes. Confirm that all accessory components—belts, pulleys, and the thermostat housing—still align after removal.
A practical approach to removing and installing the water pump (narrative)
Start by ensuring the cooling system is depressurized; remove the radiator cap only after the system cools. Remove the serpentine belt to gain access to the water pump. Unbolt the pump carefully and note the order so you can reference it during reinstall. Remove the old pump and gasket, then clean the mounting surface with a solvent and wipe dry. Place the new gasket onto the pump or block per the kit instructions, align the pump, and start the bolts by hand to avoid cross-threading. This approach minimizes the risk of damage and makes the final torquing easier.
Tightening strategy: torque sequence and technique
Torque bolts in a proper sequence to avoid warping the pump. Most LS installations use a star or opposite-cross pattern: tighten opposite bolts in small increments until you approach the final specification. Do not skip steps or jump to final torque—over-tightening early can cause cracks. Use a clean, dry thread and ensure the bolts sit flush in their holes. If your motor uses multiple bolt sizes, verify you are using the correct bolts for each position. After reaching the spec, perform a light recheck after the engine has cooled for a while and again after the first heat cycle. If you observe any movement or gaps, re-torque per the OEM guidance.
Reassembly, coolant bleeding, and leak checks
With the pump secured, reinstall the belt and refill the coolant. Bleed the cooling system according to the manufacturer's instructions to remove any trapped air—the goal is to prevent air pockets that can compromise cooling. Start the engine and monitor for leaks around the pump and gasket area. Check for coolant level and top up as needed. A short test drive helps verify there are no abnormal noises and that the pump is circulating coolant properly. If you notice overheating or a continuous leak, stop and re-inspect the installation and torque on all bolts.
Authority sources and further reading
For precision, consult official service documentation and respected automotive engineering sources. The Easy Torque team recommends checking current OEM specifications for your LS engine variant and using a calibrated torque wrench. Key references: NIST, SAE, and MIT resources for torque measurement and fastener practice.
Tools & Materials
- Torque wrench(Calibrated, with an appropriate range for automotive bolts)
- Socket set and extensions(Metric sizes matching LS pump bolts)
- Drain pan and coolant(Catch and reuse or dispose of coolant properly)
- Gasket kit(New gasket tailored to your LS engine variant)
- Non-abrasive cleaner and lint-free cloths(For clean mounting surfaces)
- Gloves and eye protection(Chemical and mechanical protection)
- Serpentine belt tool or removal tool(Optional helper depending on belt routing)
- Coolant bleed tool or collectors(Helps remove air from cooling system)
Steps
Estimated time: 60-120 minutes
- 1
Prepare and safety
Disconnect the negative battery cable and allow the engine to cool. Gather all required tools and PPE, and prep a clean work area. This minimizes electrical hazards and helps keep fasteners organized.
Tip: Label bolts as you remove them to ensure proper reuse order. - 2
Drain coolant and relieve pressure
Carefully drain the cooling system into a suitable container and relieve any residual pressure before removing components. This reduces spills and spill-related burns.
Tip: Keep coolant in a designated container for recycling or disposal. - 3
Remove belt and access pump bolts
Release tension on the serpentine belt and remove the belt to access the water pump bolts. Keep belt routing notes to reinstall correctly.
Tip: Take a photo of belt routing before unbolting. - 4
Detach pump and gasket
Unbolt the water pump and carefully remove it along with the old gasket. Inspect the gasket area for damage and ensure the mounting surface is clean.
Tip: Use a plastic scraper to avoid scoring the housing or block. - 5
Prepare mounting surface
Clean the mounting flange and the pump mating surface with a clean solvent and lint-free cloth. Ensure all residues are removed and dry before proceeding.
Tip: Dry threads ensure accurate torque readings. - 6
Install new gasket and align pump
Place the new gasket and align the pump with the bolt holes. Start bolts by hand to avoid cross-threading, then snug them in a cross pattern.
Tip: Start with the center bolts before outer ones to center the pump. - 7
Torque bolts in sequence
Torque bolts in the recommended sequence from the OEM manual, using incremental passes until the final spec is reached. Do not skip steps or force the bolts beyond the designed limit.
Tip: Wipe threads clean between passes to ensure consistent readings. - 8
Reassembly and system bleed
Reinstall the serpentine belt, refill coolant, and bleed the system per manufacturer instructions. Start the engine and monitor for leaks, then top up coolant as needed.
Tip: Watch for leaks at all bolt sites and around the gasket area during the first heat cycle.
Your Questions Answered
What is ls water pump torque?
LS water pump torque refers to tightening the water pump mounting bolts to the vehicle's specified value so the pump seals properly and the pulley remains aligned. The exact torque depends on the engine year and bolt size and must be taken from the OEM manual.
LS torque is the exact tightening value for the water pump bolts, taken from your engine's manual.
Can I reuse the old gasket?
In most cases, a new gasket is recommended when replacing the water pump to ensure a proper seal. A reused gasket may compress unevenly or degrade, increasing the risk of leaks.
Usually you should use a new gasket to ensure a good seal.
What happens if bolts are under-tightened?
Under-tightened bolts can cause coolant leaks, pump movement, and potential overheating due to improper circulation. Always torque to the OEM specification to prevent these issues.
Under-tight bolts can leak and cause overheating; torque to spec.
Do I need to replace the water pump with gasket only?
Not always. If the pump shows no signs of wear and the seals are intact, you might replace the gasket only. If the pump is old, warped, or leaking, consider replacing the pump itself.
If the pump is worn or leaking, replace it; otherwise, just the gasket may suffice.
Where can I find the torque spec for my LS engine?
Refer to the official service manual for your specific LS year/variant. If you don’t have the manual, contact the dealer or use OEM literature to locate the exact bolt size and final torque value.
Check the service manual or OEM documentation for your exact bolt size and torque.
Is a torque sequence essential?
Yes. A proper sequence (often star or cross) prevents warping and ensures even compression. Follow the OEM sequence exactly as documented.
Yes, use the recommended star or cross pattern.
Watch Video
Top Takeaways
- Always consult the OEM torque specs for your LS variant.
- Torque in small increments using a cross/star pattern.
- Ensure clean mating surfaces and fresh gaskets for a reliable seal.
- Bleed coolant and verify a leak-free system after installation.
- Document bolt order and ensure proper belt routing during reassembly.