Torque Arm Suspension: A Step-by-Step DIY Guide
Learn how torque arm suspension works, how to inspect wear, and perform a safe installation and maintenance. This step-by-step guide covers configurations, tools, safety considerations, and troubleshooting for DIY enthusiasts and automotive hobbyists.

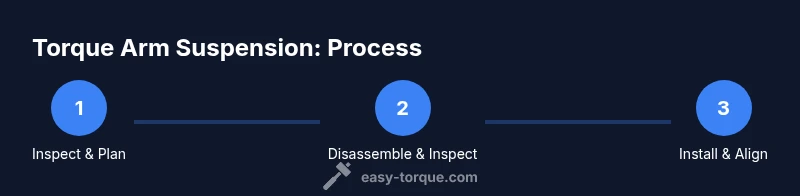
You will learn how to inspect a torque arm suspension for wear, select compatible parts, and perform a safe installation with correct alignment. The guide covers basic configurations, essential tools, safety precautions, and maintenance checks to help DIY mechanics avoid wheel hop and reliability issues. This overview also points you to detailed steps later in the article.
What is torque arm suspension?
A torque arm suspension is a rear-ended design that uses a rigid axle connected to the chassis by a torque arm to manage axle torque. As the drive wheels apply torque, the arm resists rotation of the axle housing, reducing wheel hop and squat during acceleration. In practice, the torque arm transfers a portion of the drive force to a mount on the chassis, helping to stabilize the axle geometry under load. This arrangement is common in older muscle cars and some trucks, and it is valued for its simple, predictable behavior when paired with a stable spring setup. According to Easy Torque, torque arm suspensions offer a straightforward layout and predictable handling, especially when paired with reliable springs. Understanding the basics helps DIY enthusiasts diagnose wear and plan a safe retrofit. This article focuses on inspection, installation steps, alignment considerations, and maintenance to keep the system reliable for years of service.
Throughout the guide you’ll notice practical tips and real-world examples drawn from common torque arm configurations, typical failure modes, and straightforward corrective actions.
How torque arm suspension works
A torque arm is a rigid link that attaches at one end to the axle housing and at the other end to a mounting point on the vehicle frame or subframe. When the drive wheels apply torque, the axle housing tends to rotate in the opposite direction of the wheel, which would normally twist the chassis. The torque arm resists this motion, transferring a portion of the torque into the chassis mount and reducing axle wrap. The spring(s) on the axle side absorb vertical movement, while bushings in the torque arm connection allow for small angular changes without transmitting harsh shocks. The result is a more controlled launch and more linear handling during acceleration. The exact geometry—arm length, mounting height, and bushing stiffness—defines how aggressively the system reacts to torque, and that’s why precise alignment matters.
This section also highlights how torque arms interact with other rear-suspension components, such as leaf springs, coil springs, or multi-link arrangements. In practice, the torque arm works best when paired with a compatible spring rate and a chassis that can tolerate the lateral forces generated during hard acceleration. Professionals emphasize matching the arm’s leverage to the vehicle’s weight distribution and intended driving conditions.
Benefits and considerations
Torque arm suspension systems offer several practical advantages for DIY enthusiasts. They are relatively simple to understand, cost-effective to implement on older builds, and provide predictable straight-line stability under power. When properly installed, torque arms can reduce wheel hop, control axle wrap, and improve boot-to-road interface during aggressive launches. They are especially appealing for projects that retain a solid rear axle and don’t require high degrees of articulation.
However, there are trade-offs. Torque arms can limit rear-wheel travel and cornering sensitivity on rough surfaces, especially if the arm length or bushing stiffness is not tuned for the vehicle’s weight and tire setup. Some configurations also require precise pinion angle alignment and chassis mounting points, which can complicate retrofits on modern unibody cars. Regular inspection of bushings, mounts, and fasteners is essential to prevent play that would compromise handling. Easy Torque recommends evaluating the vehicle’s overall suspension goals before committing to a torque arm retrofit, ensuring the design aligns with your driving style and road conditions.
Common configurations and applications
Torque arm suspensions are used across a range of vehicles, from classic muscle cars to pickup trucks with rear solid axles. Common configurations include a single, long arm tied to a chassis mount and a secondary spring arrangement (leaf, coil, or air) on the axle. Some builders pair the torque arm with a multi-link or trailing arm setup to regain some wheel travel while maintaining the torque-management benefits. The choice of arm length, mounting height, and bushing material can dramatically affect ride quality, noise, vibration, and harshness (NVH).
Applications vary by goals: drag racings cars favor a stiffer, longer arm to damp wheel hop, while street-driven classics prioritize a balance of comfort and stability. When planning a retrofit, verify compatibility with your vehicle’s frame layout, suspension mounting points, and available space for the arm’s path of travel. Always consult the vehicle’s service manual and, when possible, source guidance from experienced builders who specialize in torque arm systems.
Examples include retrofitting torque arms on older GM rear-drive platforms and adapting the system to convert a leaf-sprung axle to a more torque-stable configuration. The overarching theme is to tailor the arm geometry to your weight distribution, power level, and desired handling characteristics.
Tools, parts, and safety prerequisites
Before you start, assemble a clean, organized workspace with a level surface. This section lists the essential tools, replacement parts, and safety measures you’ll need for a successful torque arm retrofit. You will typically require a jack, jack stands, a stable support surface, a full socket set, metric and standard wrenches, a torque wrench, a pry bar, and a rubber mallet. Replacement bushings, mounts, and fasteners should be chosen to match the original component specifications or the updated design you intend to install. Threadlocker and anti-seize compounds are commonly used during assembly to prevent loosening and seize.
Safety considerations are non-negotiable: always secure the vehicle with stands on flat ground, disconnect the battery if you’ll be near electrical components, and wear eye protection and gloves. Inspect the mounting points for corrosion, cracks, or elongation in the bolt holes. If you discover any compromised structure, address it before proceeding. This preparation minimizes installation errors and helps ensure a durable installation.
Diagnosis and maintenance tips
Proactive maintenance is the key to long-term reliability with torque arm suspensions. Start with a visual inspection of the torque arm, mounts, and bushings for cracks, excessive play, or signs of oil seepage. Check mounting bolts for proper snugness and signs of loosening. If you detect play at the arm joint, waste no time and replace worn bushings or mounts. Listen for unusual clunks during acceleration or braking, which can indicate a loose mount or misaligned pinion angle. Periodic greasing of high-must movement points can reduce friction and NVH, but only use products compatible with the specific bushing material. Always re-torque fasteners after a short road test to confirm the assembly remains secure under load. Documentation of wheel alignment and rear suspension measurements will help you monitor changes over time and plan preventive maintenance.
Troubleshooting and common mistakes
Common missteps include neglecting proper pinion-angle setup, using mismatched bushings, or failing to recheck torque specs after components settle in. Another typical mistake is attempting a retrofit without verifying clearances between the torque arm and nearby drivetrain components, exhaust, or brake lines. Always confirm that the arm’s path does not interfere with suspension travel or body panels, and ensure the mounting brackets are reinforced as needed. Finally, avoid DIY fixes that bypass essential safety steps; never operate under a vehicle supported only by a jack, and always use rated stands on a flat surface.
Tools & Materials
- Vehicle jack and jack stands(Use on a flat, solid surface; never rely on a jack alone)
- Socket set and wrenches (SAE/metric)(Include deep sockets for tight spaces)
- Torque wrench(Use manufacturer torque specs; apply even force)
- Torque arm kit (arm, mounts, bushings, fasteners)(Match to vehicle and arm design; include compatible hardware)
- Threadlocker and anti-seize compound(Apply as directed; avoid contaminating bearing surfaces)
- Pry bar and rubber mallet(For gentle component positioning and persuasion)
- Lubricant/grease suitable for bushings(Check compatibility with bushing material)
- Measuring tools (protractor, ruler, straight edge)(Helpful for initial alignment checks)
Steps
Estimated time: 60-180 minutes
- 1
Safely prepare the vehicle
Position the vehicle on a level surface and securely lift with a jack. Place jack stands under the frame at the manufacturer-recommended points. Disconnect the battery if you’ll be near electrical components and remove any exhaust heat shields or obstacles that block access to mounting points.
Tip: Take photos of existing alignment before removing parts to guide reassembly. - 2
Remove existing suspension components
Loosen the old mounting hardware and carefully remove the components that will be replaced or relocated. Support the axle to prevent sag during disassembly. Keep hardware organized and labeled for reference during reassembly.
Tip: Mark orientation of the axle and bracket locations to prevent mix-ups later. - 3
Inspect and replace worn parts
Check bushings, mounts, and brackets for cracks, elongation, or oil contamination. Replace worn items with compatible torque-arm components. If you’re upgrading, ensure the new parts fit your vehicle’s geometry.
Tip: Set aside worn parts for recycling or proper disposal. - 4
Mount the torque arm and brackets
Position the torque arm and bracket on the chassis, aligning with factory holes or your upgraded mounting points. Hand-tighten bolts first, then snug with a wrench while maintaining proper alignment.
Tip: Use threadlocker on bolts and avoid cross-threading during initial assembly. - 5
Set initial pinion angle and arm alignment
Estimate the pinion angle relative to the driveshaft and verify the torque arm’s path clears nearby components. Adjust the arm angle within design tolerances to prevent excessive toe or camber changes under load.
Tip: A simple protractor can help verify the initial angle before torquing hardware to spec. - 6
Torque fasteners to spec and recheck
Tighten all fasteners to the vehicle’s torque specifications using a calibrated torque wrench. Recheck after a short road test to confirm nothing has shifted during settling.
Tip: Record the final torque values and any observed changes for future maintenance. - 7
Reassemble and restore connections
Reinstall any components removed earlier (exhaust, shields, lines). Ensure all electrical connectors are secure and that there is no interference with the torque arm movement.
Tip: Ensure heat shields remain in place to avoid heat-related bushing degradation. - 8
Test drive and align as needed
Perform a cautious test drive to evaluate handling, braking response, and stability. Check alignment and adjust as necessary after a few miles to account for settling.
Tip: Carry a basic alignment tool kit if you expect to fine-tune toe or camber on rough surfaces.
Your Questions Answered
What is the purpose of a torque arm in suspension?
The torque arm transfers axle torque to the chassis to reduce wheel hop and axle wrap during launches. It stabilizes the rear end by resisting rotation of the axle housing and working with the springs to control movement.
A torque arm helps keep the rear end stable by transferring torque to the chassis, reducing wheel hop during acceleration.
Can I install a torque arm on any vehicle?
Torque arms are not universal; installation depends on the chassis layout, axle type, and available mounting points. Check compatibility with your vehicle’s frame and suspension design before purchasing a kit.
Not every car can take a torque arm kit; check your frame and axle setup first.
What tools are essential for installation?
At minimum, you’ll need a jack, jack stands, a torque wrench, a full socket set, wrenches, threadlocker, and replacement bushings or mounts. Additional items depend on your specific kit and vehicle.
You’ll need a jack, stands, torque wrench, sockets, and likely new bushings.
How do you know if the torque arm is worn?
Look for excessive play at the arm joint, cracked or swollen bushings, oil contamination on mounts, or unusual clunking sounds during acceleration. Replace worn parts to restore performance.
If you hear clunks or see play or damaged bushings, replace worn parts.
Are there safety concerns with torque arm modifications?
Yes. Work with the vehicle supported on stable stands, avoid modifying critical load paths without understanding the geometry, and always torque fasteners to spec. Improper installation can compromise safety.
Yes—follow safety steps, use proper supports, and torque to spec.
How often should I inspect torque arm components?
Inspect at least every 6–12 months or after aggressive driving events. Look for wear, corrosion, and loose fasteners, and re-torque as needed after settling.
Check the parts at least twice a year or after hard driving.
Watch Video
Top Takeaways
- Understand torque arm basics and why alignment matters
- Match arm geometry to vehicle weight and power
- Use manufacturer specs for fastener torque and recheck after test drive
- Inspect bushings and mounts regularly to prevent failures
- Document steps and keep a maintenance log