How to Install Torque Arm Ebike: Step-by-Step Guide
Learn how to install a torque arm on an e-bike safely. This step-by-step guide from Easy Torque covers tools, frame considerations, mounting, alignment, and safety checks to prevent dropout torque failures.

You will learn how to install a torque arm on an e-bike, ensuring proper alignment, safe mounting, and cable management. The guide covers compatibility checks, required tools, a clear step-by-step process, and safety verifications to prevent dropout damage and improve rider safety. By following these steps, you’ll complete a robust install and validate clearance around the drive system.
What a torque arm does and why it's essential for ebikes
Torque arms redistribute the rotational force produced by the hub motor away from the dropout and into the frame. On many ebikes, the rear dropout bears the brunt of motor torque, which can lead to cracks, loosening, or wheel slip if not properly managed. According to Easy Torque, a correctly installed torque arm reduces dropout damage and improves overall ride safety. The arm should run parallel to the chainstay and transfer load smoothly into a reinforced mounting point. Proper alignment minimizes binding and helps the wheel stay true under heavy acceleration or steep climbs.
In practice, the torque arm attaches to the non-drive side dropout or the dedicated mounting point provided by your kit, depending on hub type and frame compatibility. By controlling torque, it also helps prevent sudden wheel movement that could injure the rider or damage the frame.
Frame compatibility and dropout types
Frames vary in dropout design, which affects how a torque arm is mounted. Some frames have solid dropouts, others use quick-release or through-axle designs, and a few rely on integrated reinforcement plates. Your torque arm kit may include adapters to fit multiple geometries. The Easy Torque team recommends confirming hub specifications and frame dropout type before installation. If your frame lacks a mounting point or has an unusual dropout, a specialized adapter or reinforcement plate may be required to achieve a secure, long-lasting load path.
Proper compatibility checking saves time and prevents misfit that could compromise safety. Always verify whether your kit includes the appropriate hardware for your dropout width and axle type. When in doubt, contact the kit manufacturer or consult your hub’s documentation.
Safety gear and prep steps
Begin with a clean, well-lit workspace. Put on safety glasses and wear gloves to protect hands from sharp edges and pinch points. Disconnect the battery and ensure the drive system cannot power on during installation. Remove any accessories or wheel components that might interfere with mounting. Clean the dropout area to remove dirt or old grease that could impair bolt seating. Finally, read the torque arm kit instructions thoroughly and lay out all parts in a logical order before you start.
Safety prep reduces the likelihood of injury and helps you work more efficiently. A calm, methodical approach yields a better, longer-lasting installation.
Tools, materials, and workspace setup
You’ll need a torque arm kit (arm, bracket, bolts, washers), a set of Allen wrenches, a torque wrench, threadlocker if specified by the kit, grease, safety glasses, and a clean rag. A bike stand or workshop vise makes handling the frame easier, and a small flashlight helps inspect hidden bolt threads. If your kit requires it, have adapters ready for different dropout types. Gather all items before you begin to prevent interruptions during mounting.
Pro tip: keep a dedicated container for small fasteners so nothing goes missing as you work. A dust-free workspace helps bolts seat cleanly and reduces the risk of cross-threading.
Step-by-step overview and preparation for install
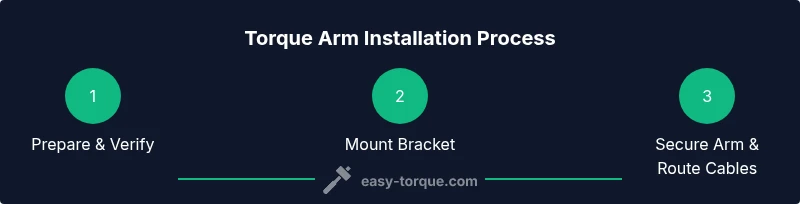
This section provides a high-level roadmap of the install process. You’ll verify compatibility, prepare the frame, mount the bracket, attach the torque arm, route any cables, reinstall the wheel, and perform final checks. Each step is described in detail in the dedicated STEP-BY-STEP block so you can follow along without ambiguity.
Having a clear overview helps you anticipate potential obstacles and plan for any frame-specific quirks, such as limited access for bolt tightening or required adapter hardware.
Mounting configurations and alignment tips
Your torque arm must align with the frame’s load path to effectively transfer forces. The arm should extend from the dropout toward the reinforced frame area without rubbing on brake discs, rotors, or cable guides. If you notice any binding or contact between the arm and the hub, recheck the mounting position and ensure the bolts are spaced correctly. Parallel alignment minimizes wobble and improves overall reliability during hard acceleration or off-road use.
Keep the arm clean and free of paint or corrosion at the contact points so bolts seat fully and threadlock (if used) adheres properly.
Cables, brakes, and clearance management
Route any wiring away from the torque arm and ensure it won’t snag on rotating parts or the wheel. Check brake caliper clearance so there’s no rubbing when the wheel spins. If you use a disc brake, confirm rotor and caliper alignment remains true after tightening the torque arm bolts. Use zip ties to secure cables neatly and avoid over-tightening, which can pinch wires or restrict movement.
Clearance is critical for long-term durability. A small misalignment can cause intermittent rubbing that wears both the arm and the frame over time.
Recheck and test ride guidelines
After installation, manually rotate the wheel to check for rubbing, binding, or misalignment. Re-torque all fasteners to the kit’s specifications and apply threadlocker if recommended. Reinstall the wheel and spin again to confirm there is no contact between the arm and frame components. Take a slow, cautious test ride in a safe area to confirm stability and smooth handling. Listen for unusual noises and stop immediately if anything feels loose.
A thorough recheck reduces the risk of on-road failures and provides confidence for a longer-term setup.
Maintenance and long-term care
Periodically inspect the torque arm mounting for loosened bolts or hairline cracks in the bracket. Re-torque as needed according to your hub’s specs and reapply threadlocker if required. Keep the contact surfaces clean, and re-grease mounting bolts to prevent corrosion. If you ever upgrade or change wheels, re-check the mounting geometry and ensure continued compatibility with frame and dropouts.
Regular inspections are straightforward, but they dramatically reduce the chance of failure during heavy riding conditions.
Common mistakes and how to avoid them
Common mistakes include misalignment, overtightening bolts, and neglecting frame compatibility checks. Always confirm the correct dropout type for your hub before purchasing a torque arm kit. Do not assume all kits fit all frames—measure and compare the mounting points against the kit’s included adapters. Finally, never skip safety checks or test rides; deliberate testing helps catch issues before you ride on public roads.
Tools & Materials
- Torque arm kit (arm, mounting bracket, bolts, washers)(Ensure kit matches dropout width and axle type)
- Allen wrenches set (metric)(Common sizes: 4mm, 5mm, 6mm)
- Torque wrench(Use to verify bolts meet kit specs)
- Grease or anti-seize compound(Light apply at contact surfaces)
- Threadlocker (blue Loctite 242)(Only if kit recommends usage)
- Safety glasses(Protect eyes from debris and pinch points)
- Rags/clean cloth(Keep workspace tidy and wipe excess grease)
- Dropout adapters (if provided)(For frames with non-standard dropouts)
- Owner’s manual or hub manufacturer instructions(Critical reference material)
Steps
Estimated time: Total time: 30-60 minutes
- 1
Prepare workspace and verify compatibility
Set up a stable bike stand and ventilated workspace. Identify your dropout design (solid, quick-release, through-axle) and confirm the torque arm kit supports your hub. Read the kit instructions thoroughly and lay out all components in a logical order before starting.
Tip: Take a photo of the dropout interface for reference during installation. - 2
Position bike and inspect dropout
Secure the bike so it won’t move during mounting. Visually inspect the dropout area; look for any cracks or existing damage. Confirm there is sufficient clearance for the torque arm path and for wheel rotation without interference.
Tip: If you notice damage, stop and assess frame integrity before proceeding. - 3
Attach the mounting bracket to the dropout
Align the bracket with the dropout mounting points and hand-tighten bolts to locate position. Ensure the bracket sits flat against the dropout with no gaps. Gradually tighten bolts in a cross-pattern to seating evenly.
Tip: Start with light torque to avoid cross-threading and realign if needed. - 4
Connect the torque arm to the bracket and hub
Slide the torque arm into the bracket or onto the hub interface as designed by your kit. Check that the arm runs parallel to the chainstay and does not rub against the frame, rotor, or brake caliper.
Tip: Verify the arm remains straight and not twisted during mounting. - 5
Secure the arm with bolts and apply threadlocker if required
Tighten mounting bolts to the kit’s specified torque values using a torque wrench. If your kit recommends Loctite, apply a small amount to bolt threads before final tightening. Recheck alignment after snugging bolts and before final torque.
Tip: Do not over-tighten; overtightening can strip threads or warp the bracket. - 6
Route cables and ensure clearance
Neatly route brake wires, sensor cables, and any motor leads away from the torque arm. Use zip ties to secure them without compressing cables. Confirm there is no contact with moving parts or the wheel during rotation.
Tip: Leave slight slack to accommodate frame flex and suspension travel. - 7
Reinstall wheel and inspect alignment
Mount the wheel back into the dropouts and spin it by hand to check for rubbing or binding. If you detect contact, adjust bracket position or re-seat bolts. Re-torque all fasteners to kit specs.
Tip: A smooth, unrestricted spin is the best indicator of correct alignment. - 8
Test ride and safety checks
Take a slow test ride in a safe area to verify stability, braking, and cornering behavior. Listen for unusual noises and check that bolts remain secure after the ride. If anything feels off, stop and reassess mounting or consult the kit instructions.
Tip: Start at low speed and gradually increase ride intensity as confidence grows.
Your Questions Answered
Do I need a torque arm on all ebikes?
Not every ebike requires a torque arm, but motor torque can stress dropouts on many hubs. Check your hub specifications and frame guidance to determine if a torque arm is advisable.
Most hub-driven ebikes benefit from a torque arm; consult your motor and frame docs.
Can I install a torque arm on carbon frames?
Carbon frames require careful assessment. If the dropout area supports mounting and the kit provides appropriate adapters, installation is possible, but avoid any mounting points that could crack the frame. Consult manufacturer guidance.
Only install if your frame supports it and the kit includes proper adapters.
What if my dropout is through-axle or uses a quick-release?
Torque arms can be adapted to different dropout designs, but you may need a specific adapter or alternative mounting solution provided by the kit or hub maker. Always verify compatibility before purchasing.
Check for adapters and clamp designs specific to your dropout type.
How do I know if the torque arm is installed correctly?
You’ll know when the arm sits firmly without play, aligns parallel to the frame, and the wheel spins freely without rubbing. After a test ride, recheck bolts for proper torque.
Look for no play, proper alignment, and a smooth wheel spin.
Do I need threadlocker for torque arm bolts?
Threadlocker is only needed if your kit specifies it. If not, ensure bolts are torqued to spec and check again after the first ride.
Only use threadlocker if the kit instructs you to do so.
What maintenance does a torque arm require?
Regularly inspect mounting bolts and bracket for looseness or wear. Re-torque as needed and keep contact surfaces clean to prevent corrosion.
Check bolts and brackets periodically and reseal if necessary.
Watch Video
Top Takeaways
- Verify dropout compatibility before installation
- Align the torque arm parallel to the frame for proper load transfer
- Follow hub/frame manufacturer torque specifications
- Test ride slowly to confirm stability and clearance
- Inspect bolts and brackets regularly for wear and loosening