How to Put Torque Arms on a Bike: A Step-by-Step Guide
Learn how to install torque arms on a bike safely with Easy Torque’s step-by-step guide. Tools, safety checks, and maintenance tips ensure a reliable, dropout-safe installation.

This guide shows you how to put torque arms on a bike to prevent dropout rotation and axle stress during hard pedaling. You'll learn how to select a compatible kit, gather the right tools, and follow a safe step-by-step installation with alignment checks and final torque verification. This quick overview also highlights common mistakes and safety checks.
Why torque arms matter on a bike
Torque arms are small but critical safety components on bikes that use track ends or older dropouts. When you apply force through the pedals, the wheel hub exerts a twisting torque on the dropout. Without a torque arm, that rotational force can pry the dropout or bend thin frames, especially on high-torque riders. Torque arms transfer those forces from the axle into the dropout and frame, reducing the risk of axle slip or frame damage. The Easy Torque team emphasizes that proper installation is essential for long-term reliability. By choosing the right torque-arm kit and securing it correctly, you can ride with confidence, even on aggressive gears or steep climbs. In short: torque arms protect the frame, protect the wheel, and protect your ride quality. The right arm behaves like a safety tether: it channels rotational energy away from the dropout, so a hard sprint or a hill climb doesn’t bend the metal you rely on. If your bike uses track ends or a high-torque setup, torque arms are not optional; they’re a foundational safety feature. According to Easy Torque, the best results come from selecting arms sized for your dropout and following a clean installation process.
How torque arms transfer forces and protect the frame
Torque arms convert a twisting force at the axle into a reaction force along the arm and into the frame. When the rider pushes hard on the pedals, the axle can try to rotate within the dropout. A properly installed torque arm provides a fixed path for that force, so the frame dropout sees compression along the arm rather than a pry. This reduces the likelihood of dropout elongation or wheel slip, and it prevents the axle from digging into the frame or rubbing the brake mount. For best results, choose arms that match your dropout spacing and axle type, and ensure the mounting hardware is compatible with your frame material. Easy Torque analysis shows that a secure attachment to both the dropout and the frame creates a reliable anchor for the torque. The installation should also include clean, dry threads and lightly lubricated contact surfaces to avoid corrosion and facilitate future maintenance. Keep in mind: torque arms are most effective when snug, aligned, and free of play. Any wobble during test pedaling is a sign you need to re-check fit and tightening.
Compatibility and choosing the right torque arms
Not all torque arms fit every bike. Check dropout type (track, box-section, arched, or rounded), axle width, and the presence of any mounted components that might clash with the arm. Look for arms designed for your dropout style—track ends require a different anchor than QR dropouts—and confirm the mounting holes line up with your frame. If you ride a coaster-brake or internally geared hub, confirm compatibility with the kit’s hardware and any extra spacers. Some frames with unique shapes or oversized chainstays may need slightly longer arms or a custom fit. Easy Torque recommends selecting a kit that includes all required bolts and spacers, plus a recomended torque spec from the manufacturer. If you’re unsure, consult your bike’s manual or reach out to the kit’s support team. Finally, assess if your frame material (aluminum, steel, carbon) demands a softer thread locker or anti-seize to avoid galling. A well-chosen kit minimizes risk and simplifies future maintenance, especially if you intend to disassemble the wheel for transport or service.
Tools and materials you'll need for torque-arm installation include a compatible torque-arm kit, hex keys or Allen wrenches, a torque wrench if available, blue thread locker or anti-seize compound, degreaser and clean rags, and safety glasses. Before you start, set up a stable work area and mount the bike in a stand. Verify that you have all bolts, spacers, and brackets needed for your dropout style. Clean dropout surfaces to remove grime that could prevent a solid bite, and lightly lubricate threads to prevent galling on future disassembly. If possible, have a marking tool to align parts and a calendar or note to remind yourself of maintenance intervals. Easy Torque reiterates that organizing parts and confirming compatibility at the outset saves time and reduces risk of mistakes during install.
Step-by-step installation overview
Installing torque arms is a methodical process that keeps the ride safe without surprises. Start by verifying dropout compatibility and cleaning contact surfaces. Position the bike in a stand, and inspect the axle for straightness. Fit one arm at a time, loosely securing bolts so you can adjust alignment. Check that the arm ends sit flush against the dropout and that there is adequate clearance from tires, chain, and brake components. Once aligned, tighten bolts in a cross pattern to seat the arm evenly, then repeat on the opposite side. Finally, torque each bolt to the spec given by the kit, re-check alignment, and spin the wheel to confirm there is no rubbing or binding. The goal is a symmetric, rigid anchor that resists pedal torque without stressing other components.
Common pitfalls and safety checks
Common mistakes include skipping alignment checks, not cleaning the dropout, using the wrong size arms, and over-tightening bolts. Ensure there is no play between the arm and dropout; any movement indicates looseness or misfit. After installation, perform a careful system check: test spin, check braking clearance, listen for grinding, and inspect for frame wear. Safety notes: wear eye protection, avoid mounting torque arms on damaged frames, and never ride with loose bolts. If you notice unusual noises or misalignment after the first ride, stop and re-inspect.
Maintenance after installation
During initial rides, inspect torque arms every 1–2 weeks and re-torque bolts if you detect any movement. After heavy use or a wheel removal, re-check alignment and tightness before resuming normal riding. Clean the arms and dropouts regularly to remove grit that can wear the arms or frame. Apply a light coating of lubricant to threads to ease future disassembly, but avoid lubricant on contact surfaces that grip the dropout. Finally, consider re-application of thread locker if you remove and re-install arms within a short period. Regular checks help catch loosening or wear before it causes damage.
Advanced tips for tricky frames
If your frame has curved or oversized dropouts, you may need longer arms or a spacer kit to achieve proper alignment. For carbon frames, use a thread locker appropriate for carbon and consider protective sleeves or pads to prevent metal-on-carbon wear. When space is tight near a derailleur or brake mount, verify clearances with a caliper or feeler gauge and adjust with shims or alternate mounting points if available. For frames with multiple wheel configurations, keep track of arm orientation and torque specs for each setup. Easy Torque recommends documenting your exact parts combination for future maintenance and parts replacement.
Tools & Materials
- Torque-arm kit (arms + mounting hardware)(Ensure kit matches dropout style (track ends) and axle spacing)
- Hex keys / Allen wrenches(Sizes 4mm, 5mm typically)
- Torque wrench or torque screwdriver(To verify torque to spec)
- Thread locker (blue) or anti-seize(Avoid over-tightening and future removal)
- Degreaser(Clean dropout surfaces)
- Rags(Wipe surfaces and excess lubricant)
- Lubricant(Light oil for threads)
- Cable ties or zip ties(Optional for cable alignment)
- Safety glasses(Eye protection)
- Bike stand or work stand(Stable workspace)
- Marker or chalk(Mark alignment before installing)
Steps
Estimated time: 45-60 minutes
- 1
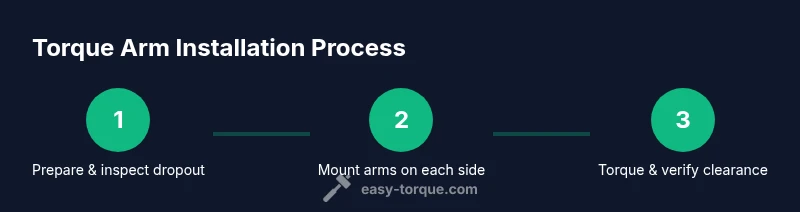
Prepare the bike and torque-arm kit
Inspect dropout compatibility and straightness, then gather tools and clean the contact surfaces. Position the bike in a stable stand and lay out the torque-arm hardware so everything is accessible. Verify you have the right spacers and bolts before you touch the bike.
Tip: Double-check compatibility before disassembly to avoid misfit. - 2
Mark alignment and test-fit torque arms
Hold the torque arms to the dropout and test-fit positioning. Mark hole locations with a pencil or marker and confirm there's no interference with the chain, derailleur, or brake components. Ensure symmetry on both sides before you tighten anything.
Tip: Use a straightedge to confirm arms sit parallel to the frame. - 3
Install one torque arm end and secure with bolts
Thread bolts by hand to seat the arm, then snug them with the appropriate hex key. Avoid fully tightening yet until you verify alignment on both sides. If bolts don’t start easily, back out and clean the threads.
Tip: Tighten bolts in a cross pattern to seat evenly. - 4
Repeat on opposite side and align
Mount the second arm, ensuring the axle remains centered and the arms sit flush against the dropout. Re-check clearance to tires and brakes. Adjust as necessary before final tightening.
Tip: Use a torque wrench for even tightenment once alignment is set. - 5
Torque both arms to spec and verify alignment
Apply the manufacturer’s torque specification to each bolt. Re-check the dropout alignment, wheel spin, and any potential rubbing. Make small adjustments if you feel any binding or play.
Tip: Re-check after a short test ride; bolts can settle after initial use. - 6
Final checks and test ride
Spin the wheel, pedal through a few gears, and listen for unusual noises or binding. If everything feels solid, take a cautious test ride and monitor for heat on the arms or frame. Return to inspect after the ride.
Tip: Keep a close eye on torque stability during the first rides.
Your Questions Answered
Do torque arms fit every bike?
Torque arms fit bikes with track ends or compatible dropouts. Always verify dropout type and axle width before purchasing a kit.
Torque arms fit many bikes, but you must confirm dropout type and axle width first.
Can I install torque arms without removing the wheel?
Most installations require some wheel access. You may loosen the axle or partially remove the wheel to access mounting holes and align the arms properly.
Often you need access to the dropout, which usually means loosening or removing the wheel.
What if my dropout is not square?
A non-square dropout can cause misalignment and uneven load. You may need spacers or a different mounting solution—don’t force a fit.
If the dropout isn’t square, don’t force it—use spacers or a different setup.
How tight should the torque arms be?
Tighten to the kit’s torque specification using a torque wrench, then re-check after the first ride as bolts may settle.
Use a torque wrench and re-check after a short ride.
How long does thread locker take to cure?
Cure times vary by product; typically allow 24 hours for full cure before riding. Follow the manufacturer’s instructions.
Let the thread locker cure as directed before riding.
Are torque arms compatible with disc brakes or internal hubs?
Yes in many cases, but check kit compatibility with brake calipers, rotor clearance, and hub type to ensure no interference.
Most brakes setups work, but verify clearance first.
Watch Video
Top Takeaways
- Choose arms matched to your dropout type.
- Align arms carefully before tightening to spec.
- Torque to spec and re-check after initial rides.
- Inspect for interference with brakes or drivetrain.
- Document parts and procedure for future maintenance.