How to Fit Torque Arms on an E-Bike: Step-by-Step Guide
Learn how to safely install torque arms on your e-bike with this comprehensive guide. Get the right tools, check compatibility, follow a clear step-by-step process, and verify alignment to protect dropouts and wheels.

You will learn how to install torque arms on an e-bike to prevent axle torque from damaging the dropouts. This quick guide covers pre-checks, the correct arm orientation, essential tools, and step-by-step mounting tips to ensure a safe, durable setup. It outlines common mistakes to avoid and verifies alignment for both rear and front installs.
How to put torque arms on ebike safely and effectively
Installing torque arms correctly is essential to prevent axle torque from spreading into the frame and damaging dropouts. According to Easy Torque, properly fitted torque arms distribute load and minimize wheel movement during acceleration and braking. In this section, you’ll learn the high-level rationale, what to check before you start, and how to plan the installation so you can complete it with confidence and safety.
Why torque arms matter in e-bike safety
Torque arms are small but critical components that help translate the rotational force generated by the motor into a safe, distributed load across the frame and fork dropouts. When an e-bike experiences torque during hard acceleration or climbs, the dropout can deform or crack if the load isn’t properly managed. Easy Torque analysis shows that well-installed torque arms reduce lateral wobble, protect the axle and dropouts, and improve overall handling. Without them, you risk accelerated wear, safety concerns, and potential warranty impacts. Understanding the physics behind torque transfer helps you appreciate why attention to detail matters during installation and ongoing maintenance.
Tools and preparation you’ll need
Before you start, gather all items and confirm compatibility with your frame. Essential tools include a torque arm kit that matches your dropout type and axle size, a set of hex wrenches (commonly 4mm and 6mm), a torque wrench, clean rags or alcohol wipes for surface prep, and safety gear. Optional items like a bike stand or a calibrating threadlocker can help but aren’t strictly required if your kit specifies otherwise. Having a stable workspace and good lighting will reduce the risk of cross-threading or missed alignment. As you prepare, review the kit’s instructions and your bike’s dropout design to ensure a clean, safe installation.
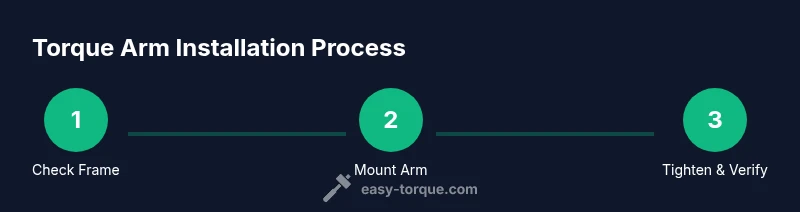
How to put torque arms on ebike: Step-by-step overview
To accomplish how to put torque arms on ebike, you’ll follow a structured sequence: verify frame/dropout compatibility, remove the wheel if needed for full access, position the arms with correct orientation, secure bolts to the proper torque, reinstall the wheel, and finally verify alignment and clearance. This overview lays the groundwork for the detailed steps that follow in the dedicated STEP-BY-STEP section. Throughout the process, keep surfaces clean, torque to spec, and check for any obvious interference with brake rotors or tire clearance.
Common mistakes and how to avoid them
A few common mistakes can compromise installation quality. Incorrect arm orientation or placing the arms on the wrong dropout side can transfer torque unevenly. Failing to torque bolts to spec, or skipping threadlocker when required, can lead to loosening over time. Not checking wheel alignment after reinstallation may cause rubbing or brake interference. To avoid these issues, double-check each step against the kit instructions, and perform a test spin with light pressure before riding. A methodical approach reduces post-install surprises and improves long-term reliability.
Maintenance, checks, and long-term care
After installation, a scheduled maintenance routine helps ensure torque arms stay effective. Inspect bolt torque and arm alignment after the first few rides and then every few weeks, or after any hard impacts. Look for signs of wear, cracking, or movement around the dropout area. Clean mounting surfaces if debris accumulates and re-torque as needed. Keeping a small log of ride conditions and torque checks can help you catch issues early and extend the life of your wheel fasteners and frame components. As you ride more, you’ll gain confidence in recognizing subtle shifts that indicate re-tightening or readjustment is needed.
Safety reminders and riding checks
Always wear eye protection and gloves during installation. Work in a well-lit area and secure the bike to a stand or wall. After installation, perform a slow roll test in a safe space before returning to normal riding. If you notice any unusual noise, clicking, or obvious movement, stop and re-check the torque arms and framing before riding again. Safety-first habits help prevent costly damage and keep you enjoying your e-bike with confidence.
Tools & Materials
- Torque arm kit (matching your dropout type and axle size)(Ensure kit supports your frame and hub axles (front/back))
- 6 mm and 4 mm Allen wrenches(Use sizes specified by your torque arm kit)
- Torque wrench(Tighten bolts to the kit’s torque spec)
- Threadlocker (medium strength)(Only use if the kit or manual requires)
- Alcohol wipes or degreaser(Clean mounting surfaces before assembly)
- Safety glasses and gloves(Personal protection during install)
- Bike stand or stable work surface(Supports stable mounting while you work)
Steps
Estimated time: 25-40 minutes
- 1
Inspect frame and dropout compatibility
Examine the dropout area for cracks or damage and confirm that the arm kit matches your dropout width and axle diameter. Verify orientation marks on the arms so you know which side goes on which dropout. This step prevents misfit and ensures the torque load is distributed correctly.
Tip: Take photos and measure dropout spacing before starting to reference during installation. - 2
Remove wheel if required for access
If the dropout area is obstructed, loosen the axle nuts or open the quick-release and carefully remove the wheel. This gives you unfettered access to the dropout faces and ensures bolts thread cleanly without cross-threading.
Tip: Keep the wheel and quick-release components organized to avoid mix-ups when reassembling. - 3
Position torque arms on the correct dropout sides
Place the left and right arms on their respective sides, aligning any notches or tabs with the frame and ensuring the arms sit flat against the dropout surfaces. Check that the arms do not clash with brake rotors, calipers, or spokes.
Tip: Use a bright light to confirm there is no gap between the arm and dropout; a snug fit here matters for load transfer. - 4
Secure arms with mounting bolts
Insert bolts and snug them by hand, then tighten diagonally to seat the arms evenly. If your kit specifies threadlocker, apply a small amount as instructed and let it set per the product guidelines.
Tip: Avoid cross-threading by starting bolts straight and keeping steady pressure as you tighten. - 5
Reinstall wheel and verify clearance
Mount the wheel back into position and spin slowly to check for any rubbing between the arm, tire, or rotor. Ensure there’s at least a small clearance and that the bolt heads don’t protrude into moving parts.
Tip: If you notice rubbing, readjust arm position and re-tighten to spec. - 6
Tighten to final torque and perform a test ride
Using a torque wrench, tighten all bolts to the manufacturer’s specified torque. After ensuring everything is snug, take a short, controlled test ride in a safe area to confirm stability and absence of abnormal noises.
Tip: Document the final torque values you used for future maintenance.
Your Questions Answered
What are torque arms and why are they important on e-bikes?
Torque arms are hardware that transfer motor-induced torque from the dropout to the frame, preventing dropout deformation and wheel movement. They’re essential on many e-bikes to protect frame integrity and ensure safe handling.
Torque arms transfer motor torque to the frame, protecting the dropouts and improving stability. They’re essential for safe e-bike operation.
Can I install torque arms without removing the wheel?
Some setups allow installation with the wheel in place, but many installations require wheel removal for full access and proper alignment. Follow your kit’s instructions and consider removing the wheel if needed.
Often you’ll need to remove the wheel to install torque arms correctly, but always follow the kit guidance.
How do I know which size torque arms I need?
Check your dropout width, axle diameter, and fork/frame design. Use a torque arm kit that matches those specs to ensure proper fit and load transfer.
Match the arm kit to your dropout width and axle size for a proper fit.
What are common mistakes when installing torque arms?
Common mistakes include wrong orientation, loose bolts, and skipping threadlocker when required. These can allow movement or damage during riding.
Wrong orientation and loose bolts are common mistakes to avoid.
Are torque arms compatible with all dropout designs?
Most standard dropouts work with torque arms, but some frames may require specialized arms or adapters. Always check manufacturer guidance for your frame.
Most frames are compatible, but some unusual designs need special arms.
How often should I inspect torque arms after installation?
Inspect after the first few rides and then every few weeks or after a noticeable impact. Re-torque bolts if you detect looseness or movement.
Check bolts and alignment after initial rides and periodically afterward.
Watch Video
Top Takeaways
- Inspect compatibility before mounting torque arms.
- Align arms to the correct dropout sides for even load transfer.
- Tighten bolts to spec with a torque wrench and verify with a test ride.
- Re-check alignment and clearance after initial rides.