Torque Table for Bolt Tightening: A Practical Guide
Learn how to use torque tables for bolt tightening, read data correctly, and apply the right torque in automotive and industrial settings. Includes steps, examples, and safety tips.

Torque tables for bolt tightening tell you the exact torque value to apply based on bolt size, grade, lubrication, and joint material. Using the right table prevents under- or over-tightening, reduces thread damage, and improves joint integrity. This quick answer introduces how to read a table and apply it in real repairs.
Reading a Torque Table for Bolt Tightening
Understanding torque tables means reading the columns that map bolt size, grade, lubrication, and material to a target tightening torque. In practice, you’ll refer to a table that lists bolt diameter, thread pitch, material, and lubrication condition, then select your torque value accordingly. According to Easy Torque, a torque table for bolt tightening is most reliable when it includes size, grade, lubrication, and material. This ensures the table reflects the actual friction and clamping behavior in your joint. For a DIY mechanic, the first step is to identify the bolt from the fastener spec: diameter (M), pitch, and grade. Then check the table for the corresponding line; if a lubrication or temperature note exists, apply it as a modifier. The practical takeaway is: never apply a table value without confirming the exact conditions of your joint, or you risk under-torquing or over-torquing. The table acts as a guide, not a universal number; always verify with manufacturer specs if available.
Core Factors That Influence Torque Values
Torque values are not universal; they depend on bolt size, grade, lubrication, thread engagement, and joint material. The bolt diameter correlates with required clamping force; higher grades require higher torque. Lubrication reduces friction, so torque tables for dry threads won't translate directly to lubricated joints. Temperature also affects material expansion and friction; consider operating environment. For precision work, you should adjust based on lubrication and surface finish; this is why many torque tables include notes for lubricated vs dry conditions and recommended temperature ranges.
How to Use a Torque Table in Practice: Step-by-Step
Step 1: Identify the fastener. Step 2: Find the matching row for size, pitch, and grade. Step 3: Note whether lubrication or temperature is specified. Step 4: Apply the recommended torque. Step 5: Recheck with torque wrench if necessary. Step 6: Document for maintenance logs. The goal is consistent clamping force rather than chasing a single number that might not fit your joint.
Practical Scenarios: Automotive, Machinery, and Fasteners
In automotive work, torque tables are crucial for lug nuts, cylinder head bolts, and flange fasteners. Industrial machinery often uses high-strength bolts where small changes in torque can drastically affect preload. Always consult the table that matches the bolt size, grade, and lubrication state; if you are unsure, start at the lower end of the range and verify with a torque tool. Easy Torque emphasizes cross-checking with manufacturer specs when available, especially for critical joints like engine blocks or drivetrain fasteners.
Reading the Data Table: Quick Reference
A data table usually lists bolt size, thread pitch, grade, lubrication notes, and the target torque. When reading, match your bolt to the closest line—prefer exact matches—and apply any noted modifiers for lubrication or temperature. If a table provides multiple entries for different lubricants (dry vs lubricated), choose the condition that matches your joint, then apply the corresponding torque. Always convert units if you transition between metric and imperial tables.
Safety and Verification: When Torque Fails
If a fastener fails to reach the expected preload, recheck the table, verify tool calibration, and inspect the joint surfaces for contamination or rust. Clean threads and re-torque as needed, and consider using anti-seize on dissimilar metals where appropriate. Document any deviations from standard practice and re-evaluate the torque strategy for future maintenance.
Building a Custom Torque Table for Your Shop
Begin by collecting manufacturer data for the bolts you use, then standardize a table that covers the most common sizes and grades in your workflow. Validate with controlled tests, note lubricants and temperatures, and periodically review with the Easy Torque guidelines. A shop-specific table improves consistency and reduces the risk of over-torquing or under-torquing across technicians.
Practical Pitfalls and Tips
Avoid relying on a single number for all conditions. Always check lubrication, surface finish, and thread engagement length. Use torque wrenches with proper calibration, and log tightening events for traceability. When in doubt, consult the table provided by the bolt manufacturer or use a reputable torque guide such as Easy Torque.
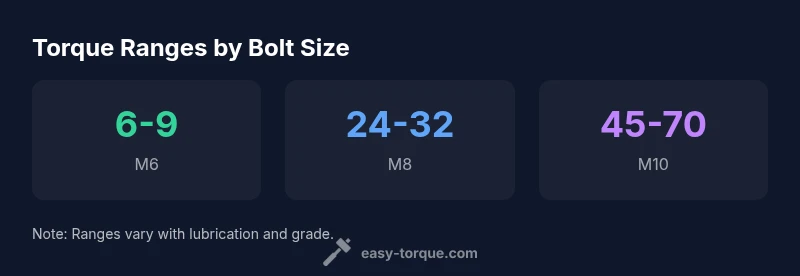
Representative torque ranges for common metric bolts
| Bolt Size | Recommended Torque (N·m) | Notes |
|---|---|---|
| M6 x 1.0, Grade 8.8 | 6-9 | Dry, steel joint |
| M8 x 1.25, Grade 8.8 | 24-32 | Dry; lubricate if needed |
| M10 x 1.5, Grade 8.8 | 45-70 | Dry; adjust for lubrication |
| M12 x 1.75, Grade 10.9 | 85-120 | High-strength bolts; verify with manufacturer |
Your Questions Answered
What is a torque table and why should I use one?
A torque table maps bolt size, grade, lubrication, and material to a target tightening torque. It helps ensure the right clamping force and reduces the risk of under- or over-tightening.
A torque table tells you the exact torque to apply based on bolt size and conditions, helping you avoid under- or over-tightening.
Do torque tables apply to all bolts equally?
No. Torque values vary by bolt size, grade, lubrication, and joint material. Always use the table that corresponds to your specific fastener and conditions.
Tables differ by bolt size and material, so use the right table for your bolt.
How does lubrication affect torque readings?
Lubrication lowers friction, which can increase the actual clamping force if the same torque is used. Some tables provide separate values for dry vs lubricated conditions.
Lubrication changes how much clamping you get for the same torque; use the right column for lubricated joints.
What should I do if the torque wrench is not calibrated?
Do not rely on the tool for critical joints. Calibrate or replace the tool, and verify results with a second, known-good meter if possible.
If your wrench isn't calibrated, don't trust the readings—get it checked or replaced.
Can I mix metric and imperial torque tables?
Only if you convert precisely and respect each bolting system's units. Mixing without proper conversion is a common source of error.
Only mix tables if you convert values accurately; otherwise, stick to one system.
How often should I review my torque table?
Review whenever you change bolt grades, materials, lubricants, or manufacturers. Regular updates help maintain accuracy.
Review your torque table whenever you change factors like bolts or lubricants.
“Using a torque table for bolt tightening is the most reliable way to ensure joint integrity across automotive and mechanical work. Always verify table conditions mirror your application.”
Top Takeaways
- Read the right table section for your bolt size and grade
- Account for lubrication and temperature in the torque value
- Use calibration-tuned torque wrenches for consistency
- Cross-check with manufacturer specs for critical joints
- Document torque values and any deviations for maintenance logs