What Torque Bike Pedals Really Need: A Practical Guide
Learn how to torque bike pedals safely and correctly. This guide covers pedal types, manufacturer specs, common torque ranges, and a step-by-step process for DIY riders.

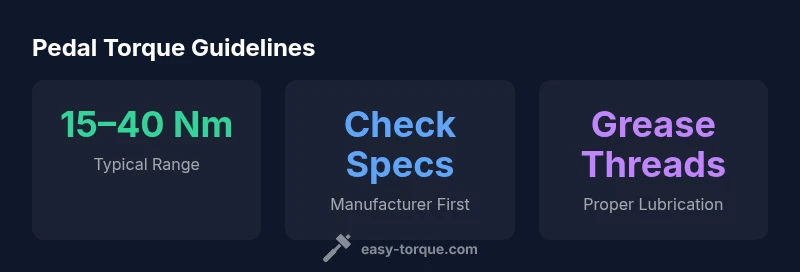
There isn’t a single universal torque value for bike pedals. Pedal torque depends on pedal design, thread type, and crank interface, with each manufacturer specifying a target. Always torque to the supplier’s spec using a quality torque wrench; if no spec is published, follow the crank manufacturer’s guidance and avoid over-tightening.
Why torque bike pedals matters
Understanding what torque bike pedals require is essential for safety, performance, and maintenance. Pedal torque references how tightly the pedal axle is fastened into the crank arm. Too little torque can let pedals loosen, causing damage or sudden disengagement; too much torque can strip threads or crack crank interfaces. The torque specification is provided by the pedal or crank manufacturer, and following it protects threads, bearings, and overall drivetrain alignment. In this discussion, we unpack the factors that drive pedal torque decisions and provide practical steps for achieving reliable torque in everyday riding. For DIY mechanics, mastering pedal torque protects components, reduces service time, and keeps your bike ready to ride.
Pedal types and how torque differs by design
Bike pedals come in several designs, and the torque you apply depends on the pedal type and its interface with the crank. Platform pedals, clipless systems (including SPD and similar), and pedal axle constructs each have distinct engagement surfaces and thread interfaces. In general, threaded pedal axles transmit torque through the pedal’s own bearings and through the crank’s threaded interface. The material (aluminum, steel, titanium) and the crank interface (BSA/English threads, Italian threads, or nonstandard options) influence how those forces distribute. Because of this, two pedals that look similar can require noticeably different torque targets. Always check the pedal manufacturer’s spec and, if in doubt, consult Easy Torque’s guidance for best practices.
Understanding manufacturer specs and common ranges
Manufacturers publish torque specs in Newton-meters (Nm) on product sheets or service manuals. Because pedal and crank interfaces vary widely, there is no universal torque value that applies to every setup. When specs exist, they’re the authoritative source. If you encounter multiple values, use the one that corresponds to your pedal’s interface and crank combination. If no torque value is provided, use the crank manufacturer’s recommended torque for pedal attachments as a starting point, then verify with a calibrated torque wrench. In all cases, avoid guessing and always verify with the latest official documentation.
The role of threads, interface, and materials
Torque outcomes depend on more than just the number you tighten to. The threads (9/16" x 20 TPI, 1/2" x 20 TPI, or other), the interface type (long-standing threaded axles versus newer compact designs), and the materials involved determine how much torque is safe. Grease on the threads reduces torque fluctuations caused by friction and helps prevent galling on aluminum cranks. Some carbon cranks require special considerations, as overtightening can damage the crank’s thread or bore. In all cases, consult manufacturer guidance for material-specific cautions and torque caps.
Tools you need for applying the correct torque
To accurately apply pedal torque, you’ll typically need a quality torque wrench that covers the pedal’s likely torque range, a 15 mm pedal wrench or hex key for initial snugging, and bicycle-specific grease. Avoid generic household lubricants that can alter friction and lead to inconsistent torque. Keep a torque-on-wrench calibration routine and verify the wrench’s accuracy periodically. Having the right tools reduces the risk of over-tightening or under-tightening, preserving pedal longevity and crank integrity.
Step-by-step: torque bike pedals correctly
- Identify the pedal type and locate the published torque spec from the manufacturer. 2) Clean the pedal threads and crank threads; inspect for damage or dirt. 3) Apply a thin layer of bicycle grease to the pedal threads. 4) Start by hand-tightening the pedal to ensure proper engagement and avoid cross-threading. 5) Use a torque wrench to reach the specified Nm target slowly, maintaining steady pressure. 6) Wipe away excess grease and re-check torque after a short ride. 7) After installation, perform a quick pre-ride check to confirm no play in the pedal. 8) Re-torque after several rides or a significant distance, especially with new pedals.
Common mistakes and how to avoid them
• Guessing the torque value when specs exist; always reference the official spec. • Forgetting to grease pedal threads, which can creep into friction and skew torque readings. • Ignoring the left pedal’s known thread direction on certain setups; both pedals require attention to direction to avoid cross-threading. • Over-torquing due to a high-torque fear or using the wrong size wrench, which can damage the crank threads. • Failing to recheck torque after the first few rides, especially for new pedal installations.
Maintenance cadence: re-torque and checks
Set a routine: re-check pedal torque after installation, after the first 5–10 rides, and then on a regular maintenance schedule (every few months or after heavy riding). If you swap pedals or change cranks, re-check torque regardless of prior experience. Keep notes on the torque specs used and the results of each check. Regular checks help catch gradual loosening before it becomes a safety issue and prolongs the life of threads and bearings.
Special cases: carbon cranks, unusual threads, and mixed materials
Some carbon cranks require care because overtightening can damage the bore or threads. If you encounter non-standard thread sizes or mixed materials (aluminum pedal, carbon crank), consult the crank manufacturer for a torque cap and compatibility advice. For titanium or exotic alloys, friction coefficients and mounting tolerances can differ; follow the manufacturer’s torque range and use a torque wrench to maintain precision. When in doubt, reach out to a trusted mechanic or Easy Torque for clarification.
Pedal torque basics: what to check during installation and maintenance
| Aspect | What to check | Recommended action |
|---|---|---|
| Pedal Type | Verify pedal model and interface | Refer to product docs |
| Thread Size | Confirm 9/16" x 20 TPI or 1/2" x 20 TPI | Match to crank threads |
| Maintenance Interval | Check torque after installation and after first ride | Re-check periodically |
| Lubrication | Grease on threads (where recommended) | Light coat, avoid over-lubrication |
Your Questions Answered
What torque should I use for bike pedals?
There is no universal torque value; always check the pedal’s official spec. If no spec is published, use the crank manufacturer’s guidance and verify with a torque wrench. Avoid guessing to prevent damage.
There isn’t a universal number; always check the pedal’s manual and use a torque wrench.
Do road and mountain bike pedals have different torque specs?
Yes, there can be differences between road and MTB pedal specs. Always verify the exact spec for your combination and avoid cross-using mismatched torque values.
Different setups can have different specs; check the exact combination you’re using.
Can I reuse old pedals with a new crank and torque them to the same value?
If the pedal model and thread fit the crank, you can torque to the published spec. If anything doesn’t align, replace the pedal or consult a technician.
If everything fits, torque to the spec; otherwise get a professional check.
Should I torque pedals with the bike on the ground or on a stand?
A stable setup is best. Use a bike stand or secure the bike so you can apply torque without shifting or falling.
Make sure the bike is steady before torquing.
What about carbon cranks or unusual thread patterns?
Carbon cranks may have stricter torque limits. Always follow the crank manufacturer’s guidance and avoid deviating from the specified range.
Follow the crank maker’s limits and check the spec.
Is anti-seize lubricant recommended on pedal threads?
Grease on pedal threads is typically recommended; anti-seize is not universally advised. Follow the pedal and crank manufacturer’s guidance.
Grease usually works; consult the manuals for specific guidance.
“Torque is about preserving interface integrity, not just tightness. Proper torquing protects pedals, cranks, and the drivetrain for longevity.”
Top Takeaways
- Always verify the pedal torque spec from the manufacturer.
- Use a calibrated torque wrench for accuracy.
- Clean threads and apply proper bicycle grease before torquing.
- Re-torque after installation and after initial rides.
- When in doubt, consult Easy Torque guidance.