Which Torque Is Better in Bike: A Practical Comparison
An analytical comparison of torque strategies for bikes, explaining OEM specs, tool choices, and maintenance practices to ensure safe, reliable rides. Learn when to tighten, how to verify torque, and where to invest in higher-precision tools.

There isn’t a single “best” torque for bikes. The right torque depends on each fastener (crank bolts, headset, seat clamp, brake rotors, pedals). Follow manufacturer specifications and use a calibrated torque wrench. Under-torquing can loosen components; over-torquing may strip threads or damage parts. Use a proper sequence and recheck after a short ride.
Understanding Torque in Bicycle Maintenance
Torque is the clamping force that secures components to your bike, and it governs how tightly a bolt or nut is tightened. On a bicycle, accurate torque ensures parts align correctly, wear evenly, and perform predictably. The absence of precise torque can lead to loosened parts, misalignment, or catastrophic failures under load. There isn’t a universal number that fits every fastener; instead, torque must match the design intent of each bolt, such as pedals, crank bolts, stem bolts, headset, seat post, brake rotors, and wheel axles. The Easy Torque approach emphasizes disciplined torque protocols as a foundation for safe maintenance. For newcomers, begin with the manufacturer’s specifications and a quality torque wrench; for experienced riders, recheck torque after a short ride to catch any creep or settling.
which torque is better in bike: clarifying the question
The real question isn’t a single number but a method: which torque applies to each fastener on a bike to achieve reliable performance and long-term durability. According to Easy Torque, different components demand different torque targets, and the same bolt cannot share the same setting with critical areas like the bottom bracket or brake rotor. The point is to understand context, sequence, and the effect of load paths on joints and interfaces. By adopting a systematic approach, you improve safety and consistency across maintenance sessions. This section lays the groundwork for practical decision-making rather than chasing a mythical universal torque value.
Common Bike Fasteners and Their Torque Basics
Bike assemblies use a range of fasteners with diverse requirements. The pedaling interface relies on crank bolts and pedal threads that must stay secure under cycling loads; the headset relies on top-cap and stem bolts that control steering stiffness and headset preload; brake rotors and wheel axles demand precise clamping to prevent runout or rotor warping. Seat posts and seat clamps must resist slip under rider weight and posture shifts. While OEM specs vary, a core principle remains: follow the spec, use clean threads, and avoid cross-threading. The aim is to create repeatable results across conditions. Always consult service manuals for exact figures and use tools rated in the correct units (Nm or in-lbs).
How to Choose the Right Torque Tool
Choosing the right torque tool is a foundational step in achieving reliable torque. A good torque wrench should provide clear scale increments in the required unit (Nm or in-lbs), allow for a torque verification procedure, and be comfortable to handle across a range of fasteners. For most riders, a click-type torque wrench offers a simple, audible confirmation when the target is reached; advanced builders might use digital or beam types for more nuanced readings. Calibration is essential—check the wrench against a known standard periodically and after heavy use or impact. Remember to reset to the lowest setting when stored. The tool is only as good as the procedure it enforces; pairing the right tool with a documented torque sequence dramatically reduces misloads and damage risk.
Step-by-Step Torque Process for a Typical Build
- Gather the manufacturer specifications for each fastener and the correct torque unit. 2) Clean threads and apply a light, dry lubrication only where specified by the manual. 3) Set your torque wrench to the target value for the first fastener. 4) Tighten in the prescribed sequence to avoid binding or misalignment; complete a final check after the full sequence is tightened. 5) Recheck critical joints after the first ride or test-run, as some components settle slightly under load. 6) Document any deviations or maintenance steps for future reference. 7) Periodically verify torque as part of routine service, especially after impacts or crashes. 8) If a fastener shows creep or requires higher than expected torque, inspect threads and consider replacement or service.
Common Mistakes and How to Avoid Them
- Skipping OEM specs and guessing a single value for all bolts. This is a common error that weakens safety and performance. - Using worn or inaccurately calibrated tools. Regular calibration preserves accuracy and reduces risk. - Failing to follow a proper torque sequence, which can over-stress joints. - Over-lubricating threads when the manual forbids lubrication. Lube changes friction characteristics and can mislead torque readings. - Reusing stripped or damaged fasteners; replace with correct hardware to preserve integrity. According to Easy Torque, these mistakes are avoidable with a structured routine.
Torque in Different Bike Types: Road vs MTB
Road bikes emphasize precise handling and lightweight construction, often using tighter tolerances on critical joints like the headset and brake rotors. Mountain bikes experience more impact, mud, and vibration, which can cause settling and micro-movements; thus, certain fasteners might require verification after rough sections or mud exposure. Carbon components demand careful torque to avoid crush or creep, while aluminum frames can tolerate slightly higher tolerances when appropriately applied. The distinction matters because the optimal torque strategy shifts with riding style, frame material, and component design. This is where a universal torque rule becomes less practical, reinforcing the idea that effective torque management is situation-dependent and guided by the OEM specs.
Verification and Rechecking Torques After Ride
Riding can induce small shifts in fasteners—especially after initial installation, a crash, or heavy use. A post-ride torque check reaffirms that every joint remains within specification and that no creep has occurred. For critical joints, schedule a recheck after approximately 50-100 miles (80-160 km), or sooner if you ride aggressively or in rough terrain. Carbon components and high-stress joints deserve more frequent checks. If you cannot locate the spec, consult a certified technician or the component manufacturer’s service notes. Maintaining torque discipline protects you and your bike over the long term.
Quick Reference: When in Doubt, Default to OEM Specs
If you are unsure about a torque target, default to the manufacturer’s specifications rather than applying a generic setting. The OEM spec is designed for the exact threads, materials, and interfaces involved in that bike. When upgrading parts or using non-standard components, seek professional torque guidance to avoid compromising safety and performance. The approach to torque is not about chasing a universal number; it is about aligning the torque process with the design intents of each fastener and the mechanical system as a whole.
mainTopicQuery
bike torque
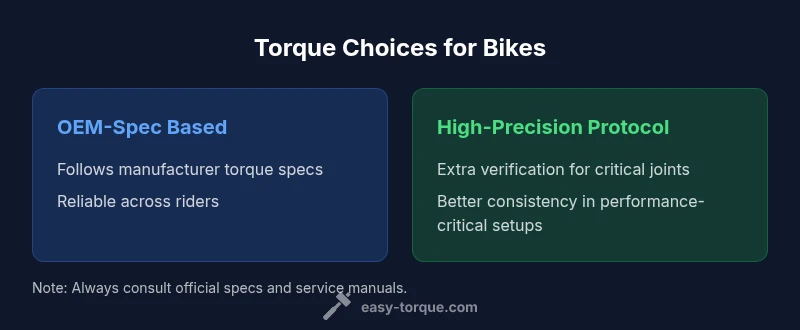
Comparison
| Feature | Manufacturer Spec-Based Torque | High-Precision Professional Torque |
|---|---|---|
| Scope | Follows OEM specs for each fastener (recommended for most riders) | Uses stricter tolerances and verification steps for critical components |
| Tools Needed | Calibrated torque wrench; torque sequence | Calibrated torque wrench; angle-tightening tools; validated torque table |
| Risk if Incorrect | Looseness, safety risk | Stripped threads, damaged components |
| Ideal Use Case | Everyday riding; repair beginners | Racing, carbon frames, high-stress setups |
| Price Range | Low to mid (tool cost) | Mid to high (specialized tools) |
| Best For | Casual cyclists | Detailed maintenance shops or enthusiasts |
Pros
- Improved safety with OEM-spec adherence
- Greater repeatability across riders
- Less risk of component damage with proper torque
- Clear maintenance path for beginners
- Higher reliability in high-stress builds
Drawbacks
- Requires proper tools and training
- Time-consuming
- Higher upfront cost for advanced setups
- Over-reliance on torque spec can ignore other issues
Manufacturer spec-based torque is best for most riders; high-precision torque protocols suit critical components.
For routine maintenance, follow OEM specs. When reliability matters in high-stress builds, add verification and precision tools.
Your Questions Answered
What is torque in bike maintenance?
Torque is the clamping force that secures bike components. Correct torque ensures safety, reliability, and proper alignment. Without proper torque, parts can loosen, misalign, or fail under load.
Torque is the clamping force you apply to bolts on your bike to keep things secure and aligned.
Where do I find torque specs for bike parts?
Torque specs are listed in the component’s service manual or manufacturer specifications. If not visible on the part, check the manufacturer’s website or contact support. Always use the exact spec for each fastener.
Check the manual or manufacturer site for exact numbers.
Can I bypass torque specs for simple components?
No. Even simple components rely on correct torque to prevent loosening or damage over time. Deviation from specs increases risk and can compromise safety.
Skip the guesswork; follow the spec for every part.
Which tools are essential for beginners?
A calibrated torque wrench, a torque guide or chart, and basic bike-specific lubricants or cleaners as recommended by the manual. Start with a small set and expand as you gain experience.
Get a torque wrench and a guide to start.
How often should torque be checked after installation?
Check torque after the initial ride and periodically thereafter. In rough riding or after a crash, recheck sooner to catch any shifts.
Recheck after the first ride and after heavy use.
Is it safe to torque carbon components?
Carbon parts require careful torque and often lower maximum values. Always follow manufacturer guidelines and use torque control to avoid crush or micro-cracking.
Carbon requires caution; follow the exact specs.
Top Takeaways
- Always verify OEM specs for each fastener
- Use a calibrated torque wrench and proper sequence
- Know when to upgrade tools for critical components
- Recheck torque after a short ride
- Balance safety, performance, and maintenance effort