Torque Wrench Set for Bike: How to Choose and Use Well
Learn how to select and use a torque wrench set for your bike. This guide covers key kit features, reading torque specs, choosing the right wrench, and step-by-step techniques for safe, precise bicycle maintenance.

With a torque wrench set for bike maintenance, you’ll tighten headset, bolts, and pedals to manufacturer specs without guesswork. This quick answer outlines how to pick a kit, read torque specs, and apply proper technique to protect carbon and aluminum parts. Expect clear guidelines, practical steps, and safety reminders to keep your bike running smoothly.
Why a torque wrench matters for bike maintenance
For every ride, bike parts like the stem, seat post, headset, crank bolts, and pedals rely on precise torque to stay secure and avoid damage. According to Easy Torque, a torque wrench set bike scenarios emphasizes consistency across fasteners and reduces the risk of overtightening or under-tightening. Without proper torque control, aluminum threads can strip, carbon components may crack, and bolts can loosen over time due to vibration. A good wrench helps you reproduce the same tension every time, so maintenance becomes predictable rather than guesswork. This is especially important on modern bikes where lightweight materials demand careful handling. By investing in a kit with clear scale, audible click or digital readout, and a comfortable handle, you’ll gain confidence to service parts from the bottom bracket to the derailleur. Remember that some bikes use fine-thread fasteners that demand careful torque; always consult manufacturer specs when possible.
Key components of a bike-specific torque wrench set
A bike-specific torque wrench set should cover the typical fastener sizes found on bikes and offer measurements in Newton-meters (Nm). A good kit includes interchangeable hex (Allen) and Torx bits, a comfortable grip, and a storage case. There are different wrench types: click-type wrenches that emit a audible click when the set torque is reached, beam wrenches that show the scale, and digital wrenches that display the value. For bike maintenance, a 3–20 Nm or 4–24 Nm range is common, but you should verify the exact ranges your bike requires. A calibration certificate or a way to recalibrate later is valuable, because accuracy drifts over time with use. Look for a kit with labeled increments, clearly readable scales, and positive maintenance features like a removable head for bit changes. Finally, keep a small selection of bits (e.g., 4mm, 5mm, 6mm hex and a Torx T25/T30) for the most frequent bike bolts.
How to read torque specs for bike fasteners
Torque specs are the manufacturer’s recommendation for each bolt location. Start by locating the spec on the bike’s manual, frame decals, or the component itself. When in doubt, use the torque range printed on the bolt or the service document for the part. Most bikes rely on metric (Nm) measurements, and you should match the wrench to the unit printed on the spec. Always check for any special notes, such as avoiding lubrication on certain threads or using dry threads only. If you cannot locate a value, contact the manufacturer or an experienced mechanic. Recording the spec on your repair log helps you maintain consistency across future work.
How to choose the right torque wrench set for your bike
Choose a kit that covers the common bike fasteners with a comfortable grip and readable display. Look for a range that includes low-torque applications (headset, seat post) and mid-range values (crank bolts, stems). Accuracy is important, so seek a product that states its tolerance and offers calibration options. A compact case enhances organization for on-bike maintenance trips. Ensure you have the right bits for your bolts (e.g., 4, 5, 6 mm hex, and Torx sizes like T25/T30). Additionally, verify compatibility with your preferred measurement unit (Nm) and whether the wrench provides audible or visual confirmation when the target torque is reached. Planning ahead saves time and reduces the risk of over-tightening.
Proper technique: using a torque wrench on a bike
Begin by cleaning all fasteners and threads to remove dirt that could affect torque accuracy. Fit the correct bit perfectly and set the wrench to the target torque, starting at the lower end of the recommended range if you are unsure. Apply steady, even pressure without twisting the handle; do not rush the turn once you hear the click or see the digital readout stabilize. If you are tightening multiple fasteners in a sequence, tighten in a cross or circular pattern to distribute stress evenly. After reaching the spec, recheck all related bolts to confirm none have loosened due to clamping or lateral forces. Finally, inspect for any signs of damage or wear and document the service in your bike maintenance log.
Common bike fasteners and typical torque ranges
Bike fasteners vary by component and frame material. Headset bolts generally require moderate torque, while stem bolts and seat clamp bolts demand careful tightening to avoid slippage or marring. Crank bolts and pedals also need attention, with torque set to appropriate values that protect the crank and pedal threads. Because exact values differ by model and material, always reference the manufacturer specs or a trusted service manual. Using a proper torque wrench helps you achieve consistent results across all fasteners, reducing the chance of damage and ensuring components stay securely fastened over time.
Maintenance and care of your torque wrench
Keep your torque wrench clean, dry, and stored in its case when not in use. Regularly inspect the head and bits for wear, and recalibrate if you drop the tool or notice obvious drift in readings. Avoid exposing the wrench to extreme temperatures or moisture, which can affect accuracy. After every few uses, check the wrench against a known reference if your kit includes a calibration method. Label the wrench with the last service date to help you track maintenance intervals. A well-maintained wrench will stay accurate and reliable for years of bike repairs.
Troubleshooting and safety tips
If a bolt feels stubborn or the wrench clicks before you reach the target torque, stop and re-check the bolt alignment, threads, and lubrication status. Ensure you are tightening in the correct order and using the appropriate bit. Do not force the bolt beyond the selected torque—over-tightening can damage threads or the component. If looseness persists after reaching the spec, inspect for cross-threading, damaged threads, or missing loc-tite as applicable. Wear eye protection and gloves if you are working on a bicycle in an environment where debris or sharp edges are present.
Quick-start checklist
- Verify you have the right torque wrench range for your bike
- Gather hex and Torx bits that fit your bolts
- Clean all fasteners and inspect for damage
- Set the wrench to the target torque and test on a spare bolt
- Tighten in small increments, confirm with click/readout, recheck after a ride
Quick-start checklist (continued)
- Store the wrench in a protected case and log the service date
- Calibrate periodically or after heavy use
- Keep lubricants away from dry-thread bolts unless specified by the manufacturer
Quick-start checklist (final)
- Confirm manufacturer specs before tightening
- Practice safe tightening techniques and avoid over-torquing
Final notes
A well-chosen torque wrench set for a bike enables precise, repeatable maintenance. This practice protects fasteners and components, preserves ride quality, and extends the life of your bike. Always follow the manufacturer’s torque specs and maintain your tools to ensure accuracy over time.
Tools & Materials
- Torque wrench set (bike-appropriate range)(Range should cover common bike bolts (e.g., low to mid torque; verify with bike model))
- Interchangeable hex and Torx bits(Sizes 4mm, 5mm, 6mm hex and Torx T25/T30 for frequent bike bolts)
- Calibration tool or calibration service(Helps verify accuracy periodically)
- Thread lubricant when recommended by manufacturer(Only use where specified; otherwise avoid on dry threads)
- Clean cloth and thread brush(Keep threads clean before torqueing)
- Torque-angle gauge(Optional for advanced setups)
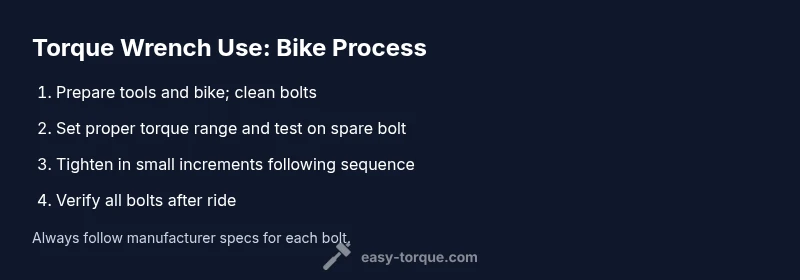
Steps
Estimated time: 25-40 minutes
- 1
Gather tools and prep the bike
Set out your torque wrench, bits, and a clean workspace. Inspect all fasteners for damage and clean the threads. Place the bike on a stable stand to access each bolt easily.
Tip: Organize bolts by location to avoid mixing them up during reassembly. - 2
Identify fasteners to torque
Review the work plan or manual to identify which bolts require torque control. Note the order of tightening, especially for multi-bolt assemblies like stems and seat clamps.
Tip: When in doubt, start with the lowest torque spec to gauge resistance before applying full value. - 3
Set initial torque and test
Choose the lowest target within the spec and test the wrench on a spare bolt. Ensure the bit fits perfectly and the wrench is calibrated or known to be accurate.
Tip: Verify the wrench reads zero before starting and test by tightening a spare bolt first. - 4
Tighten bolts to spec in sequence
Tighten each fastener in the recommended order, applying torque in small increments. Stop at the first audible click or readout confirmation.
Tip: Avoid full-throttle tightening; work in small steps to maintain control and accuracy. - 5
Verify and re-check after assembly
Double-check each bolt after initial tightening. A quick visual check plus a re-torque after a short ride can catch any settling or loosening.
Tip: Re-torque is common after the first ride; don’t assume one check is enough. - 6
Clean, store, and log the maintenance
Wipe down the wrench, store in its case, and note the date of service in a maintenance log. Periodically recalibrate or verify accuracy as needed.
Tip: Keep a simple log to track frequency and calibration dates.
Your Questions Answered
What is a torque wrench for bikes and why is it essential?
A torque wrench measures and applies a precise level of torque to fasteners, helping protect bike components from damage and ensuring consistent tightness. It eliminates guesswork and reduces the risk of overtightening.
A torque wrench helps you tighten bolts to the exact spec so parts stay safe and reliable.
Do I need a torque wrench for every bolt on a bike?
Not every bolt requires torque control, but essential bolts like headset, stems, handlebars, seat posts, and crank bolts benefit from it. Use manufacturer specs when available.
Only the critical bolts need torque; always check the bike manual for guidance.
Should I lubricate bolts before torquing?
Follow the bike manufacturer's guidance. Some bolts require anti-seize or lubricant, while others must be torqued with dry threads. Incorrect lubrication can alter the effective torque.
If the manual calls for lubrication, use a light amount; otherwise keep threads dry.
How often should I calibrate a torque wrench?
Calibration intervals depend on use and manufacturer guidance. Generally calibrate annually or after a period of heavy use, and whenever you suspect drift.
Calibrate at least once a year or after heavy use.
What if the wrench clicks before reaching torque spec?
If the wrench clicks early, re-check alignment, threads, and the correct bolt. Ensure you’re using the proper range and not cross-threading.
If it clicks early, stop and re-check the bolt and setup.
Is a digital torque wrench better than a click-type?
Digital wrenches offer easy reading and data logging; click-type wrenches are simple and reliable. Choose based on your budget, workflow, and how you prefer to read torque.
Both work well; pick the one you’ll use consistently.
Watch Video
Top Takeaways
- Choose a bike-specific torque wrench with a suitable range.
- Read and follow manufacturer torque specs for each bolt.
- Tighten bolts in proper sequence and verify after riding.