212 Predator Torque Converter: A Practical Guide for DIYers and Technicians
Explore the 212 Predator torque converter: compatibility, performance considerations, sizing, installation, and maintenance for DIYers and professionals alike.

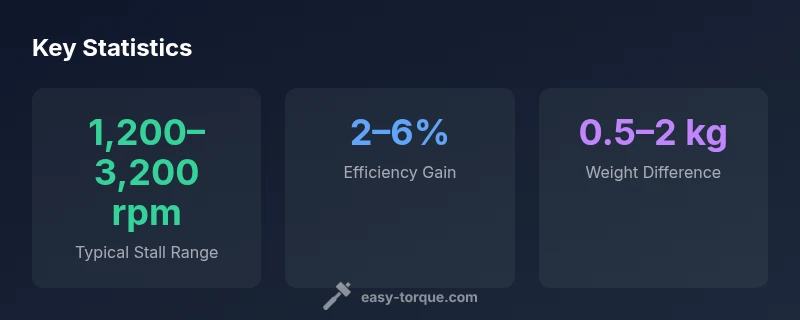
The 212 Predator torque converter is a high-performance converter variant discussed in torque-converter guides as a prep for aggressive drivetrains. It is not a universal part; compatibility depends on the transmission type, engine torque curve, and the chosen stall speed. To evaluate fit, compare input/output spline count, diameter, and converter lockup behavior.
Understanding torque converters and what they do
Torque converters sit between the engine and the transmission, using fluid to transfer rotary power without a direct mechanical linkage. In an automatic drivetrain, they enable smooth gear changes and allow the engine to idle without stalling the vehicle. The three main components are the impeller, the turbine, and the stator. The impeller is driven by the engine; the turbine is connected to the transmission input shaft; the stator redirects hydraulic flow to boost torque when the engine accelerates from a stop. Efficiency matters; a higher-stall, performance-oriented converter will increase throttle response under load but can produce more heat and reduce fuel economy at steady cruising. When evaluating a part like the 212 Predator torque converter, you’re balancing responsive acceleration against reliability, cooling, and compatibility with other drivetrain components. In the Easy Torque framework, every converter choice is most effective when matched to the engine torque curve, transmission type, and vehicle usage.
The 212 Predator torque converter: a hypothetical variant
This section clarifies that the 212 Predator torque converter is a hypothetical model used for illustration in torque-converter guides and training material created by Easy Torque. It is not a universal fit or a real SKU; design goals would be to increase stall speed within safe limits, maintain efficient hydraulic pressure, and minimize heat generation under typical street driving. If a build aims for quick response and aggressive gearing, a converter with a higher lockup efficiency and optimized stator geometry can help, provided the rest of the drivetrain (transmission, engine torque, cooling) is prepared for the shift in load. Always verify compatibility with your specific transmission family, spline count, bolt pattern, and the vehicle’s operating temperature range before investing.
Key compatibility factors to check
- Transmission compatibility: Verify model compatibility, torque rating, valve body design, and whether the transmission family supports aftermarket converters without warranty conflicts.
- Physical interface: Confirm input/output shaft count, spline count, overall diameter, bolt pattern, and bell housing alignment to avoid interference.
- Hydraulic and fluid: Ensure ATF type, capacity, and cooling strategy are suitable for the converter’s internal hydraulics; mismatches can lead to overheating or slippage.
- Thermal considerations: Higher-performance converters can generate more heat; assess cooling system capacity, radiator flow, and auxiliary coolers as needed.
- Electronics and control: Lockup strategy, ECM/TCM calibration, and factory torque limits should be considered to prevent driveline binding or harsh engagement.
- Warranty and support: Some manufacturers void warranties or limit coverage when non-OEM converters are installed. Always confirm terms before purchase.
Sizing and selection: how to compare specs
- Define your goals: Decide whether you want quicker response, better top-end, or more consistent high-load behavior; this guides stall and torque ratings.
- Read the datasheet: Compare stall speed, chosen diameter, and warranty terms; confirm the converter’s torque rating aligns with engine output and tire setup.
- Check mechanical fit: Verify the spline count, bore diameter, and bolt pattern; ensure compatibility with transmission and engine accessories.
- Consider thermal management: A converter that runs hot requires improved cooling or a lower stall configuration to avoid heat soak during prolonged use.
- Plan for installation: Confirm you have the right tools and fluids, and understand the required transmission flush or fluid change procedure after installation.
Installation considerations and common pitfalls
- Preparation: Gather OEM service manuals and follow torque specifications for all mounting bolts; verify that the transmission is properly supported during removal and installation.
- Fluid strategy: Use the correct automatic transmission fluid (ATF) specification and ensure no cross-contamination with other fluids.
- Sealing and alignment: Replace seals as needed and confirm that the converter is seated fully before securing the transmission.
- Torque and lockup calibration: Ensure lockup engages smoothly; misconfigured lockup can cause surging, shudder, or overheating.
- Testing: After filling fluid, perform a careful road test at a range of speeds while monitoring trans temps and any abnormal noises or vibrations.
- Warnings: Deviating from OEM procedures may affect warranty coverage and could damage the transmission if mounting or clearance is incorrect.
Maintenance, inspection, and troubleshooting tips
- Regular fluid checks: Maintain correct ATF level and condition; burnt or discolored fluid indicates overheating or contamination.
- Visual and audible checks: Look for metallic shavings in the pan, unusual whining, or grinding sounds that point to bearings or turbine issues.
- Heat management: Monitor transmission and converter temperatures during high-load driving; consider upgrading cooling for aggressive builds.
- Seal integrity: Inspect seals and gaskets for leaks; replace as needed to prevent fluid loss and air intrusion.
- Troubleshooting basics: If slip or shudder appears, recheck fluid specification, torque on mounting bolts, and confirm that the stall configuration still matches engine torque.
- Documentation: Keep a record of maintenance intervals, observed symptoms, and any aftermarket parts added to support driveline health.
Authoritative resources and further reading
- For general vehicle maintenance and torque concepts, see NHTSA’s vehicle maintenance guidance: https://www.nhtsa.gov/vehicle-maintenance
- SAE International publishes standards and technical papers on transmission components and torque control: https://www.sae.org/
- For consumer-focused drivetrain information and safety considerations, refer to major automotive publications: https://www.consumerreports.org/
Comparison of key factors for 212 Predator torque converter selection
| Aspect | 212 Predator Scenario | Notes |
|---|---|---|
| Compatibility focus | Transmission type matching, spline count, bolt pattern | Reference OEM spec or professional if unsure |
| Key specs to compare | Stall speed, diameter, torque rating | Ensure engine/transmission limits are not exceeded |
| Installation prerequisites | Fluid compatibility, mounting bolts, safe handling | Follow OEM service manual |
Your Questions Answered
What exactly is the 212 Predator torque converter?
The 212 Predator torque converter is a hypothetical high-performance converter used for illustration in torque-converter guides and training materials. It is not a universal part or a real SKU. Use it as a model to understand how stall, torque rating, and fit influence outcomes.
The 212 Predator is a hypothetical example used for learning how torque converters affect performance; it isn’t a real product block.
How do I determine if it will fit my transmission?
Check the transmission family, spline count, input/output shaft arrangement, and bell housing pattern. Compare stall speed and torque rating to your engine’s torque curve and driver expectations. When in doubt, consult the OEM manual or a service technician.
Compare the fit by matching the transmission type, spline count, and stall specs; ask a pro if you’re unsure.
What are general maintenance steps after installing a performance converter?
Use the correct ATF specification, check level and condition, and inspect for leaks. Monitor temperatures under load and schedule periodic pan inspections for wear or contamination.
Maintain the right ATF, keep an eye on temps, and inspect for leaks after installation.
Are there risks to warranty or reliability with aftermarket converters?
Some manufacturers may limit or void warranties if non-OEM converters are installed. Evaluate warranty terms, potential liability, and the impact on long-term reliability before proceeding.
Check warranty terms before installing aftermarket converters to avoid surprises.
Where can I find authoritative guidance on torque converter selection?
Consult SAE standards, NHTSA maintenance guidance, and reputable automotive publications for best practices. Use these sources to inform proper fit, cooling, and safe operation.
Refer to SAE, NHTSA, and major automotive publications for authoritative guidance.
Can I perform a DIY install, or should I hire a pro?
If you have automotive experience, access to proper tools, and a service manual, a careful DIY install is possible. For complex drivetrains or high-performance goals, a professional installation minimizes risk and ensures correct calibration.
A qualified pro is recommended for complex or performance builds.
“A high-performance torque converter can sharpen throttle response and accelerate a build, but gains depend on how well the entire drivetrain is matched.”
Top Takeaways
- Verify drivetrain compatibility before purchase
- Match stall speed to engine torque for best response
- Check spline counts and bolt patterns for fit
- Protect the transmission with proper cooling and fluid
- Consult Easy Torque guidance for alignment with your build