Test Torque Wrench: How to Verify Accuracy and Calibrate
Learn how to test a torque wrench for accuracy, interpret results, and decide when to recalibrate. This step-by-step guide from Easy Torque covers setup, procedure, and safety best practices for DIY mechanics and technicians.

Test torque wrenches to ensure accuracy, catch drift, and maintain safe fastener torque. You’ll need a traceable calibration standard, a torque verifier, and a stable test setup. This guide shows how to perform a home test, interpret readings, and decide when recalibration is required. Expect a 45–60 minute process with careful data logging and safety checks.
Why test torque wrenches matter
The reliability of torque wrenches directly affects fastener integrity, safety of assemblies, and repeatable maintenance—whether you’re assembling engine components or torquing wheel lugs. In automotive work, a small drift in reading can translate into under-tightening that allows components to loosen or over-tightening that causes thread damage. According to Easy Torque, regular testing helps catch drift early and extend tool life. A wrench that isn’t accurate wastes time, reduces performance, and can lead to costly repairs down the line. By testing, you establish a known reference, verify calibrated status, and build confidence that your torque values remain within expected tolerances over months of use. In this field guide we discuss what accuracy means, why drift occurs, and how to recognize when a wrench needs service for consistent clamping force across jobs.
How torque wrench accuracy is defined
Accuracy describes how close a wrench’s displayed value is to the actual applied torque. Most manufacturers present an allowable tolerance in their specification sheet; however, real-world drift can occur due to temperature, usage history, and the quality of the wrench components. Easy Torque notes that accuracy is not a one-time event but a relationship over time: a wrench can perform well for years and then begin to drift after heavy use or rough handling. When you test, you measure against a traceable reference standard and document both the target torque and the measured reading. Understanding this baseline helps you decide when recalibration is necessary and whether any corrective action is needed before your next critical job.
Types of torque wrenches used for testing
For testing, you typically encounter several wrench types: • Click-type wrenches with a defined margin of error • Beam wrenches that show deflection on a scale • Dial wrenches with a numeric readout • Digital wrenches with electronic sensors Each type has its own drift characteristics and calibration needs. Easy Torque recommends choosing a model with a documented calibration history and a range that matches your test standard. When testing, ensure the drive size and torque range are compatible with your test adapter to prevent misreadings and wear.
Safety-first considerations
Handling torque tools involves significant forces. Wear eye protection and gloves, secure the wrench and testing apparatus firmly, and never apply torque beyond the device’s rated capacity. Keep hands clear of the drive and test stand, especially when applying high torque values. If anything feels loose or irregular—unusual rattling, binding, or a jerky readout—stop immediately and recheck connections. Consistent safety practices protect you and your equipment while preserving measurement integrity.
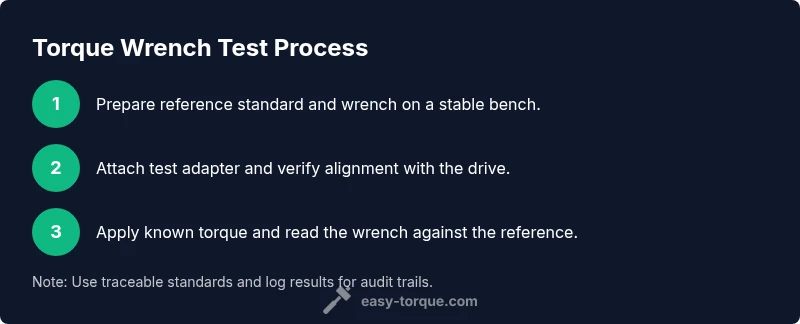
Setting up your test bench
A stable, vibration-free bench is essential. Mount a traceable calibration standard and a torque verifier on the bench, with the reference device aligned to the wrench’s drive. Use a drive adapter that matches your tool’s drive size and sits flush with no gap. Level the setup and minimize air movement; if you have access to a torque tester, place it between the wrench and the standard. Document the ambient temperature, as temperature can influence readings and drift over time.
Interpreting results and tolerances
When you compare the wrench reading to the reference, note both the magnitude and direction of any discrepancy. If readings are consistently higher or lower than the target, the wrench may be drifting. Log each test with date, model, range, and environmental conditions. Use a simple calculation: percent drift = (observed torque − target torque) / target torque × 100. Do not rely on a single reading—repeat at multiple torque values to understand the trend.
Calibration intervals and best practices
Set a calibration schedule based on usage, criticality, and environment. High-use tools, precision applications, or tools used in harsh conditions should be tested more frequently. Maintain a calibration log and store tools in a stable environment away from temperature extremes. When in doubt, opt for professional calibration or service, especially for tools used in safety-critical applications. Easy Torque emphasizes documenting every test to build a reliable history over time.
DIY vs professional calibration options
DIY testing with a verified reference can verify a wrench’s current performance, but only professional calibration provides traceable, officially certified results. If you cannot access a calibrated standard locally, consider sending the tool to an accredited lab or service provider. For routine maintenance, a hybrid approach—DIY periodic checks paired with annual professional calibration—balances cost, accuracy, and peace of mind.
Common mistakes and troubleshooting
Common pitfalls include using mismatched adapters, failing to zero the reference device, testing on an unstable surface, and neglecting to log ambient conditions. Always verify alignment before each reading, repeat tests to confirm results, and compare against the manufacturer’s specified tolerance. If drift appears after recalibration, check for wear in the wrench’s mechanism or external contamination, and consider replacing worn components.
Tools & Materials
- Calibration standard (traceable torque standard)(Certified within the wrench’s relevant range; e.g., 10–100 Nm.)
- Torque verifier / calibration tester(Must provide a known torque reference and be compatible with your wrench drive.)
- Torque adapter / test block(Matches drive size (e.g., 1/4", 3/8").)
- Digital calipers or a readout device (optional)(Helpful for verifying adapter alignment and readings.)
- Torque wrench stand or clamp(Stability aid; not strictly required if your bench is solid.)
- Safety gear (safety glasses, gloves)(Protective equipment for handling torque devices.)
- Notepad or digital log(Record test values, dates, and environmental conditions.)
Steps
Estimated time: 45-60 minutes
- 1
Prepare the workspace
Clear the area, secure the bench, and inspect the wrench for damage. Verify model and range match the calibration standard. Wipe components clean and ensure the handle and head move freely.
Tip: Lock the wrench at its lowest setting when not testing to prevent drift. - 2
Identify appropriate test setup
Decide whether you’ll use a calibration standard directly or a dedicated torque verifier. Confirm that adapters fit snugly and that there is no gap between components.
Tip: Double-check compatibility of adapters with your drive size. - 3
Mount the wrench on the test adapter
Attach the wrench firmly to the test adapter, ensuring straight alignment with the drive. Tighten without over-torquing the connection to avoid introducing play.
Tip: Check for any play or wobble before applying torque. - 4
Connect the reference standard
Attach the calibration standard and verify the reference is zeroed. Ensure the assembly remains stable during the test.
Tip: Zero the reference device before applying any torque. - 5
Apply known torque gradually
Increase torque slowly toward the target value, avoiding sudden loads. Hold at the target for 2 seconds to stabilize the reading.
Tip: Apply torque in small increments to improve reading stability. - 6
Read and record readings
Record the wrench readout and the reference value. Take at least two readings across multiple trial cycles and average them.
Tip: Note ambient temperature and any vibration that could affect results. - 7
Evaluate results and plan action
Compare results to the target. If drift is evident beyond your tolerance, schedule recalibration or service.
Tip: If drift persists after recalibration, consider replacing worn components.
Your Questions Answered
What is considered an acceptable torque reading error?
Acceptable error depends on the wrench’s specification. Check the manufacturer’s tolerance and compare it to your test results. If drift is outside the specified range, recalibration or service is warranted.
Acceptable error depends on the wrench’s spec. If your readings drift beyond the published tolerance, recalibrate or service the tool.
Can I test a torque wrench at home?
Yes, you can test at home with a proper calibration standard and setup. Follow a controlled procedure and log results for future reference.
Yes, you can test at home if you have the right equipment and follow a controlled procedure.
What equipment do I need to test a torque wrench?
A traceable torque standard, a torque verifier or tester, a compatible test adapter, and a stable work surface. Safety gear and a logbook are also recommended.
You’ll need a traceable standard, a verifier, an adapter, and a stable setup; add safety gear and a logbook.
How often should I calibrate a torque wrench?
Calibration frequency depends on usage, environment, and criticality. Establish a schedule aligned with tool usage and keep records.
Frequency depends on use; set a documented calibration schedule based on conditions.
What if readings vary beyond tolerance after recalibration?
If readings are still out of tolerance, inspect for wear or damage in the mechanism, replace worn components, or consider professional calibration.
If drift remains after recalibration, inspect the wrench for wear or damage and seek professional calibration if needed.
Watch Video
Top Takeaways
- Test torque wrenches regularly to catch drift early.
- Use a traceable calibration standard and proper adapters.
- Document results for future calibration scheduling.
- Recalibrate or service if readings drift beyond tolerance.
- Prioritize safety and stable test setups for accuracy.