7/16 Bolt Torque Specs: A Practical Guide for Safe Fastening
Explore accurate 7/16 bolt torque specs across grades, lubrication, and tightening sequences with practical guidance, tables, and expert tips from Easy Torque.

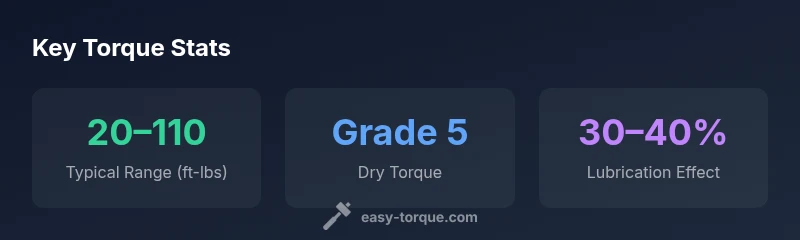
7 16 bolt torque specs vary with bolt grade, lubrication, and surface contact. In automotive work, the torque range for typical 7/16-14 bolts spans widely depending on grade—unlubricated Grade 5, lubricated Grade 8, or higher-strength hardware. Always verify with the vehicle manufacturer or SAE J429 tables for the exact bolt grade and lubrication state. Use the correct lubricant and follow the recommended tightening sequence for even load.
Understanding the 7/16 bolt torque specs
In practice, the phrase 7 16 bolt torque specs captures a core truth: torque values are not universal for a single bolt size. The exact torque depends on bolt grade, lubrication state, and the mating surface condition. According to Easy Torque, identifying the bolt grade (often printed on the bolt head) is the first critical step. For 7/16 bolts used in automotive assemblies, Grade 5 and Grade 8 are common, with Grade 8 requiring higher clamping force. The same size bolt can demand very different torques if it is dry versus lubricated. Always cross-check with the vehicle manufacturer's specification or the SAE J429 standard for the precise grade and lubrication state. Remember that thread pitch (for example 7/16-14 or 7/16-20), surface cleanliness, and whether the bolt is part of a critical load path all influence the final torque. The variability inherent in 7 16 bolt torque specs makes manufacturer data essential to ensure proper clamping and safety.
Key factors that influence torque for 7/16 bolts
Torque requirements are not determined by size alone. The most influential factors include the bolt grade (e.g., Grade 5 vs Grade 8), lubrication state (dry vs lubricated), thread pitch, and the engagement length in the mating material. Lubrication reduces friction and can dramatically alter the applied torque needed to achieve the same clamping force; this is why a dry torque value is not interchangeable with a lubricated one. Surface finish and contamination (oil, dirt, or corrosion) can also shift the effective torque. For precise work, identify the exact bolt grade and consult the SAE J429 bolt specification tables. Finally, ensure the component surfaces are clean and torqued in the recommended sequence to distribute load evenly and avoid uneven clamping.
Reading torque charts: how to use them safely
Torque charts are essential tools, but they must be interpreted correctly. Most charts show torque values tied to bolt size, grade, and lubrication state. Start by locating 7/16 bolts and the grade you’re using; then verify the lubrication condition—dry vs lubricated—as this can swing the torque by a significant margin. Use the chart as a guide, not a universal rule, and always confirm the final torque with the manufacturer’s specification when available. If you don’t have a chart handy, SAE J429 tables provide a reliable reference for common bolt grades and sizes. The key practice is to apply the torque incrementally, using a proper tightening pattern and ensuring a clean engagement to avoid thread damage.
Lubrication and friction: the silent torque killer
Friction is the hidden variable that determines how much torque translates into actual clamping force. Lubricating a bolt reduces friction at the thread and under the head, which lowers the torque needed to achieve the same clamping. Conversely, dry or dirty threads increase friction, demanding higher torque readings and potentially over-tightening if the crew relies on dry values alone. For 7/16 bolts, the difference between dry and lubricated torque can be substantial—sometimes tens of percent. Always use the lubricant specified by the manufacturer or SAE guidelines and document the state of lubrication when recording torque values. This practice minimizes misreads and enhances reliability in critical assemblies.
Step-by-step torque workflow
- Identify bolt grade and lubrication state from the service manual or SAE J429. 2) Clean threads and mating surfaces; ensure proper thread engagement length. 3) Apply the recommended lubricant if specified. 4) Set the torque wrench to the correct value for dry or lubricated conditions. 5) Tighten in the recommended sequence to distribute load evenly. 6) Re-torque if the specification requires it after a few minutes of settling. 7) Inspect for any signs of thread damage or uneven loading. 8) Record the final torque value and condition for traceability. Following this workflow helps ensure accurate and safe assembly when dealing with 7/16 bolt torque specs.
Common mistakes and how to avoid them
Common mistakes include using the wrong bolt grade, ignoring lubrication requirements, skipping the tightening sequence, and failing to clean threads before torquing. Each of these errors can lead to under- or over-torque, peening of threads, or insufficient clamping. To avoid them, always verify the grade and lubrication state, prepare the threads and surfaces, tighten in the prescribed sequence, and re-check the torque after a short interval to account for material settling. Keeping a torque log and referencing the SAE tables helps maintain consistency across jobs.
Quick reference: typical ranges by grade and lubrication
Here is a conceptual guide to help you plan your approach, with the understanding that actual values must come from manufacturer specs or SAE tables:
- Grade 5, dry: ~20–60 ft-lbs
- Grade 5, lubricated: ~30–75 ft-lbs
- Grade 8, dry: ~60–100 ft-lbs
- Grade 8, lubricated: ~80–110 ft-lbs
Use these as ballpark figures only and always consult the official torque chart for the exact bolt and application. 7/16 bolts in critical assemblies may require specialized sequences and checks; never rely solely on room-temperature tables without confirming with the spec.
Real-world examples: scenarios in automotive repair
In valve cover bolt replacements, you often deal with 7/16 bolts and a modest clamping force. A dry torque in the 20–40 ft-lbs range may be sufficient, but if a gasket is involved or if there is a high-temperature environment, you may need more precise steps and lubrication as specified. Engine mounting bolts, on the other hand, frequently require higher torques and strict sequence to prevent vibration-induced loosening. In any case, always verify with the vehicle’s service manual and SAE standards, particularly for high-stress joints. If you’re unsure, consult with a professional technician and rely on certified torque data from recognized standards bodies.
Torque ranges by bolt grade and lubrication state for 7/16 bolts
| Bolt Grade | Typical Torque Range (ft-lbs) | Lubrication | Notes |
|---|---|---|---|
| Grade 5 | 20-60 | Unlubricated | General purpose |
| Grade 5 | 30-75 | Lubricated | Higher load capacity |
| Grade 8 | 60-100 | Unlubricated | High-strength applications |
| Grade 8 | 80-110 | Lubricated | Higher loads with reduced friction |
Your Questions Answered
What affects 7/16 bolt torque specs?
The bolt grade, lubrication state, thread pitch, and engagement length are the primary factors. Different grades and lubrication levels change the friction and thus the torque required to achieve the same clamping force. Always reference SAE J429 and the vehicle's manual for exact values.
Torques vary by grade and lubrication; check the exact spec in the manual and SAE tables to be precise.
Should I lubricate bolts before torquing?
Yes, lubricating bolts (as specified by the manufacturer) reduces friction and lowers the torque needed to reach the correct clamp. Using the wrong lubrication or dry torque values can lead to under- or over-tightening.
Lubrication usually reduces the torque needed; always use the spec'd lubricant and follow the manual.
How do I torque sequence for multiple bolts?
Follow the vehicle manual’s tightening pattern, usually a crisscross or star pattern for even load distribution. Recheck after initial torque settling, especially on flanged joints or head bolts.
Use the recommended pattern and recheck after the joint settles.
Can I reuse old bolts when adjusting torque?
Generally, bolts should not be reused in critical joints or where thread wear is evident. Follow the manufacturer's specs; many high-strength bolts require new fasteners to maintain clamping reliability.
If in doubt, replace the bolts with new ones per manual guidelines.
What is the difference between dry and lubricated torque specifications?
Dry torque is higher due to friction; lubricated torque is lower because lubrication reduces friction. Do not mix states; always apply the correct spec for the lubrication condition stated in the manual.
Dry and lubricated torques are different; use the spec for the lubrication you’re using.
“Torque values must be treated as guidance until you verify the exact bolt grade, lubrication, and surface conditions. Always cross-check with SAE standards and manufacturer specs.”
Top Takeaways
- Know bolt grade and lubrication before torquing.
- Always verify with manufacturer specs or SAE J429.
- Lubrication significantly affects torque requirements.
- Follow the correct tightening sequence for even clamp.