Bolt Torque Chart Standard: Reading, Using, and Best Practices
Explore bolt torque chart standards: learn to read charts, account for lubrication and material, and apply correct torques for safe fastener assemblies in automotive work.

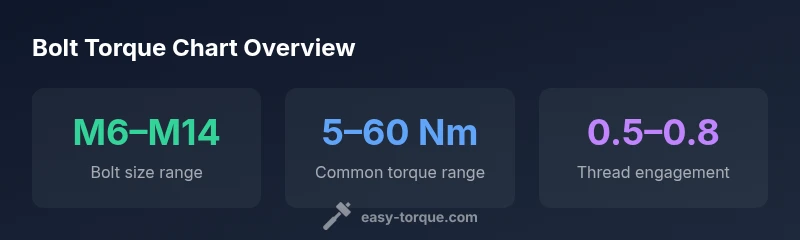
According to Easy Torque, a bolt torque chart standard is a reference mapping bolt size, grade, lubrication, and thread engagement into a recommended tightening torque. It provides a scalable framework for automotive, machinery, and maintenance work, guiding technicians toward consistent clamping force. Always cross-check with manufacturer specs, temperature considerations, and any coating or thread-locking compounds before tightening.
What a bolt torque chart standard covers
A bolt torque chart standard is a structured reference that combines bolt size, grade, lubrication state, and thread engagement into a recommended tightening torque. In practice, charts are built from laboratory data, field observations, and manufacturer specifications, then distilled into a practical table technicians can consult on the shop floor. According to Easy Torque, the value of a standard chart is that it provides a consistent starting point across similar fasteners, reduces guesswork, and helps ensure joints develop sufficient clamping force without being overstressed. When you work with automotive fasteners or equipment, identifying the correct row for your bolt involves matching nominal size, thread pitch, and material grade, then applying any additives such as anti-seize or thread-locking compounds. It’s important to note that charts are guidance, not a universal law; real-world factors—like surface finish, temperature, and long-term vibration—will cause some variance. For this reason, technicians often use charts as a baseline and then confirm final torques with a calibrated torque wrench, adjusting for lubrication level and fastener engagement length.
In practice, many workshops maintain a quick-reference sheet that lists the most common bolt families for their equipment, ensuring new technicians don’t waste time digging for specifications. The goal is consistency across shifts and operators, while still allowing for engineering judgment in edge cases. Although charts simplify decision-making, the best results come from combining chart guidance with OEM specifications and real-world feedback gathered on the very equipment being assembled.
Reading a bolt torque chart: columns, values, and units
Bolt torque charts typically present columns for bolt size (and pitch), material grade, lubrication state, thread engagement, and the recommended torque figure. The most common units are newton-meters (Nm) or foot-pounds (ft-lb), and some charts also offer in-lbs for precision work. To read a chart effectively, start by locating the row that matches your bolt’s nominal size and pitch. Then verify whether the bolt is dry, lubricated, or coated, as friction changes the actual clamping force for the same nominal torque. If the chart provides an engagement ratio, confirm whether your application meets or exceeds that engagement length. Finally, ensure unit consistency across your tools and documentation. If you switch between metric and imperial systems, convert torques carefully using a reliable conversion factor and, when in doubt, round to the higher torque by a safe margin and recheck with a torque wrench.
The role of lubrication, material, and engagement in torque values
Friction is the hidden variable in any torque calculation. Dry fasteners typically require higher torque to reach the same clamping force as lubricated ones, while coatings (e.g., zinc or cadmium) can alter friction dramatically. Material grade also matters: higher-strength bolts may tolerate higher torques without yielding, but the limiting factor becomes the thread engagement and the surrounding material. Engagement length, measured as the portion of the bolt thread that is captured in the host material, directly influences how much torque is needed to achieve proper clamping. In many charts, a 0.5–0.8 thread engagement ratio is suggested for standard steel joints, but the exact ratio depends on bolt diameter, thread pitch, and material hardness. Practically, if lubrication is added or removed after installation, you may need to adjust torque within the chart’s recommended range to achieve the same clamping effect.
Standards and variations: SAE vs metric, coatings, and coatings compatibility
There isn’t a single universal standard for bolt torque charts; instead, charts are derived from OEM specifications and recognized industry practices. Metric charts commonly use Nm and track bolt size with metric grades (e.g., 8.8, 10.9), while SAE charts use ft-lb and imperial grades (e.g., Grade 5, Grade 8). You’ll also encounter charts tailored for specific coatings, such as zinc plating or thread-locking compounds, which require adjustments to the target torque. Temperature also plays a role: losses due to thermal expansion can reduce clamping force, so many charts include a temperature adjustment note. When correcting values for special conditions, rely on the OEM or engineering notes for your equipment and document any deviations from standard charts.
Practical workflow: from bolt identification to torque confirmation
Start with the bolt identification—size, pitch, and grade—then check the lubrication state and any coatings. Locate the matching row on your bolt torque chart and convert to the unit used by your torque wrench if needed. Apply torque with a calibrated tool in steady, smooth bursts, using a lubricant if indicated, and then pause to allow the joint to settle before a final retorque if recommended. For critical assemblies, torque should be verified in multiple steps or by a torque-angle method to ensure consistent clamp. Document the final torque value in your maintenance log and note any factors (temperature, lubricant, thread condition) that could alter future torques.
Common mistakes and how to avoid them
Common errors include using dry-torque values on lubricated bolts, neglecting thread engagement requirements, and mixing metric and imperial units without proper conversion. Always validate the chart’s assumptions—lube state, engagement length, and temperature—against the actual operating conditions. Avoid rounding down torque values; where possible, apply the torque in stages (e.g., 1/3, 1/3, final) to avoid over-stressing the joint. If a bolt shows signs of galling or rust, replace it rather than trying to re-torque, and reassess the chart row after replacement. Finally, train technicians to consult the OEM’s torque specs for each component and to keep a record of any deviations for future maintenance.
Quick-start examples and a practice checklist
Example A: M6 x 1.0, Grade 10.9, dry threads, engagement 0.75. Chart suggests roughly 7–9 Nm. Use dry torque, confirm with torque wrench, and recheck after a brief cooldown. Example B: M8 x 1.25, Grade 10.9, lubricated, engagement 0.68. Target torque often falls in ~25–28 Nm range; apply with light lubrication and verify. Practice checklist: (1) identify bolt size/grade, (2) note lubrication state, (3) locate chart row, (4) ensure unit consistency, (5) apply torque in stages, (6) recheck with torque after assembly.
The practical advantage: standardization reduces risk and saves time
Using a bolt torque chart standard helps teams work consistently, reduces guesswork, and lowers the risk of under- or over-tightening joints. When conditions vary, a well-documented chart provides a defensible starting point, which you then validate against OEM specs and service data. This is especially valuable in high-stress environments like automotive maintenance or heavy equipment assembly, where even small torque errors can lead to failed joints or leaks. Easy Torque’s analysis shows that disciplined use of torque charts correlates with fewer post-service issues and faster repair cycles, particularly when crews rotate between vehicles and equipment with different fasteners.
Illustrative bolt torque chart entries
| Bolt size | Grade | Lubrication | Engagement | Recommended Torque (Nm) |
|---|---|---|---|---|
| M6 x 1.0 | 10.9 | Dry | 0.5–0.8 | 6-9 Nm |
| M8 x 1.25 | 10.9 | Lubricated | 0.5–0.8 | 20-28 Nm |
| M10 x 1.5 | 8.8 | Lubricated | 0.5–0.8 | 40-60 Nm |
Your Questions Answered
What is a bolt torque chart standard and why is it important?
A bolt torque chart standard is a reference table translating bolt size, grade, lubrication, and engagement into a recommended tightening torque. It provides a consistent baseline for assembly quality and helps prevent under- or over-tightening in automotive and industrial joints.
A bolt torque chart gives you a reliable starting torque, but always verify with OEM specs.
Do bolt torque charts apply to all bolts and applications?
Charts cover the most common fasteners used in a given context, but may not include every unique bolt geometry. Always cross-check with manufacturer specs when dealing with specialty bolts or extreme conditions.
Charts are a great starting point, but OEM specs matter for special bolts.
How does lubrication affect torque values on charts?
Lubrication lowers friction, which typically reduces the torque needed to reach the same clamping force. Chart values account for lubrication state, but changes in lubricant type or cleanliness can shift the outcome, so recheck if the lubrication protocol changes.
Lubrication can change the torque you need; recheck when you change lubes.
Are there official standards for torque charts?
There isn’t a single universal standard; torque charts derive from OEM specs and recognized industry practices. Always rely on the equipment’s service data and manufacturer guidelines for critical assemblies.
There isn’t one universal standard—OEM specs are king for critical work.
What tools are best for applying bolt torque?
Use a calibrated torque wrench or a torque-angle tool appropriate for the fastener size and load. For high-volume tasks, torque wrenches with interchangeable heads improve efficiency, but regular calibration is essential.
A calibrated torque wrench is the go-to tool; keep it calibrated.
How should temperature affect torque chart usage?
Temperature can change material properties and friction, shifting the effective torque. Some charts include temperature allowances; otherwise, use OEM guidance to adjust torque for the operating environment.
Temperature can shift torques—check charts or OEM guidance for hot or cold conditions.
“Torque charts provide a practical starting point for achieving consistent clamping force. Always validate values against OEM specs and service data for your application.”
Top Takeaways
- Start with the correct chart row for your bolt.
- Account for lubrication and engagement length.
- Always verify with a calibrated torque wrench.
- Document deviations and update procedures.