Chevy Torque Converter Replacement: Step-by-Step Guide
Learn how to replace the Chevy torque converter with a thorough, safe, step-by-step method. Tools, safety, and maintenance tips help DIY enthusiasts complete the job confidently.

In this guide you will learn how to replace a Chevy torque converter safely and effectively, restoring smooth shifts and proper transmission operation. You’ll need basic hand tools, a transmission jack or support, and a service manual specific to your Chevy model. This process covers removing the old unit, inspecting the torque converter, and installing a replacement with proper torque specs.
Why Chevy Torque Converter Replacement Matters
The torque converter is a fluid-coupled device that transfers engine torque to the transmission. For Chevy vehicles, the converter not only enables smooth gear changes but also helps conserve fuel by locking up at cruising speed. When it wears, you can experience slipping, shuttering, or overheating that degrade performance and shorten transmission life. According to Easy Torque, a high-quality replacement is essential for long-term reliability and safe operation. The Easy Torque team found that replacing a tired converter promptly often prevents more costly repairs later. In many Chevy models, the torque converter is integrated with the transmission and cannot be replaced in isolation without removing the transmission. Before you begin, understand that this is a substantial repair that involves handling heavy components and hot transmission fluid. A methodical plan and correct torque specs are critical. This section explains why replacement matters and what you should expect from a professional-grade job. You’ll learn to assess whether the converter is the root cause or if other parts—like the transmission fluid, filter, or oil pump—may contribute to the symptoms. A proper evaluation saves time and reduces risk during the replacement.
Symptoms That Signal a Faulty Torque Converter
Common symptoms point to a torque converter problem, but they can overlap with other issues. Look for:
- Slipping or high engine RPMs without acceleration
- Shuddering or whining when shifting or at highway speeds
- Overheating transmission fluid or burnt smell
- Poor acceleration or reduced fuel economy
- Transmission not fully engaging into gear or a delayed engagement
If you notice multiple symptoms, plan a diagnostic approach that includes fluid analysis, pressure testing, and, when safe, a controlled test drive. Remember that a failing torque converter can also stress the transmission's pump and clutches, accelerating wear elsewhere in the drivetrain.
Tools, Parts, and Safety Precautions
Prepare a clean workspace with adequate lighting, a sturdy lift or jack stands, and a draining setup. Essential tools include a full socket set, a breaker bar, a quality torque wrench, pry tools, and a transmission jack or support. Replacement options include an OEM torque converter or a reputable aftermarket unit, depending on your budget and vehicle year. Additional parts to budget for include a new front seal, converter bolts, transmission fluid, and a filter if applicable. Safety first: disconnect the battery, wear eye protection, and never work under a supported vehicle without proper stands. Keep a fire extinguisher nearby for peace of mind, and have a friend assist when maneuvering heavy components.
Preparing Your Chevy: Vehicle Prep and Workspace
Set the parking brake, place wheel chocks, and remove the key from the ignition. Raise the vehicle securely and support with stands on a level surface. Disconnect the negative battery cable and drain the transmission fluid into a suitable container. Label and organize fasteners as you go; a simple magnet tray helps prevent misplacement. Review the service manual for your specific Chevy model to confirm transmission type, torque specs, and any step-specific cautions. Finally, set aside enough space to maneuver the transmission assembly and tools without crowding.
Removing the Old Torque Converter: Key Considerations
With the engine and transmission supported, begin by draining fluid if not already done. Access the starter or flex plate area and remove the torque converter bolts from the flex plate. Some models require supporting the transmission while you separate it from the engine. Carefully detach any wiring, sensor connectors, and cooler lines as needed. Once all fasteners are removed, gently guide the transmission away from the engine until the torque converter separates. Avoid forcing the converter; verify the converter is partially engaged and rotate while backing away to reduce the risk of damaging the pump.
Installing a Replacement Torque Converter: Best Practices
Lubricate the torque converter’s splines with clean transmission fluid before mating to the transmission input shaft. Align the converter with the flex plate and rotate gently to seat it. Install new converter bolts in a crisscross pattern to the manufacturer's recommended torque, then reinstall the transmission to the engine, reconnecting mounts and supports. Reattach cooler lines and wiring, and verify that all connections are secure. Before sealing and final assembly, perform a test rotation of the crank to ensure free movement and no binding. If you detect any resistance, back off and recheck alignment.
Post-Installation Checks and Fluid Service
Refill transmission fluid to the correct level using the vehicle's dipstick or service manual guidance. Start the engine and allow the transmission to reach operating temperature while monitoring for leaks. Take a careful road test, listening for unusual noises and checking for smooth engagement. Scan for error codes and verify that shift patterns are normal. Consider changing the transmission filter if the vehicle has one and monitor the fluid color and level over the next several drives to ensure stability.
How to Choose Between OEM and Aftermarket Torque Converters
OEM torque converters are designed to match factory specifications and are often more expensive but come with reliable performance and proven compatibility. Aftermarket units may offer cost savings and options for improved stall speed or locking behavior, but quality varies by supplier. When Chevy owners decide, evaluate warranty terms, core return policies, and documented compliance with the vehicle year and model. Also assess the availability of service manuals and the ease of installation. If uncertain, consult a professional and compare customer reviews from trusted sources before purchase.
Common Mistakes to Avoid During Chevy Torque Converter Replacement
Avoid rushing the job, skipping steps in the alignment process, or reusing seals and bolts without inspecting them. Do not underestimate the importance of proper torque specs and a clean transmission surface. Never force a components fit; if something binds, step back and re-check alignment, wiring, and fluid levels. Finally, avoid operating the vehicle without confirming all systems are leak-free and that the transmission fluid is at the correct level.
Tools & Materials
- Full socket set(Metric and SAE sizes; include deep sockets)
- Breaker bar(For stubborn bolts)
- Quality torque wrench( calibrated to vehicle specs)
- Transmission jack or support(To safely support the transmission)
- Drain pan(Large capacity for trans fluid)
- New front seal for converter(Prevent leaks)
- Torque converter (OEM or aftermarket)(Choose based on model/year)
- Replacement bolts for converter and transmission(Use new hardware)
- Transmission fluid (type per manual)(Estimate quantity; factor for spill loss)
- Gasket/sealant (if required)(Check manual)
- Shop rags and degreaser(Keep area clean)
- Wheel chocks(Prevent vehicle roll)
- Safety glasses and gloves(Personal protective equipment)
- Service manual for specific Chevy model(Model/year-specific torque specs)
Steps
Estimated time: 4-8 hours
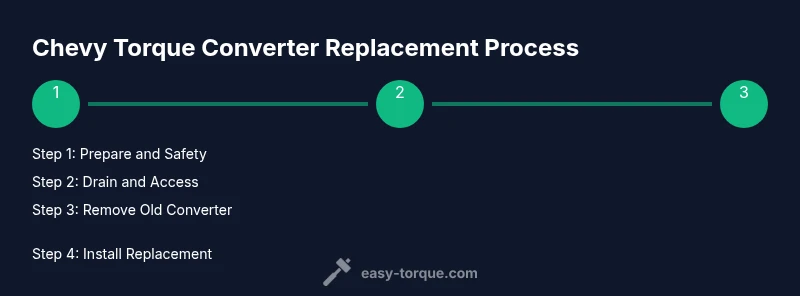
- 1
Prepare the vehicle and safety measures
Park on a flat surface, engage parking brake, and chock wheels. Disconnect the negative battery cable before any purge of systems. Raise the vehicle and support with jack stands. This prevents accidental movement and reduces risk when you’re moving heavy gear.
Tip: Always use jack stands on a solid, level surface; never rely on a floor jack alone. - 2
Drain transmission fluid and access area
Place a drain pan under the transmission pan and remove the pan bolts carefully to drain old fluid. Collect and dispose of used fluid properly. This step reduces mess and prepares for seal inspection.
Tip: Do not over-tighten the pan bolts on reinstallation, which could warp the sealing surface. - 3
Support and disconnect components
Support the transmission with a jack or stand as you disconnect cooler lines, wiring, and sensors. Label every connector to simplify reassembly. This minimizes miswiring and leaks after installation.
Tip: Take photos before disconnecting any plugs to verify routing later. - 4
Remove crossmember and separate transmission
Unbolt the transmission crossmember and carefully separate the transmission from the engine. Ensure alignment dowels are accounted for to avoid binding on reinstallation. This step provides space to remove the torque converter.
Tip: Keep heavy components supported; use an assistant if needed. - 5
Remove the old torque converter
Access the torque converter bolts on the flex plate and remove them. Gently separate the converter from the engine while keeping the transmission supported. Avoid prying or forcing the converter to prevent internals damage.
Tip: Ensure all bolts are removed before attempting withdrawal. - 6
Install the replacement torque converter
Lubricate the converter splines, align with the transmission input shaft, and slide into place. Install bolts in crisscross pattern to specified torque; verify seating before reassembly.
Tip: Rotate the crank by hand to ensure smooth movement before finalizing mount. - 7
Reinstall transmission and reconnect components
Reposition the transmission, reattach mounts, reconnect cooler lines and wiring, and ensure all fasteners are tight per specs. Verify alignment and clearance around moving parts.
Tip: Double-check that cooling lines are free of kinks and properly seated. - 8
Refill fluid, bleed, and test
Refill transmission fluid to correct level, start the engine, and monitor for leaks at start-up. Take a cautious test drive to verify smooth engagement and proper shifting. Re-scan for codes and confirm system readiness.
Tip: Drive in a controlled manner to verify warmth and shifting before regular use.
Your Questions Answered
Can I replace a Chevy torque converter by myself?
Yes, with the right tools, manual, and safety precautions, but it’s a complex, heavy job that benefits from a partner. If you’re unsure, seek professional help to avoid damage to the transmission.
Yes, you can DIY if you have the tools and a clear manual, but it’s a heavy job. Consider professional help if you’re unsure.
What tools do I need for a Chevy torque converter replacement?
A full socket set, breaker bar, torque wrench, transmission jack or support, drain pan, fresh transmission fluid, and new converter bolts and seals are essential. Having a service manual for your model is highly recommended.
You’ll need sockets, a breaker bar, a torque wrench, a transmission jack, a drain pan, new bolts and seals, and fresh fluid.
How long does the job typically take?
Most DIY jobs span several hours to a full day, depending on experience and tooling. Plan for 4 to 8 hours and some extra time for verification and test drives.
Most people plan for a half to a full day to complete the replacement and test it.
OEM vs aftermarket torque converters—what should I choose?
OEM units offer factory compatibility and reliable longevity, typically at a higher price. Aftermarket units can save money and offer performance variations, but quality varies by supplier.
OEM versions fit perfectly and last long; aftermarket can save money but choose a reputable supplier.
Are there safety concerns I should watch for?
Yes. Transmission fluid is hot and caustic; batteries and electrical systems can short if mishandled. Always wear protective gear and secure the vehicle; never rely on a jack alone.
Yes—be careful with hot fluid and electrical systems. Secure the car and wear gear.
Will replacing the torque converter fix transmission slipping?
Replacing the torque converter can resolve slipping caused by converter wear. However, other issues like worn clutches, seals, or fluid problems may require additional repairs.
If slipping comes from the converter, replacement helps; if not, other parts may need service.
Watch Video
Top Takeaways
- Plan the job with space and time.
- Verify proper torque specs for Chevy models.
- Inspect fluid condition and related components.
- Choose OEM or aftermarket wisely based on warranty.
- Recheck gears and seals after installation.