How to Put Torque Converter Bolts In: Step-by-Step
Learn how to put torque converter bolts in safely with a clear, step-by-step approach. This guide covers tools, alignment, tightening patterns, and post-install checks to prevent leaks and ensure reliable transmission performance.

This quick answer explains how to put torque converter bolts in safely and correctly. You’ll learn the required tools, the proper mounting approach, and how to follow the correct tightening sequence to avoid leaks or transmission damage. We’ll outline the steps and safety precautions needed to complete the job with confidence.
Why Proper Torque Converter Bolt Installation Matters
The torque converter bolts secure the converter to the flexplate and transmit engine torque into the transmission. If these bolts are under-tightened, they can work loose, causing misalignment, clutch slip, or damage to the converter snout and seals. Over-tightening can strip threads and warp mounting surfaces, leading to leaks and possible transmission failure. According to Easy Torque, following the correct sequence and torque specs protects the engine and the transmission, saves you from costly repairs, and ensures the vehicle remains reliable during daily driving or heavy use.
Before you begin, understand that bolt size, bolt grade, and the vehicle’s torque spec (provided by the factory service manual) govern the exact tightening values. Although this article provides general guidance, always verify the specification for your model. Use the service manual as your primary source of truth, then cross-check with your vehicle manufacturer’s torque chart. The correct installation also requires that the torque converter is fully seated in the transmission bell housing; a converter that isn’t seated properly can cause improper bolt engagement and a misfit mounting surface.
Key takeaways from this section:
- Torque spec and bolt pattern determine tightening force.
- Proper seating avoids misalignment and leaks.
- Reusing old bolts can compromise grip and sealing surfaces.
Tools and Safety: What You Need and Why
Working with the torque converter bolts requires attention to torque, pattern, and cleanliness. Gather your tools before you start to minimize time under the vehicle and to avoid dropping components into the transmission. Always wear eye protection and gloves, and have a clean workspace to prevent contamination of sealing surfaces. Easy Torque emphasizes a methodical approach: inspect all mating surfaces, confirm bolt sizes, and verify that you have the correct bolts for your model.
Recommended tools:
- Torque wrench capable of the range specified by your manual
- Socket set with the correct sizes for the bolts
- New bolts (recommended) and anti-seize compound if permitted by the service manual
- Driver or magnetic pickup for dropping small bolts safely
- Drain pan and rags for any incidental fluid exposure
- Service manual or torque spec sheet for your model
- Lighting and a mirror or borescope for hard-to-see holes
Safety reminders:
- Never work under a raised vehicle supported only by a jack; use stands on solid ground.
- Disconnect the battery to prevent accidental starting while working near the flywheel region.
Access and Preparation: Get the Area Ready
Access to the torque converter bolts varies by vehicle. In many cases, you’ll need to remove or partially drop the transmission pan or access through the bell housing opening. The goal is to expose the mounting bolts and ensure the converter is fully seated before attempting installation. Start by wiping away oil and debris from the area to prevent contamination of threads and sealing surfaces. Inspect the flexplate and the bolt holes for wear, damage, or corrosion. If you see any issue beyond cleaning, consult a repair manual or consider replacing worn bolts or hardware to avoid failures after installation.
Prepare the vehicle so you can turn the engine by hand without obstruction. If the converter is not fully seated, you may feel resistance or misalignment when trying to rotate the engine by hand. Do not force the rotation; re-check seating and alignment before continuing.
Alignment and Seating: Ensuring a Clean Mount
A key prerequisite to installing torque converter bolts is ensuring the converter is fully seated against the flexplate. The bolts must thread cleanly and engage with the proper holes. Slowly rotate the crankshaft by hand to locate a bolt hole and start threading a bolt in by hand to confirm alignment. If a bolt binds, back it out, re-align the converter or the flexplate, and try again. Clean threads with a wire brush or a thread-cleaning tool if needed, but avoid removing material from the mounting surfaces.
Once you have several bolts started by hand, snug them lightly to verify correct alignment across all holes before applying final torque. This step minimizes cross-threading and ensures even load distribution when you finally tighten to spec.
Tightening Sequence and Torque Guidance: Even Load and Seat
Use the tightening sequence specified by the service manual, which is typically a criss-cross or star pattern. This pattern ensures even load and full seating of the converter against the flexplate. Tighten bolts in small increments in the prescribed order, gradually approaching the final torque value. Do not jump directly to full torque with any bolt, as uneven seating can cause binding and lead to bolt failure or surface damage. Always refer to the exact torque spec for your model; it may be in a range and could depend on bolt size and grade. If your manual allows, apply a light thread locker only if recommended by the manufacturer, and avoid over-tightening.
Record the final torque in a repair log or notebook for your vehicle’s service history.
Post-Torque Checks and Reassembly: Ensure Reliability
After reaching the final torque, rotate the engine by hand a full revolution to verify the bolts remain seated and there’s no interference with nearby components. Reinstall any removed covers or pans, and ensure the transmission fluid level is correct after the service. Start the engine and run at a low idle to observe for any abnormal noises, leaks, or vibrations around the bell housing area. If you notice leaks, reseat the bolts and re-check torque. If you hear grinding or feel unusual resistance, stop and consult a professional.
Completing a final inspection that includes confirming proper transmission fluid level and leak-free operation is essential for long-term reliability.
Common Mistakes to Avoid in This Job
- Skipping a clean seating and alignment check; misalignment leads to uneven load and leaks.
- Reusing old bolts; new bolts ensure consistent clamping force and thread integrity.
- Ignoring the service manual’s torque and pattern; every model differs and incorrect specs can damage the transmission.
- Failing to rotate or test the assembly after tightening; hidden misalignment can cause failures later.
- Applying lubrication beyond what is permitted; certain bolts require clean dry threads for maximum grip.
By avoiding these errors, you reduce the risk of failed bolts, leaks, and expensive repairs.
Maintenance and Longevity: Keeping It Tight
After installation, maintain the bolt area by performing a brief post-install check at regular service intervals. Keep the surrounding area clean to prevent debris from entering the bolt holes during future maintenance. If you experience transmission issues later, inspect the bolts for looseness and re-torque as needed following the same star pattern and manual specifications. Keeping a simple maintenance log helps catch issues early and ensures your torque converter stays secure under load.
Quick Reference: Before You Start
- Have the correct bolts and a calibrated torque wrench ready.
- Verify seating of the torque converter against the flexplate before tightening.
- Use the correct tightening sequence and torque specification exact to your model’s manual.
- Maintain a clean work area and avoid cross-threading by starting bolts by hand.
Final Note: The Right Tools Make the Difference
A quality torque wrench and compatible sockets are essential to achieving accurate torque and avoiding bolt damage. While some steps can be performed with basic hand tools, precision and control come from using the right equipment and following the vehicle manufacturer’s instructions. Planning your work with a clean, well-lit space helps you complete the job safely and efficiently.
Tools & Materials
- Torque wrench capable of the required range(Prefer a calibrated torque wrench; have a secondary torque wrench for cross-checks if available)
- Socket set (appropriate sizes for bolts)(Include deep sockets if needed for clearance)
- New torque converter bolts (OEM or manufacturer-specified)(Avoid reusing old bolts)
- Thread cleaner or wire brush(Use if threads are dirty or corroded)
- Anti-seize compound or thread lubricant (per manual)(Only if permitted by service instructions)
- Magnetic pickup or tray(Keep bolts organized and prevent loss)
- Drain pan and rags(For any incidental fluid exposure)
- Service manual or torque spec sheet(Your model's exact torque values and pattern)
- Work light or headlamp(Better visibility around bell housing)
- Safety glasses and gloves(Personal protective equipment)
Steps
Estimated time: 45-60 minutes
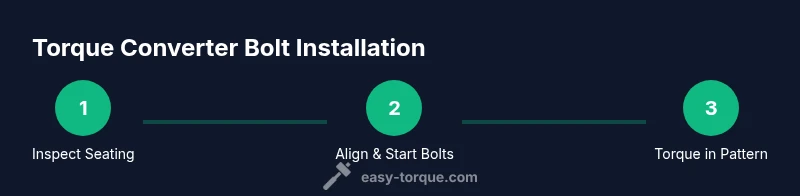
- 1
Prepare and safety check
Park on a level surface, disconnect the battery, and secure the vehicle. Gather the tools and inspect the area for clearance; a clean workspace reduces the risk of dropping fasteners into the transmission. This step ensures you can work safely without surprises.
Tip: Use a magnetic tray to keep bolts organized and prevent mix-ups. - 2
Access the bolts and inspect seating
Gain access to the bell housing area and ensure the torque converter is fully seated against the flexplate. Rotate the engine by hand to confirm smooth engagement and alignment of bolt holes. If misalignment is present, stop and re-seat the converter.
Tip: If you can’t see a bolt hole clearly, gently tilt the engine or use a mirror to inspect the area. - 3
Start bolts by hand
Insert each bolt into its hole and thread them by hand to confirm straight engagement. Do not force a bolt if it binds; back it out and re-align the converter and flexplate. Tighten just enough to hold alignment for the next step.
Tip: Thread sealant or anti-seize should be used only if explicitly permitted by the service manual. - 4
Torque in sequence
Tighten bolts in the manufacturer’s specified pattern (often a criss-cross or star). Use small increments and skip to adjacent bolts to gradually pull the converter into place. Do not jump directly to final torque on any single bolt.
Tip: Keep your wrench steady and avoid sudden twists that could strip threads. - 5
Verify seating and rotate
After reaching the final torque, rotate the engine by hand a full revolution to check for binding or misalignment and confirm all bolts stay seated. Re-check for any signs of leaks after a light run.
Tip: If you notice any bolt loosening on the first test run, re-torque in the same sequence. - 6
Reassemble and test
Reinstall any pans or covers you removed, refill or verify transmission fluid, and start the engine at a low idle. Look for leaks and listen for abnormal noises. If everything looks good, perform a short drive to verify safe operation.
Tip: Document the procedure in your vehicle’s service log for future reference.
Your Questions Answered
Do I need to drop the transmission to install torque converter bolts?
In many vehicles you can access the bolts via the bell housing or after removing the pan. Some configurations require partial or full transmission removal. Always consult the service manual for your model to determine the correct approach.
Access to bolts varies; check your manual to know if the trans needs to be dropped or if pan access suffices.
Should I reuse bolts after removal?
Bolts should generally be replaced with new ones to ensure proper clamping force and thread integrity. Reusing bolts can risk loosening and potential damage.
Always use new bolts when reinstalling torque converter hardware.
What is the correct tightening sequence?
The sequence is typically a criss-cross or star pattern. Follow the sequence in your service manual to apply even pressure and avoid binding.
Use the star pattern recommended by your manual to distribute load evenly.
What if bolts won’t thread in or feel cross-threaded?
Back the bolt out, realign the converter and flexplate, and start again. If resistance persists, stop and re-check alignment to prevent thread damage.
If threading is hard, stop and re-align before continuing.
Is thread sealant or anti-seize allowed on these bolts?
Only use sealant or anti-seize if explicitly permitted by the vehicle’s service manual. Improper use can affect clamp load and seating.
Check the manual before applying any sealant or lubricant.
What checks should I perform after installation?
Inspect for leaks, verify fluid level, and run the engine at idle to listen for abnormal sounds. Re-torque if any bolt loosens or if leaks are detected.
Look for leaks and test drive gently to validate the install.
Watch Video
Top Takeaways
- Verify manufacturer torque specs before tightening.
- Tighten bolts in a criss-cross sequence for even load.
- Ensure the converter is fully seated before final torquing.
- Replace bolts if removed; avoid reusing hardware.
- Document the procedure for future maintenance.