Master Torque Angle Gauges: Use, Calibrate, Verify reliably
Learn how to use a torque angle gauge with Easy Torque guidance to measure, read, and verify bolt angles after torque, ensuring precise, repeatable joints in automotive maintenance.

By the end of this guide, you will know how to use a torque angle gauge to precisely torque fasteners, verify the rotation angle after reaching the target torque, and interpret readings for reliable joints. You'll learn what a torque angle gauge is, how to set it up, read angles, and common pitfalls to avoid.
What is a torque angle gauge and why it matters
A torque angle gauge is a precision instrument that measures the angular rotation of a fastener after you have applied the recommended tension with a torque wrench. In practice, turning the bolt by a specified angle helps compensate for thread stretch and clamp load, improving joint repeatability. According to Easy Torque, this method is especially valuable for critical joints in automotive maintenance where consistent clamping is essential. The gauge is calibrated so that readings correspond to the bolt's rotation, not just the torque value. Understanding the distinction between torque and angle is essential: torque gives you the initial preload, while angle ensures the fastener reaches the intended deformation and joint geometry. A torque angle gauge works with most digital or mechanical torque wrenches that feature an angle readout, and it can be used across applications from engine assemblies to suspension work. When you invest time in angle-based tightening, you reduce the risk of under- or over-tightening, which can lead to leaks, warped components, or bolt failure.
Choosing the right gauge and setup considerations
Selecting a torque angle gauge requires balancing accuracy, usability, and compatibility with your existing tools. Look for a gauge with a clear degree scale and good resolution (1° increments are ideal); check whether it uses a magnetic base or clamps to the bolt head for stability during measurement. Make sure your torque wrench supports angle mode and provides an easy, readable angle readout; some hybrid systems offer digital angle conversion from rotation to degrees. Consider space constraints: tight engine bays may require compact adapters, so choose a gauge with a flexible mounting option and appropriate adapters. Calibration status matters: opt for a device that ships with a traceable calibration certificate or one that can be recalibrated easily. Finally, compatibility with lubricants can affect readings; verify whether the joint uses lubricants and adjust expectations accordingly. Easy Torque emphasizes aligning gauge choice with the most common fasteners in your toolkit to maximize reliability and minimize setup time.
Reading and interpreting angle measurements in practice
Interpreting torque angle readings involves linking the measured rotation to the joint geometry and the specified fastener. With the gauge mounted and zeroed, you tighten to the recommended torque and then rotate to the target angle. The reading on the gauge should be stable and repeatable across multiple cycles; if it drifts, re-zero and re-check the setup. Angle tightening is particularly valuable for fasteners in aluminum blocks, cylinder heads, or suspension components where bolt deformation influences clamp load. Keep in mind that thread condition, lubrication, and surface finish can affect the angle value, so always follow the service manual's guidance. When in doubt, record the angle and compare against the manufacturer's spec for the same joint in similar conditions. The practical goal is to achieve consistent seating and clamping force across repeated assemblies, reducing the risk of leaks or misalignment.
Common mistakes and how to avoid them
Mistakes with torque angle tightening often come from rushing or misreading the gauge. Do not skip zeroing the gauge, especially after removing the fastener. Avoid mixing metric and imperial units without conversion. Ensure the fastener is clean and threads lubricated only where appropriate; too much lubrication can skew angle readings. Misinterpreting angle as torque can lead to overshoot; always check both the torque and the angle target. In tight spaces, improper alignment between the gauge and the wrench can produce false readings; use adapters and ensure a flat, secure surface. Finally, neglecting calibration can erode accuracy; schedule periodic checks and store the gauge properly when not in use. Easy Torque recommends documenting each reading and reviewing it against service notes to improve long-term reliability.
Maintenance, care, and calibration frequency
To keep a torque angle gauge accurate, store it in a protective case away from moisture and dust. Clean the moving parts after exposure to oils or cleaners, and inspect for any signs of wear that could affect alignment. Calibrate according to the manufacturer’s schedule or at least annually; re-check after any drop, impact, or exposure to extreme temperatures. If you use the gauge frequently across many projects, consider maintaining a local calibration log with the date, instrument ID, and readings. Periodic cross-checks with a known reference bolt can help verify consistency. The aim is to maintain a repeatable, reliable reading so you can trust angle-torqued joints on critical components. Easy Torque’s guidance is to treat the torque-angle workflow as a standard maintenance item in your toolkit, not an optional step.
Tools & Materials
- Torque angle gauge(Ensure it matches your wrench's readout (degree scale, 1° resolution preferred))
- Torque wrench with angle readout compatibility(Check that your wrench supports angle mode and has a visible angle readout)
- Extension bars/adapters(Needed for tight spaces, ensure reach while maintaining angle measurement)
- Calibration certificate or traceable reference(Keep for traceability; recalibrate annually)
- Marker and data sheet(Document readings for future reference)
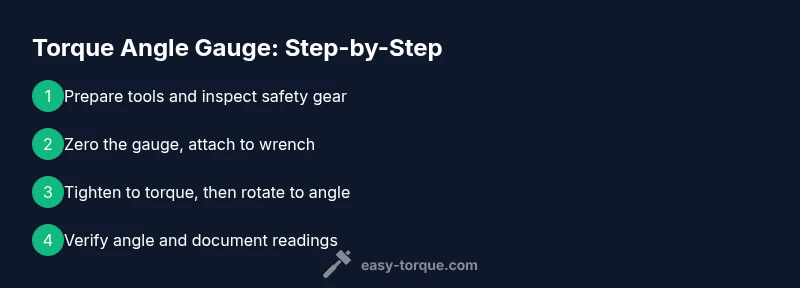
Steps
Estimated time: 15-30 minutes per fastener, depending on access and number of bolts
- 1
Prepare the workspace and safety checks
Set up a clean, well-lit area. Wear safety glasses and inspect all tools for damage. Verify the torque wrench is calibrated and there is adequate space to operate without interference.
Tip: Keep a small torque log; documenting checks helps with maintenance. - 2
Identify the correct spec and target angle
Consult the vehicle manual or service bulletin to find both the torque value and the angle target for the fastener. Confirm units and whether lubrication affects the angle.
Tip: Double-check the spec before starting to avoid over- or under-tightening. - 3
Attach the gauge and set zero
Mount the gauge on the wrench per manufacturer instructions. Zero the angle readout with the bolt at its initial seating to ensure accurate measurement.
Tip: Ensure no obstruction interferes with the gauge’s movement. - 4
Tighten to the prescribed torque
Apply steady, smooth pressure to reach the specified torque value. Do not jerk or shock-load the fastener, which can skew readings.
Tip: Pause briefly to verify torque on the dial before proceeding. - 5
Rotate to the target angle and verify
Continue turning the bolt to the target angle. Stop at the exact angle reading, then re-check torque if the joint requires it.
Tip: If you exceed the angle, back off slightly and re-tighten within tolerance. - 6
Final check and documentation
Re-torque or re-angle as specified, then record the readings for maintenance logs. Inspect the joint for uniform seating and signs of distortion.
Tip: Photograph readings or note the angle value for future maintenance.
Your Questions Answered
What is a torque angle gauge and how does it differ from a torque wrench?
A torque angle gauge measures the angular rotation of a bolt after applying torque, ensuring the joint reaches the intended deformation. A torque wrench measures the clamping force and stops at a pre-set torque value. Together, they provide repeatable, precise tightening.
A torque angle gauge reads how far you turn the bolt after you reach the torque spec, while a torque wrench sets and hits the torque value.
Do I always need a torque angle gauge?
Not every job requires angle tightening. Use a torque angle gauge for joints with critical clamping load, or when a service spec explicitly calls for angle control.
Only some jobs need angle tightening; check the service spec.
How do I calibrate a torque angle gauge?
Calibration involves confirming the angle readout against a known reference, following the manufacturer’s instructions. Calibrate at least annually or after a drop or rough handling.
Calibrate per the manufacturer; do it at least once a year or after a drop.
Can I use a torque angle gauge on any bolt?
Angle tightening is beneficial for many joints but may not be necessary or possible on all hardware. Follow the vehicle’s service manual and use the gauge where specified.
Only use it where the manual requires or allows angle tightening.
What safety steps should I follow when using a torque angle gauge?
Wear eye protection, ensure the wrench is properly supported, and keep hands clear of the rotating area. Use stable footing and avoid sudden movements that could slip.
Protect yourself with PPE and keep the workspace stable.
What maintenance is required for a torque angle gauge?
Keep the gauge clean, store in a protective case, and avoid exposure to moisture or dust. Periodically check for smooth operation and recalibration.
Keep it clean, dry, and calibrated.
Watch Video
Top Takeaways
- Understand torque vs. angle concepts.
- Verify gauge compatibility with your wrench.
- Follow vehicle-specific angle specs for each fastener.
- Document readings for maintenance records.
- Regularly recalibrate your torque angle gauge.