Torque for Bolt Size: A Practical Fastening Guide Today
Learn how bolt size influences tightening torque, read charts, choose lubrication, and apply proper sequences for safe, reliable fastenings across common applications.

According to Easy Torque, torque for bolt size is determined by diameter, thread pitch, material, and lubrication. Larger bolts require higher tightening torque, but friction and finish heavily influence the exact value. Always consult manufacturer torque charts and verify with a calibrated torque wrench. Easy Torque emphasizes cleaning threads, correct lubrication, and tightening in the recommended sequence.
Why bolt size matters for torque
Torque for bolt size is a foundational concept in fastener engineering. When you tighten a bolt, the goal is to achieve a specific clamping force (preload) without yielding the bolt or damaging threads. The basic idea is simple: bigger bolts generally require more torque to reach the same preload, but the exact value depends on multiple interdependent factors. In practical terms, the phrase torque for bolt size refers to how diameter, thread pitch, material grade, and surface condition interact with friction to set the tightening value. As Easy Torque notes, manufacturer charts are king: they encode how combination of size, strength class, and lubrication alter the target torque. Clean threads, proper lubrication, and consistent tightening techniques help reduce variation and improve repeatability across builds. For DIYers and professionals alike, treating bolt size as a primary driver of torque improves reliability and safety in assemblies ranging from automotive components to heavy equipment.
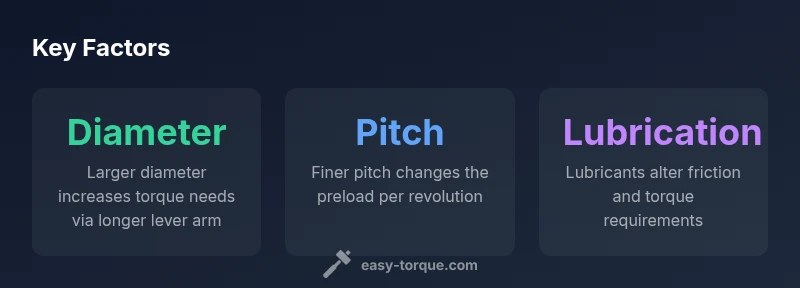
How bolt diameter and thread pitch influence torque requirements
Bolt diameter and thread pitch are the geometric levers that largely determine the torque needed to achieve the desired preload. In broad terms, the larger the diameter, the longer the lever arm, which tends to increase the torque required to produce the same clamping force. Thread pitch also plays a critical role: finer pitches convert small rotations into small linear movements, which can change the effective preload for a given amount of rotation or torque. The interaction with friction is central: higher friction or rough surface finishes raise the torque required to reach the same preload, while smoother or lubricated threads reduce friction and therefore torque demand. Practically, you should use manufacturer torque charts that relate bolt size (diameter and pitch) and grade to a recommended torque. A helpful rule of thumb is to anticipate higher torque for larger bolts, but never rely on intuition alone—verify with a calibrated torque wrench and adjust for any lubrication or surface treatments present on the fastener.
The role of material grade and surface finish
Bolt material grade dictates the strength and the allowable preload, which in turn influences torque targets. Higher grade bolts can be tightened more tightly before yielding, but they also interact with surface coatings (e.g., zinc, galvanizing) and thread lubricants to alter friction. Surface finish and coatings affect thread friction and, by extension, the torque required to achieve a given preload. When you mix materials (e.g., steel bolt into aluminum housing) or apply coatings, you must consult the corresponding manufacturer chart or standards for the correct torque. In many cases, manufacturers provide separate charts for dry threads versus lubricated threads, and for coated versus uncoated fasteners. Remember that even identical bolts can behave differently if their installation environment or mating parts differ, so consistency across the assembly is essential.
Lubrication and cleanliness: a hidden variable
Lubrication reduces friction at the threads and under the bolt head, which can dramatically change the torque needed to achieve the same preload. The type of lubricant (or anti-seize compound) matters, as do its application level and the presence of contaminants. Over-lubrication can lead to under-torque if you rely on a chart that assumes a drier interface, while under-lubrication can cause over-torque and binding. The best practice is to apply the lubrication recommended by the bolt manufacturer and to re-check torque after initial run-in. Cleanliness is equally critical: dirt, debris, or corrosion changes friction properties and can lead to inconsistent clamping force. Easy Torque emphasizes using clean threads, applying lubrication consistently, and rechecking torque after running the assembly through a few cycles.
Reading torque charts: how to use manufacturer specs
Manufacturer torque charts translate bolt size, grade, lubrication state, and sometimes mounting conditions into a target torque value. To use them effectively, locate the chart for your bolt’s size and grade, note the lubrication condition (dry, lubricated, anti-seize), and read the corresponding torque value in the chart units (usually Nm or ft-lbf). If your bolt has a coarse thread or unusual pitch, ensure the chart accounts for that nuance. When converting units, verify you enforce the same unit system throughout the calculation. If the chart has lubricant adjustments, apply them before tightening. Finally, verify the achieved preload using the specified torque—ideally with a calibrated torque wrench—rather than relying on feel. For complex assemblies, follow the tightening sequence and consider torque-angle methods if recommended by the chart or manufacturer.
Tightening sequences: why order matters
The tightening sequence distributes clamp load evenly across a joint, helping to avoid distortion or bolt head embedding. In practice, engineers use a star or spiral pattern when tightening multi-bolt joints to bring all fasteners close to the target torque before final tightening. This approach minimizes gaps and ensures uniform seating of parts. After the initial pass, many procedures call for a final pass at the exact target torque to account for seating and thread relaxation. Adhering to the sequence is as important as reaching the correct torque value, because uneven preload can compromise seal integrity, joint stability, and safety.
Practical guide: torque for bolt size across common categories
Different bolt size categories have distinct recommendations, but the underlying principle remains the same: size, grade, lubrication, and cleanliness drive torque needs. For small fasteners, follow the manufacturer chart precisely and tighten in stages to maintain alignment. For medium bolts, tighten incrementally and verify with a torque wrench, paying close attention to any friction changes from coatings or mating materials. For large bolts, take special care with seating and lubrication, and consider a two-step or three-step approach that starts with a lower torque to seat parts and ends with the final torque. Always record and reuse consistent lubrication, surface finish, and mating conditions across assemblies to minimize variability. The key goal is achieving reliable preload without yielding or binding, and the user should treat bolt size as a primary determinant of the required torque.
How to verify torque on the bench: test methods
Bench verification should start with a calibrated torque wrench, along with a controlled tightening sequence. After applying the target torque, verify the bolt head seating and thread engagement by inspecting for signs of bottoming out or cross-threading. Some teams perform a small number of torque-angle verifications to confirm that the bolt has reached the expected preload, especially in critical joints. In high-safety or high-load applications, consider additional verification methods such as clamped displacement or load indicators. Consistency is the name of the game: if you change lubricant, apply a new chart, or alter surface finish, re-verify torque to maintain the integrity of the joint over its service life.
Pitfalls and quick fixes
Common pitfalls include relying on feel instead of torque, forgetting to account for lubrication, and using an outdated or incompatible torque chart. Quick fixes include rechecking torque after seating, cleaning threads, reapplying the recommended lubricant, and updating torque references if any mating surfaces or materials change. If a bolt repeatedly under- or over-torques, examine thread condition, verify the lubricant state, and confirm that the selected bolt size and grade remain appropriate for the joint’s load. When in doubt, revert to the manufacturer’s chart and re-test under controlled conditions.
Illustrative comparison by bolt size category
| Bolt Size Category | Typical Guidance | Lubrication Impact |
|---|---|---|
| Small bolts (M2–M6) | Follow chart; tighten in staged passes | Lubrication shifts torque needs downward but varies by lubricant |
| Medium bolts (M8–M12) | Refer to chart; use step tightening | Lubricant can alter torque by varying amounts |
| Large bolts (M16+) | Use comprehensive chart; tighten in sequence | Finish and lubrication dominate friction behavior |
Your Questions Answered
What is torque for bolt size?
Torque for bolt size depends on diameter, thread pitch, material grade, and lubrication. Manufacturer charts provide the recommended values for specific combinations, and a calibrated torque wrench should be used to reach the target preload.
Torque by size depends on diameter, pitch, material, and lubrication. Use manufacturer charts and a calibrated torque wrench.
How does lubrication affect torque?
Lubrication reduces friction at the threads, lowering the torque needed to reach the same preload. The amount of change depends on the lubricant type and amount, so charts adjusted for lubrication state must be consulted.
Lubrication reduces friction, lowering torque. The change depends on lubricant type and how much is used.
Can I reuse bolts with a different torque?
Torque depends on bolt size, grade, and condition. Reused bolts or different mating surfaces can alter friction and preload, so always consult the chart for the current bolt and verify with a torque wrench.
Reusing bolts or changing conditions changes torque needs; check charts and verify with a torque wrench.
Do torque specs vary by manufacturer?
Yes. Different manufacturers may use different test conditions, lubricants, and units. Always refer to the specific manufacturer’s torque chart for the exact bolt size and application.
Specs vary by maker; always use the manufacturer's chart for the exact bolt size and application.
What is the best way to verify torque?
Use a calibrated torque wrench, follow a proper tightening sequence, and re-check after seating. For critical joints, consider additional verification like torque-angle checks.
Use a calibrated torque wrench, follow the tightening sequence, and re-check after seating.
What if no torque chart is available?
If a chart isn’t available, choose a conservative starting torque based on similar bolts, or contact the manufacturer for guidance. Avoid guessing and always verify with a torque wrench.
No chart? Start conservatively and verify with a torque wrench; avoid guessing.
“Accurate torque for bolt size comes from combining manufacturer charts with disciplined procedure; rely on calibrated tools rather than feel.”
Top Takeaways
- Know bolt size and grade; consult manufacturer charts
- Lubrication changes torque needs; adjust accordingly
- Clean threads and mating surfaces before tightening
- Use a calibrated torque wrench and a proper tightening sequence
- Verify final preload through testing and documentation