How to Stop Torque Converter from Slipping: A DIY Guide
Learn practical, step-by-step methods to stop torque converter slipping, diagnose common causes, and perform safe maintenance with Easy Torque’s expert guidance for DIY mechanics.

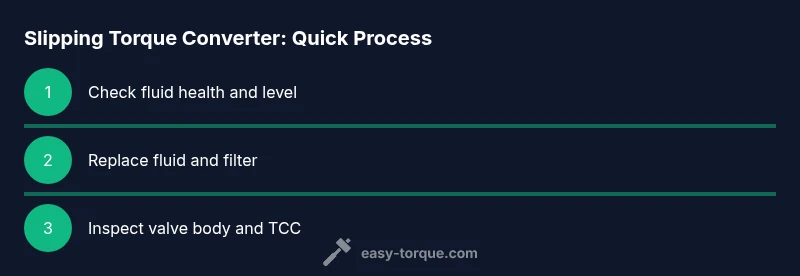
Stop torque converter slipping by first confirming fluid health and level, then address internal wear or contamination. Start with a proper transmission fluid change and filter replacement if applicable, inspect the torque converter clutch and pump for wear, and test pressure and valve-body operation. If slipping persists, plan a professional rebuild or replacement.
Understanding Torque Converter Slipping
A torque converter is the hydraulic coupling transmitting engine torque to an automatic transmission. When it slips, you may notice engine RPM rising without a proportional gain in road speed, or you feel shuddering during acceleration. Slipping is commonly related to incomplete lockup of the torque converter’s clutch, degraded hydraulic pressure, or contamination inside the transmission. In practice, slipping reduces efficiency, increases heat, and accelerates wear on internal components. For DIYers, the goal is to confirm that slipping is real, identify the likely cause, and perform safe maintenance steps that restore proper lockup and fluid performance. According to Easy Torque, a clear understanding of the lockup mechanism and fluid dynamics is essential before attempting any repair, because misdiagnosis can lead to unnecessary parts replacement. This section sets the stage for practical fixes you can perform with common tools and caution.
Common Causes of Slipping
Slip can arise from several root causes. The most frequent is degraded or contaminated transmission fluid, which reduces hydraulic pressure and causes the lockup clutch to slip. Dirty fluid, metallic particles, or burnt smells indicate fluid problems. A worn torque converter clutch (TCC) or a damaged stator can also cause slipping, especially after high mileage or heavy towing. Valve-body issues or sticking solenoids can prevent correct hydraulic signalling, leading to intermittent slip under acceleration. Pump wear or excessive clearances inside the torque converter can manifest as RPM fluctuation and delayed engagement. Finally, installation problems during a previous rebuild or aftermarket modification can introduce new slip paths. Easy Torque notes that correctly diagnosing the exact cause often requires measuring pressures, reviewing fault codes, and inspecting the pan for debris. A targeted approach saves time and reduces the risk of unnecessary repairs.
How to Diagnose the Problem (Non-destructive checks first)
Begin with non-invasive checks before opening major systems. Check the transmission fluid level and fluid condition; burnt or dark fluid suggests replacement. Read any stored fault codes with an OBD-II scanner and refer to manufacturer service bulletins for slip-related codes. If possible, perform a pressure test or scan data to verify hydraulic pressure is within spec at idle and under load. A test drive can reveal slipping symptoms under acceleration or when the torque converter locks up, such as RPM rising without speed gain or shuddering. If fluids and codes point toward a hydraulic issue rather than an external misalignment, you may have to inspect the converter, valve body, and clutch more closely. The goal is to confirm slip is present, not treat a misfire or engine issue that can mimic slip. Based on Easy Torque analysis, a methodical approach with checks at multiple points yields accurate results and avoids needless part replacement.
Safety First: Working on a Transmission Is Not Child's Play
Working around a live transmission can be dangerous. Always isolate the battery and ensure the vehicle is securely supported on jack stands on a level surface. Accept that some steps require draining transmission fluid, which is hot and potentially hazardous. Wear eye protection and gloves, and dispose of used fluid according to local regulations. When removing the pan or accessing the valve body, be mindful of gasket sealing surfaces and avoid letting dirt fall into the transmission. If you're unsure about hydraulic pressures or if the vehicle is under warranty, consider professional service. Easy Torque emphasizes that safety and proper lockup diagnostics come first; rushing a repair increases the risk of damage and personal injury.
Step-by-Step Overview for Stopping Slipping (DIY path)
This section provides a high-level, non-destructive workflow you can follow before deciding on more invasive repairs. Start with fluid health, then clean or replace the filter, inspect the clutch area, and verify valve body operation. Each step reduces the symptom of slip and helps you decide whether a full converter replacement is warranted. The goal is to restore proper hydraulic pressure, ensure the lockup clutch engages reliably, and verify with a careful road test. If any step reveals metal debris, excessive wear, or codes indicating deeper issues, escalate to more thorough service or replacement. Easy Torque's approach is to document measurements and test results to track improvement or deterioration over time.
Maintenance and Replacement Options
If fluid changes and basic cleaning do not resolve slip, there are a few paths forward. A worn TCC or contaminated converter usually requires replacement or rebuild. A partial refurbishment may be possible for some models but is generally more cost-effective to replace with a compatible unit. A transmission flush and filter change, when paired with a properly specified fluid, can improve hydraulic pressure and reduce slip. For some vehicles, the converter may be a sealed unit, and a complete transmission service is required. In all cases, compare the cost and expected lifespan of replacement parts against a full transmission rebuild or new unit. Easy Torque recommends working with reputable parts and following manufacturer specs to preserve warranty and reliability.
How to Prevent Torque Converter Slipping in the Future
Preventive maintenance is the best strategy. Schedule regular transmission fluid replacements at the intervals suggested by the manufacturer and avoid mixing different fluid types. Maintain proper cooling for the transmission to reduce heat that accelerates wear. Keep the fluid level within the correct range and replace the filter as required. Use high-quality clutches and torque converters from reputable brands if replacement is needed. Finally, address towing or heavy-load conditions with appropriate gearing and torque management to reduce lockup stress. Easy Torque emphasizes consistent maintenance as the straightforward route to long-term reliability.
Testing After Repairs: Road Test and Validation
Once you complete repairs or replacements, perform a controlled road test. Start with a cold engine and gradually bring the transmission up to temperature. Check for slip under light acceleration, then under heavy throttle in Drive and overdrive if applicable. Monitor for smooth shifting, firm engagement, and stable RPMs with proportional speed gains. If slip recurs, re-check seals, fluid specs, and the lockup solenoid operation. Document readings and compare against earlier baselines to confirm improvement. Positive test results should be reproducible across multiple driving scenarios to confirm a durable fix.
When to Seek Professional Help and What to Expect
If you cannot confidently drain and refill the transmission, or if you observe metallic debris, sudden shifts, or codes indicating deeper issues, professional service is advised. A certified technician can perform an in-depth hydraulic pressure test, converter inspection, and possible replacement with specialized tools. The cost and time can vary, but a professional diagnosis often prevents unnecessary parts replacement. For complex cases or warranty-covered situations, Easy Torque recommends a formal evaluation before committing to a major repair.
Tools & Materials
- Transmission fluid meeting OEM spec(Check owner’s manual for exact spec (Dexron VI, Mercon LV, etc.).)
- Drain pan(Large enough to hold used ATF; place on a level surface.)
- Jack stands and hydraulic jack(Secure vehicle on level ground; never rely on a jack alone.)
- Socket and wrench set(Common sizes for pan bolts and drain plug.)
- Torque wrench(Important for gasket bolts and mounting torque specs.)
- Shop towels and rags(Clean surfaces and wipe fluid spills to avoid contamination.)
- Safety glasses and gloves(Protect eyes from splashes and skin from hot components.)
- Replacement transmission pan gasket(Use if pan is removed or gasket shows wear.)
- New torque converter (optional)(Only if converter is confirmed worn or damaged.)
- OBD-II scanner (for codes)(Helpful for diagnosing slip-related fault codes.)
Steps
Estimated time: 2-4 hours
- 1
Check fluid level and condition
Park on level ground and run the engine to warm up the transmission. Check the ATF level with the dipstick and inspect color, odor, and consistency. If the fluid is dark, burnt, or smells off, plan a full drain and refill.
Tip: Use the correct temperature range on the dipstick; inconsistent readings mean the fluid isn't ready. - 2
Drain and replace transmission fluid and filter
Drain the old ATF into a suitable container. Replace the filter if your model uses one, and reinstall the pan with a new gasket. Refill with fresh fluid to the manufacturer’s specified level and type.
Tip: Dispose of used ATF responsibly at an authorized collection site. - 3
Inspect torque converter clutch and turbine
Remove the pan and inspect the torque converter clutch and turbine area for glazing, wear patterns, or obvious damage. If the clutch discs show heat wear or glazing, replacement is usually necessary.
Tip: Take photos of wear patterns for reference during replacement. - 4
Test valve body and solenoids
With the transmission case open, inspect for stuck valves or slowed response from the solenoids. If you can, perform a hydraulic pressure test or scan live data to check for abnormalities in pressure readings.
Tip: Be mindful of gasket surfaces and avoid contaminating the valve body during inspection. - 5
Check for contamination and debris
Inspect the pan magnet and sump for metal shavings or debris that indicate internal wear. Debris often points toward a broader problem requiring professional service or a converter replacement.
Tip: Document debris findings; it helps justify a rebuild or replacement decision. - 6
Decide on replacement or rebuild if slip persists
If slip remains after fluid changes and basic checks, evaluate whether a torque converter replacement or a full rebuild of the transmission is the most cost-effective solution for your vehicle.
Tip: Compare cost, downtime, and warranty implications before committing. - 7
Road test and verify no slipping
With the engine warm, perform controlled acceleration in a safe area. Confirm that the lockup clutch engages reliably and that RPM corresponds to speed without slipping across gears.
Tip: Test in multiple conditions (light throttle and heavy throttle) to confirm stability.
Your Questions Answered
What are common signs that the torque converter is slipping?
Common signs include RPM rising without speed gain, shuddering during acceleration, harsh or delayed shifts, and increased transmission temperature. Always verify fluid condition first, then consider the torque converter and valve body as potential causes.
Common signs are RPM rising without speed, shuddering on acceleration, and harsh or delayed shifts. Start by checking fluid condition before investigating the torque converter.
Can low or dirty transmission fluid cause slipping?
Yes. Low fluid level or dirty, burnt fluid reduces hydraulic pressure and can prevent the lockup clutch from engaging fully, leading to slip. Replace fluid with the correct specification and consider a filter change if applicable.
Low or dirty fluid can cause slip because it reduces hydraulic pressure and clamping force. Replacing the fluid with the right spec often helps, and a filter change may be needed.
Is it safe to drive with a slipping torque converter?
Driving with a slipping torque converter can cause overheating and additional wear. If slip is noticed, limit driving and seek a diagnostic service or repair to prevent further damage.
It's risky to drive when slipping; it can overheat and cause more damage. Get a diagnostic and repair soon.
Can I fix a slipping torque converter myself?
Some non-invasive steps like fluid changes and basic inspections can be DIY-friendly, but many fixes require transmission specialist tools and expertise. If you’re unsure, consult a professional to avoid missing internal issues.
You can try fluid changes and checks, but complex fixes usually need a pro. Don’t hesitate to seek help if you’re unsure.
How long does a torque converter replacement take?
Replacement times vary by vehicle and shop workload, but you should expect several hours to a full day for removal, replacement, and test drive. Plan for downtime and potential parts availability delays.
Expect several hours to a day depending on the car and shop flow.
What maintenance can prevent torque converter slipping?
Regular transmission fluid changes, proper cooling, and avoiding fluid mixing are key. Routine checks for leaks and transmission performance help catch issues before they slip into serious failure.
Keep up with fluid changes and cooling, and check for leaks to prevent slipping.
Watch Video
Top Takeaways
- Diagnose before replacing parts to avoid unnecessary costs.
- Fluid health and proper lockup clutch operation are critical to preventing slip.
- Follow manufacturer specs for fluid type and torque when reassembling.
- Safety and careful diagnostics minimize risk and maximize reliability.
- Professional help is wise when debris or codes indicate deeper issues.