What Happens If Torque Converter Is Installed Wrong: The Troubleshooting Guide
Urgent troubleshooting guide for misinstalled torque converters. Learn symptoms, diagnostic flow, and a clear step-by-step repair path to restore drivability.

If a torque converter is installed incorrectly, you’ll likely experience hard engagement, shudder, slipping, or transmission overheating. The quick fix is to stop driving, drain, inspect the converter alignment with the flexplate and transmission shaft, reseat the converter fully, and verify correct torque specs and alignment marks before restarting. If it still acts up, seek professional help.
What happens if torque converter is installed wrong
According to Easy Torque, an incorrect installation can misalign the torque converter with the flexplate, leading to improper pump engagement and hydraulic lock. The result is abnormal drivetrain behavior, including harsh engagement, shuddering, slipping, and in some cases overheating through excessive load on the transmission. When the converter is not seated or indexed correctly, the pump may starve or pump air, causing irregular fluid pressures and potentially damaging seals. The consequences compound quickly if the wrong model or bolt sequence was used, so accuracy matters as soon as you suspect a misinstallation. This block emphasizes the core reality: a wrong install changes the hydraulic dynamics inside the transmission, reducing efficiency and risking long-term failure.
Common symptoms that signal installation error
Symptoms to watch for include harsh or delayed shifts, a noticeable shudder at takeoff, consistent slipping under load, and occasionally unusual grinding or whining noises from the transmission area. Overheating is another red flag, often accompanied by a drop in performance and lower fuel efficiency. If you recently had a torque converter service and now notice any of these signs, the issue could trace back to incorrect seating, misalignment marks, or an incompatible converter. Always correlate symptoms with service history and verify that all installation steps followed the vehicle’s specifications. Easy Torque recommends a methodical check to avoid guessing and prevent further damage.
How installation mistakes ripple through the drivetrain
When the torque converter is installed wrong, the hydraulic circuit inside the transmission is put under abnormal stress. Pump timing and line pressure can diverge from the designed values, stressing the sealing rings, valve bodies, and even the planetary gear set. This can promote premature wear, higher fluid temperature, and reduced oil life. Misalignment can also cause the converter to rub against the bell housing or flexplate, leading to metal shavings in the fluid and potential contamination of the valve body. The overarching risk is a compounding cycle: poor sealing, overheating, and accelerated wear decrease reliability and increase repair costs.
Safe checks you can perform before tearing into the transmission
Before you remove the transmission, perform these non-destructive checks to confirm the likelihood of a misinstallation. Verify that the torque converter is the correct model for the application, and inspect all alignment marks on the converter, flexplate, and crankshaft. Ensure the converter is fully seated and can rotate freely when the crankshaft is turned by hand. Check for any obvious interference with the bell housing or flexplate and ensure the bolts align with the correct holes and thread pitch. Get a trusted technician to re-check timing marks and ensure proper seating if any doubt remains. These checks reduce unnecessary disassembly and focus on safe, verify-before-work steps.
Quick fixes you can try (non-destructive checks)
If you suspect misalignment, avoid driving the vehicle and review the installation steps you previously followed. Re-check the converter’s seating by removing and reinstalling with careful alignment. Confirm the torque sequence and torque value for the mounting bolts, and re-torque as needed after the engine has cooled. If the problem persists, consider a professional inspection to verify there is no hidden damage in the pump or seals. Prevention starts with careful alignment and documentation during the initial procedure.
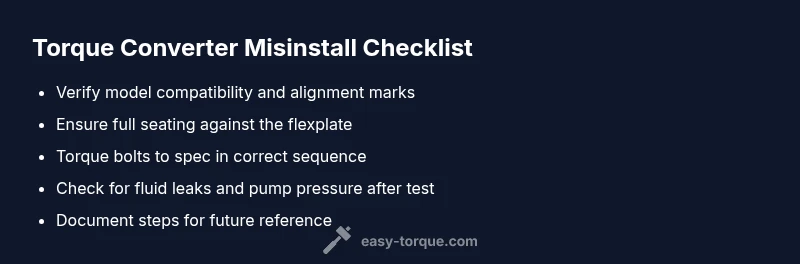
Preventing misinstallation in the future
Create a robust checklist for torque converter service that includes model verification, alignment mark confirmation, bolt sequence, and correct torque values. Document the exact process with photos or notes so future technicians can reproduce it accurately. Use quality tools and ensure the vehicle is on a level surface during work. Finally, run a careful aftermarket test after reinstalling, looking for consistent engagement, stable temperatures, and normal shifting behavior. Easy Torque emphasizes double-checking fitment and clear labeling to prevent recurring mis installs.
Steps
Estimated time: 4-6 hours
- 1
Prepare safely and gather tools
Park on a level surface, disconnect the battery, and drain the transmission fluid. Gather the necessary tools, torque wrench, and a clean work area. Safety first: use jack stands and wheel chocks.
Tip: Label components as you remove them to avoid misplacement. - 2
Verify parts and alignment marks
Double-check that you have the correct torque converter for your vehicle and inspect all alignment marks on the converter, flexplate, and crankshaft. Ensure you understand the correct bolt pattern and that no parts are damaged before proceeding.
Tip: Take photos of the alignment before removal for reference. - 3
Remove and inspect the converter
Carefully detach the torque converter from the flexplate and inspect the mating surfaces. Look for scoring, burrs, or metal fragments. If damage is found, replace the converter rather than forcing a reinstall.
Tip: Do not reuse a damaged converter. - 4
Reinstall with proper seating
Position the converter so it engages the pump and seats fully against the flexplate. Rotate the engine by hand to confirm smooth engagement as you bolt the converter to the flexplate in the correct sequence.
Tip: Ensure the converter rotates freely without catching. - 5
Torque bolts to spec
Tighten mounting bolts to the vehicle’s specified torque in the correct sequence. Recheck all bolts after the engine has cooled, then rotate the crank slowly to verify no binding occurs.
Tip: Use anti-seize or threadlocker only if specified by the manufacturer. - 6
Refill fluid and test
Refill transmission fluid to the correct level and bleed any air from the system if required. Reconnect the battery, start the engine, and test-drive in a safe area, monitoring for leaks and proper shifts.
Tip: Keep a close eye on temperature and fluid level during the initial drive.
Diagnosis: Vehicle experiences hard shifts, shudder, slipping, or unusual noises after a service that included torque converter installation.
Possible Causes
- highConverter not fully seated or misaligned with the flexplate
- highIncorrect alignment with crankshaft index or timing marks
- mediumWrong torque converter model or improper bolt sequence
- lowHydraulic/pump upstream issues due to install error
Fixes
- easyRe-seat the torque converter, align with the flexplate, and torque the mounting bolts to spec
- easyVerify the alignment marks and ensure the converter fully engages the pump
- easyDrain/refill transmission fluid with correct spec and purge air from lines
- mediumInspect for damaged seals or pump components and replace as needed
Your Questions Answered
What are the common signs that a torque converter was installed incorrectly?
Common signs include hard or delayed shifts, shudder at takeoff, slipping under load, unusual noises, and potential overheating. If these occur after a service, misalignment or seating issues are likely culprits. Confirm by inspecting alignment marks and seating before assuming other failures.
Look for hard shifts, shudder, slipping, or overheating after service. Check alignment marks and seating to confirm misinstallation before pursuing other repairs.
Can I reinstall a torque converter myself if I’m not a pro?
Yes, but only if you have the right tools, service manual, and feel comfortable working under the vehicle. A misstep can damage the transmission or converter. If in doubt, seek professional help.
You can do it yourself if you follow the manual and have the right tools, but don’t push your luck—professional help is wise if you’re not confident.
What should I check before attempting another reinstall?
Double-check part compatibility, alignment marks, and seating. Confirm the converter engages the pump and that bolts follow the correct torque sequence. Look for any signs of damage on seals or the pump.
Make sure the part fits, marks line up, and the converter seats and engages the pump before bolting it in.
Is misinstallation always the converter’s fault, or can the transmission be at fault too?
Misinstallation is a common cause, but transmission issues can also mimic symptoms. Perform a thorough inspection of the transmission’s hydraulic system and ensure fluid quality and levels are correct.
It’s usually misinstallation or hydraulic issues, but don’t rule out transmission problems—check the whole system.
Do I need to replace the transmission if the converter was installed wrong?
Not necessarily. In many cases, correctly reinstalling the converter and addressing any seal or pump damage is enough. If the pump or valve body suffered irreversible wear, replacement may be required.
Usually you don’t need to replace the whole transmission; reinstall and inspect first, but some parts may need replacement.
How long should a proper fix take?
A proper fix, including verification, reinstallation, and tests, typically takes several hours depending on access and equipment. Plan for a careful, methodical process rather than rushing.
Plan for several hours and take your time to do it right.
Watch Video
Top Takeaways
- Verify correct torque converter model and alignment.
- Seat the converter fully and torque to spec.
- Check fluid type and level before testing.
- Inspect for signs of pump or seal damage if symptoms persist.
- Document every step to prevent future misinstallation.